RV water heater gas valve issues can be frustrating. Knowing how to troubleshoot them is crucial.
Owning an RV means enjoying the open road and the great outdoors. But, it also comes with its own set of challenges. One common issue is a faulty gas valve in your water heater. It can disrupt your trip and leave you without hot water.
Understanding the basics of troubleshooting can save you time and stress. In this guide, we will walk you through the steps to identify and fix common gas valve problems. This knowledge will empower you to handle small issues on your own, ensuring a smooth and comfortable adventure in your RV. Let’s dive in and get your water heater back in working order.
Common Issues
Dealing with RV water heater gas valve issues can be frustrating. Understanding common problems helps you troubleshoot effectively. Here, we will discuss two frequent issues: no hot water and irregular heating.
No Hot Water
One common issue with RV water heaters is the absence of hot water. This can result from a faulty gas valve. First, check if the gas supply is on. If it is, the gas valve might be clogged or broken. Clean the valve and test again. If there’s still no hot water, the thermocouple could be the problem. Replace it if necessary. Ensure the pilot light is on, as it ignites the gas. If the pilot light keeps going out, it might indicate a gas valve issue.
Irregular Heating
Another problem is irregular heating. This means the water temperature fluctuates. A dirty gas valve can cause this. Clean the valve to ensure smooth gas flow. Also, check the thermostat. It may need adjustment or replacement. Inconsistent gas pressure can also lead to irregular heating. Ensure the gas regulator is functioning properly. If the problem persists, consult a professional for further inspection.
Credit: www.youtube.com
Safety Precautions
When troubleshooting your RV water heater gas valve, safety is paramount. Taking the right precautions prevents accidents and ensures a safe working environment. Follow these steps to keep yourself and your RV safe.
Turn Off Gas
Before starting, turn off the gas supply. Locate the gas valve and turn it to the off position. This step prevents gas leaks and potential fires. Do not skip this step under any circumstances.
Ventilation Tips
Ensure proper ventilation in your working area. Open windows and doors to allow fresh air to circulate. This helps disperse any gas that might escape. Avoid working in enclosed spaces without ventilation.
Tools Needed
When your RV water heater gas valve starts acting up, troubleshooting it can seem overwhelming. But fear not. With the right tools, you can diagnose and fix the issue yourself. In this section, we will cover the essential tools you need to get started.
Basic Tools
To troubleshoot your RV water heater gas valve, you will need a few basic tools. A screwdriver set will help you remove panels and access the valve. A wrench set is essential for loosening and tightening nuts and bolts. A multimeter allows you to check electrical connections. Safety goggles protect your eyes from debris and chemicals.
Specialized Equipment
While basic tools are necessary, some specialized equipment can make the job easier. A gas leak detector helps you find any leaks in the system. A manometer measures the gas pressure within the heater. An infrared thermometer allows you to check the temperature of different components. These tools ensure you diagnose the problem accurately.
Credit: johnmarucci.com
Identifying The Problem
When dealing with RV water heater gas valve issues, the first step is identifying the problem. This can save time and help you fix the issue quickly. Here are two essential steps to get started.
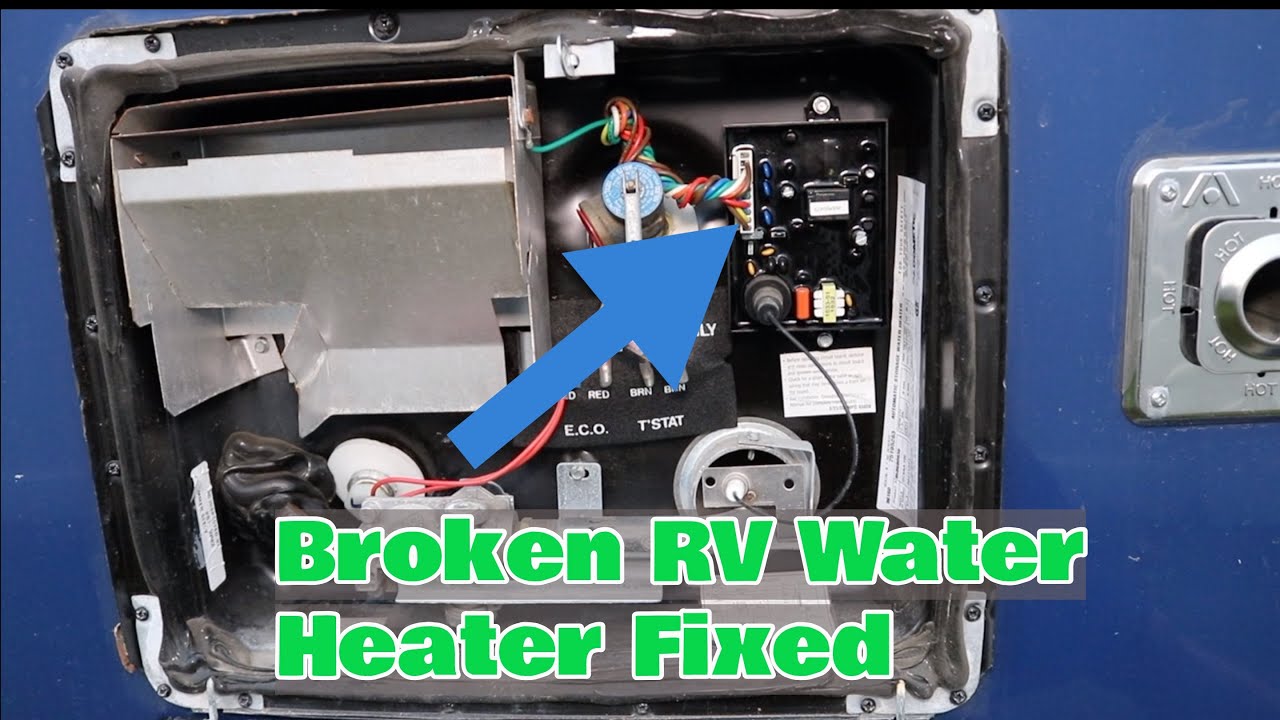
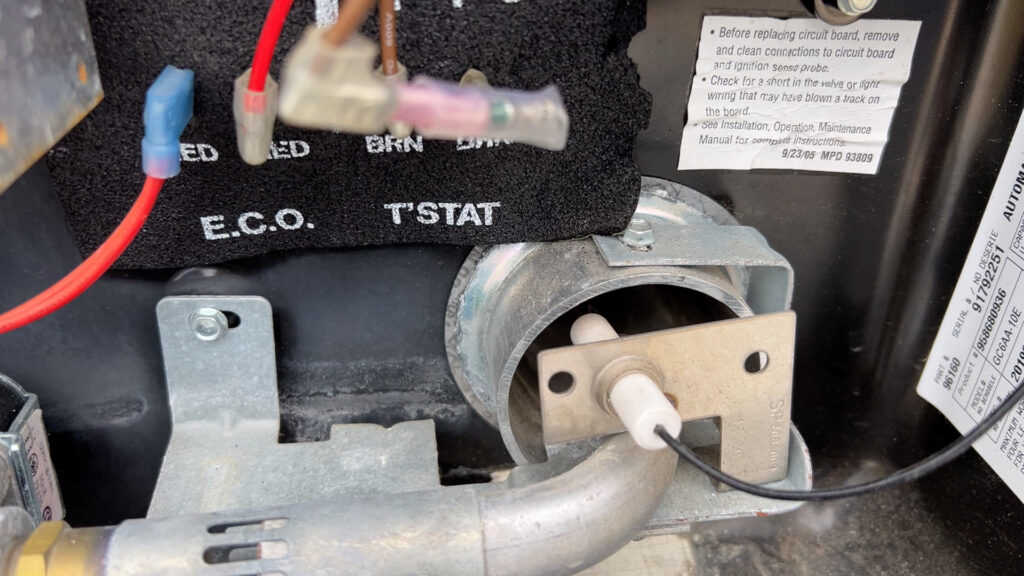
Visual Inspection
Begin with a visual inspection. Look at the gas valve closely. Check for any visible damage. Ensure all connections are secure. Look for any signs of leaks or wear. A broken or loose part might be the culprit.
Smell For Gas
Next, smell for gas. This is crucial for safety. Turn off the gas supply before you start. After turning it off, smell around the gas valve. If you detect a gas odor, there might be a leak. A gas leak needs immediate attention from a professional.
Cleaning The Gas Valve
Cleaning the gas valve in your RV water heater is crucial. It ensures optimal performance and safety. Over time, debris and deposits can clog the valve. This can reduce efficiency and even cause malfunctions. Regular cleaning can prevent these issues.
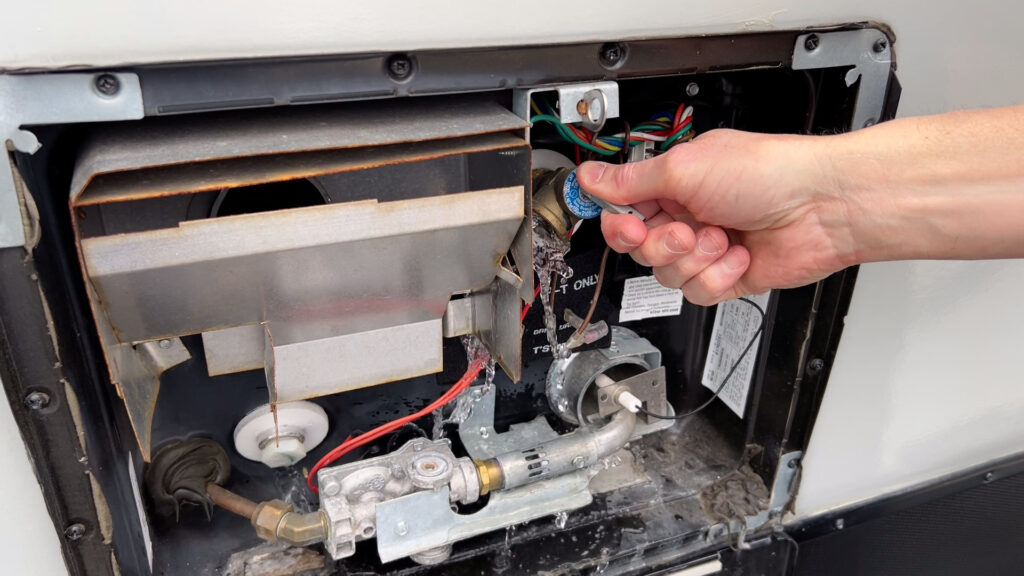
Removing Debris
First, turn off the gas supply. Ensure the area is well-ventilated. Next, locate the gas valve on your RV water heater. Carefully remove it using a suitable wrench. Examine the valve closely. Look for any visible debris or deposits. Use a soft brush to gently remove any loose debris. Be thorough, but gentle, to avoid damage.
Using Cleaning Solutions
Sometimes, a brush isn’t enough. In such cases, a cleaning solution can help. Choose a cleaner that is safe for gas valves. Apply the solution to a cloth. Wipe the valve surfaces carefully. Allow the solution to sit for a few minutes. This will help dissolve any stubborn deposits. After a few minutes, wipe the valve clean. Ensure no residue remains. Reinstall the valve and turn on the gas supply. Check for proper operation.
Checking For Gas Leaks
Ensuring there are no gas leaks in your RV water heater is crucial. Gas leaks can be dangerous, leading to fire hazards or health issues. Follow these methods to check for gas leaks effectively.
Soap Solution Test
A simple and effective method to detect gas leaks is the soap solution test. To perform this test, you need a spray bottle filled with a mixture of water and dish soap.
- Turn off the gas supply to the RV water heater.
- Mix water and a few drops of dish soap in a spray bottle.
- Spray the solution on all the gas connections and valves.
- Turn the gas supply back on and observe the sprayed areas.
Look for bubbles forming at the connections. Bubbles indicate a gas leak. If you see bubbles, immediately turn off the gas supply and tighten the connections. Repeat the test to ensure there are no leaks.
Using A Gas Detector
Using a gas detector is another effective method to check for gas leaks. Gas detectors can detect even the smallest leaks that might be missed by the soap solution test.
- Purchase a gas detector designed for propane or natural gas.
- Turn on the gas detector and follow the manufacturer’s instructions.
- Pass the detector around the gas connections and valves.
The gas detector will alert you if it detects any gas leaks. Make sure to move the detector slowly and cover all areas around the gas connections.
| Method | Tools Needed | Steps |
|---|---|---|
| Soap Solution Test | Water, Dish Soap, Spray Bottle |
|
| Gas Detector | Gas Detector |
|
Both methods are effective in detecting gas leaks. Regular checks ensure safety and proper function of your RV water heater.
Adjusting The Gas Valve
Adjusting the gas valve on your RV water heater can be tricky. But it’s essential for proper operation. If the valve isn’t set right, the water heater might not work. Or it could be unsafe. Let’s learn how to adjust it correctly.
Correcting Pressure
First, check the gas pressure. Too high or too low pressure can cause problems. Use a gas pressure gauge to measure it. The ideal pressure is usually in the manual. Adjust the gas valve to reach this pressure.
Turn the adjustment screw on the valve. Turn it slowly. Watch the gauge while turning. Small changes can make a big difference. Stop adjusting once you reach the ideal pressure.
Testing Adjustments
After adjusting, test the water heater. Turn it on and let it run. Check if it heats the water properly. Listen for any unusual noises. Smell for any gas leaks.
If there are issues, turn off the heater. Recheck your adjustments. Make small changes and test again. Repeat until everything works smoothly.
Always ensure safety. If unsure, seek professional help.
Credit: johnmarucci.com
When To Replace
Knowing when to replace your RV water heater gas valve is crucial. It ensures your safety and the efficiency of your heater. Regular inspection can help you identify issues early. This section will guide you through the signs of wear and purchasing a new valve.
Signs Of Wear
Recognizing the signs of wear in your gas valve can prevent bigger problems. Look for these common indicators:
- Leaking Gas: If you smell gas around the heater, the valve might be leaking.
- Inconsistent Heating: Water temperature fluctuates without changing the settings.
- Strange Noises: Unusual sounds, like hissing or clicking, from the heater area.
- Visual Damage: Cracks, rust, or other visible damage on the valve.
If you notice any of these signs, consider replacing the valve immediately.
Purchasing A New Valve
Buying a new gas valve for your RV water heater doesn’t have to be complicated. Follow these simple steps:
- Identify the Model: Check your heater’s model number to ensure compatibility.
- Research Brands: Look for trusted brands that offer durable and reliable valves.
- Read Reviews: Customer reviews can provide insights into the valve’s performance.
- Compare Prices: Shop around to find the best deal without compromising quality.
Here’s a quick comparison table for popular gas valve brands:
| Brand | Durability | Price Range |
|---|---|---|
| Brand A | High | $$ |
| Brand B | Medium | $ |
| Brand C | High | $$$ |
Consider these factors to ensure you purchase the right valve for your needs.
Professional Help
Sometimes, RV water heater gas valves can be tricky to fix. Even with the best efforts, a problem may persist. This is where professional help comes in handy. Trained technicians can diagnose and repair issues swiftly.
When To Call An Expert
Consider calling an expert if basic troubleshooting steps fail. Also, if you notice gas leaks, it’s crucial to seek professional help immediately. Unusual noises or smells are other signs to call a technician. Safety concerns always warrant professional intervention.
What To Expect
A professional will inspect the entire system. They will check the gas valve, connections, and other components. They may perform tests to identify the issue. Experts use specialized tools for accurate diagnosis. Repairs are done efficiently and safely.
After the repair, they will ensure everything works correctly. They will also provide maintenance tips to prevent future problems. Professional help ensures your RV water heater runs smoothly and safely.
Frequently Asked Questions
How Do I Know If My Rv Water Heater Gas Valve Is Faulty?
If your RV water heater isn’t heating water or there’s a gas smell, the gas valve might be faulty. Inspect for leaks and listen for unusual noises.
Why Is My Rv Water Heater Not Igniting?
A common reason is a malfunctioning gas valve. Check for debris or obstructions and ensure the gas supply is on.
Can I Replace The Rv Water Heater Gas Valve Myself?
Yes, if you’re comfortable with DIY repairs. Turn off the gas supply and follow the manufacturer’s instructions carefully.
What Tools Do I Need To Troubleshoot The Gas Valve?
You may need a multimeter, wrench, and leak detection solution. Always ensure safety by turning off the gas supply first.
Conclusion
Fixing your RV water heater gas valve can be straightforward with the right steps. Remember to check connections, clean parts, and test the valve. Safety is important, so always ensure the gas supply is turned off before starting. Regular maintenance helps avoid major issues.
Following these tips can keep your water heater working well. Stay safe and enjoy warm showers on your travels.


