An RV toilet that doesn’t hold water in the bowl can cause issues. This is a common problem for RV owners.
Understanding why your RV toilet isn’t holding water is essential. It can save you time and frustration. A properly working toilet is crucial for a comfortable RV experience. There are several reasons for this issue, ranging from simple to complex.
Leaky seals, damaged flappers, or even clogged vents could be the cause. Knowing the root of the problem helps in finding the right solution. Let’s explore the possible reasons and solutions for your RV toilet not holding water. This will help you get back to enjoying your travels without worry.

Credit: www.rvtravel.com
Common Causes
Many RV owners face issues with their toilet not holding water in the bowl. Understanding the common causes helps you fix the problem faster. Here, we discuss two main causes: seal issues and a cracked bowl.
Seal Issues
A common reason your RV toilet doesn’t hold water is a faulty seal. The seal is crucial for keeping water in the bowl. Over time, it can wear out or get dirty, leading to leaks.
- Worn-out seal: Seals degrade over time. Regular use and cleaning can cause them to wear out.
- Dirty seal: Debris or waste can accumulate on the seal. This prevents it from closing properly.
- Improper installation: A seal not installed correctly can lead to leaks.
To fix seal issues, inspect the seal regularly. Clean it to remove debris. Replace it if it’s worn out.
Cracked Bowl
An RV toilet bowl can crack for various reasons. Cracks lead to leaks, preventing the bowl from holding water.
- Physical damage: Dropping heavy objects can crack the bowl.
- Age: Older toilets are more prone to cracking due to material fatigue.
- Extreme temperatures: Freezing and thawing can cause the bowl to crack.
Check the bowl for visible cracks. If you find any, replace the bowl to prevent leaks.

Credit: www.youtube.com
Initial Inspection
Dealing with an RV toilet that doesn’t hold water can be frustrating. The first step in addressing this issue is conducting an initial inspection. This helps identify the root cause of the problem. Performing a thorough check ensures you don’t overlook any details.
Visual Check
Start by visually inspecting the toilet. Look for any obvious signs of damage. Cracks or leaks in the bowl can cause water to drain out. Check the toilet seal and flapper for wear and tear. Ensure the connections are secure.
Examine the flush valve. A worn or misaligned valve can prevent the bowl from holding water. Make sure it moves smoothly. If it sticks or feels loose, it may need replacement.
Water Level Test
Next, perform a water level test. Fill the bowl with water. Watch closely to see if the water level drops. This can indicate a leak or faulty seal. Note how quickly the water drains out.
If the water level drops rapidly, the issue is likely with the seal. If it drops slowly, there may be a crack or another minor issue. Use a flashlight to check for any hidden damage.
This initial inspection helps pinpoint the problem. It lays the groundwork for further troubleshooting or repairs. Always address the most obvious issues first. This saves time and effort in the long run.
Seal Replacement
Is your RV toilet not holding water in the bowl? The likely culprit is a worn-out seal. Replacing the seal can restore the functionality of your toilet. It’s a simple process that you can do yourself. Here’s a detailed guide on how to replace the seal.
Necessary Tools
Before you start, gather these tools:
- Screwdriver
- Pliers
- Replacement seal
- Gloves
- Cleaning supplies
Step-by-step Guide
- Turn off the water supply: Locate the shut-off valve near the toilet. Turn it off to stop water flow.
- Flush the toilet: Press the flush lever to drain the water from the bowl and tank.
- Remove the toilet: Use the screwdriver to remove bolts securing the toilet to the floor. Lift the toilet off the flange.
- Access the seal: Look for the old seal at the base of the toilet. It’s usually a rubber or wax ring.
- Remove the old seal: Use pliers to pull out the worn-out seal. Clean the area thoroughly.
- Install the new seal: Place the new seal where the old one was. Ensure it’s properly aligned.
- Reattach the toilet: Position the toilet back onto the flange. Secure it with the bolts you removed earlier.
- Turn on the water supply: Open the shut-off valve to let water flow back into the toilet.
- Test the toilet: Flush the toilet a few times to ensure it holds water.
Replacing the seal is a straightforward task. With the right tools and this guide, your RV toilet will be working like new again.

Credit: www.reddit.com
Temporary Fixes
Is your RV toilet not holding water in the bowl? This issue can be frustrating. Fortunately, there are some temporary fixes you can try. These quick solutions can help maintain water levels in the bowl until you can get a permanent fix.
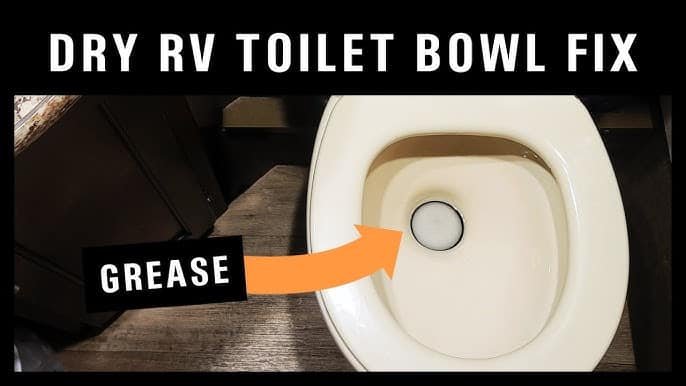
Using Petroleum Jelly
Petroleum jelly is a handy item for many RV owners. It can help create a seal in your toilet. Follow these steps:
- First, ensure the toilet bowl is clean and dry.
- Next, apply a generous amount of petroleum jelly to the rubber seal.
- Make sure to cover the entire surface of the seal.
- Finally, test the toilet by flushing and checking if it holds water.
This method works by improving the seal and reducing water leakage. Repeat this process as needed.
Adding Water Manually
Another simple solution is to add water manually to the toilet bowl. This method is straightforward:
- First, fill a container with water.
- Pour the water directly into the toilet bowl.
- Make sure to add enough water to cover the bottom of the bowl.
- Repeat this step each time you use the toilet.
Adding water manually ensures there is always some water in the bowl. This method is a quick fix but requires regular maintenance.
Both these methods can help you manage the issue temporarily. Try them out and see which works best for you.
Professional Help
Sometimes, your RV toilet doesn’t hold water in the bowl. This issue can disrupt your travel plans. When basic troubleshooting doesn’t help, professional assistance might be necessary. Seeking expert advice ensures a thorough solution to the problem.
When To Call A Plumber
A plumber should be called if the toilet consistently loses water. Slow leaks or persistent issues indicate deeper problems. If DIY fixes fail, professional help becomes essential. Specialized tools and expertise can identify hidden issues. A plumber can also prevent further damage.
If you notice unusual noises or odors, it’s time to call. Water pooling around the toilet base signals urgent attention. Delaying professional help may lead to costly repairs.
Cost Considerations
Hiring a plumber involves certain costs. Basic repairs might range from $100 to $300. Complex issues could exceed this range. Factors like location and the severity of the problem affect the cost.
Investing in professional help can save money long-term. Ignoring the issue may lead to extensive damage. Regular maintenance checks by a plumber can also prevent future problems.
Preventive Measures
Preventive Measures are key to ensuring your RV toilet functions properly. Keeping the bowl holding water avoids unpleasant odors and potential clogs. Regular maintenance and proper cleaning techniques play a crucial role in this.
Regular Maintenance
Regular maintenance can prevent many common RV toilet issues. Inspect the toilet seal frequently to ensure it is intact. Replace any damaged seals immediately. A damaged seal can cause water to leak out of the bowl.
Keep an eye on the water level in the bowl. If it drops too quickly, there may be a problem. Check the toilet’s connections and seals. Tighten or replace them as needed.
Proper Cleaning Techniques
Proper cleaning techniques are essential to maintain your RV toilet. Use RV-specific cleaning products. Household cleaners can damage the toilet’s components.
Clean the bowl regularly to prevent buildup. Use a soft-bristled brush to scrub the bowl gently. Avoid abrasive brushes which can scratch the surface.
Never use bleach. It can deteriorate the seal and other parts. Instead, opt for a mild, non-abrasive cleaner. This ensures the longevity of your toilet’s components.
Follow these preventive measures to keep your RV toilet in good condition. Regular maintenance and proper cleaning techniques can save you from future headaches.
Product Recommendations
Keeping your RV toilet in proper working condition is crucial for any trip. A common issue is water not staying in the bowl. This can cause odors and make the toilet unusable. Below are product recommendations to help solve this problem.
Sealant Options
Sealants play a vital role in maintaining your RV toilet. They ensure no leaks and keep water in the bowl. Use a silicone-based sealant. It is durable and water-resistant. Another good option is a rubber seal. It forms a tight bond and is easy to install.
Cleaning Solutions
Proper cleaning solutions can help maintain the seal and the bowl. Use a non-abrasive cleaner. This will not damage the seal or the bowl. Vinegar and baking soda make a good natural cleaner. They remove stains and keep the bowl fresh. Use them regularly to keep your RV toilet in top condition.
User Experiences
Experiences with RV toilets can vary widely among users. Some face issues with water retention in the bowl. Others find solutions that work effectively. Let’s explore these user experiences to understand common challenges and success stories.
Common Challenges
Many RV owners encounter problems with their toilet not holding water. This issue can lead to unpleasant odors and additional cleaning tasks. Below are some common challenges reported by users:
- The toilet bowl empties quickly after flushing.
- Seals and gaskets wear out, causing leaks.
- Mineral buildup prevents the proper sealing of the bowl.
These issues can be frustrating, especially during travel. Regular maintenance and proper usage can help mitigate some of these problems. Understanding the root cause is essential for finding the right fix.
Success Stories
Despite the challenges, many RV owners have found effective solutions. Here are some success stories shared by the community:
| Problem | Solution | Outcome |
|---|---|---|
| Leaking seals | Replaced with new gaskets | Bowl holds water consistently |
| Mineral buildup | Used vinegar to clean | Improved seal and water retention |
| Worn-out flapper | Installed a new flapper | Eliminated leaks |
These simple fixes often involve replacing parts or regular cleaning. Maintaining your RV toilet can lead to a more pleasant travel experience. Listening to other users’ experiences can provide valuable insights and tips.
Frequently Asked Questions
Why Doesn’t My Rv Toilet Hold Water?
This often occurs due to a faulty toilet seal or valve. Regular cleaning and maintenance can help prevent this issue.
How Do I Fix An Rv Toilet Seal?
To fix the seal, remove the toilet and replace the faulty seal. Ensure you use the correct replacement parts.
Can I Use Household Cleaners On Rv Toilets?
Avoid using household cleaners, as they can damage the toilet. Use RV-specific cleaning products instead for safe maintenance.
What Causes Rv Toilet Bowl Leaks?
Leaks can be caused by damaged seals or a cracked bowl. Inspect and replace any faulty components promptly.
Conclusion
Solving the issue of your RV toilet not holding water is crucial. A properly functioning toilet ensures comfort and hygiene. Regular maintenance helps avoid bigger problems. Check seals and valves often. Fix any issues immediately. Simple steps can save you headaches later.
A well-maintained RV toilet makes trips more enjoyable. Remember these tips for a hassle-free experience.


