Dealing with an RV kitchen sink leaking underneath can be frustrating. It can also lead to further damage if not addressed.
Your RV is your home on wheels, and a leaking kitchen sink can disrupt your adventure. Water leaks can cause extensive damage over time, ruining cabinets and floors. They can also create mold and mildew issues, which are harmful to health.
Understanding why your RV kitchen sink is leaking and how to fix it is essential. This guide will help you identify the cause of the leak and provide steps to repair it. With some basic tools and a bit of time, you can get your RV back in top shape and continue enjoying your travels.
Common Causes
Experiencing a leak under your RV kitchen sink can be frustrating. Understanding the common causes of such leaks can help you fix the problem quickly. Let’s look at the two most frequent causes: loose connections and worn-out seals.
Loose Connections
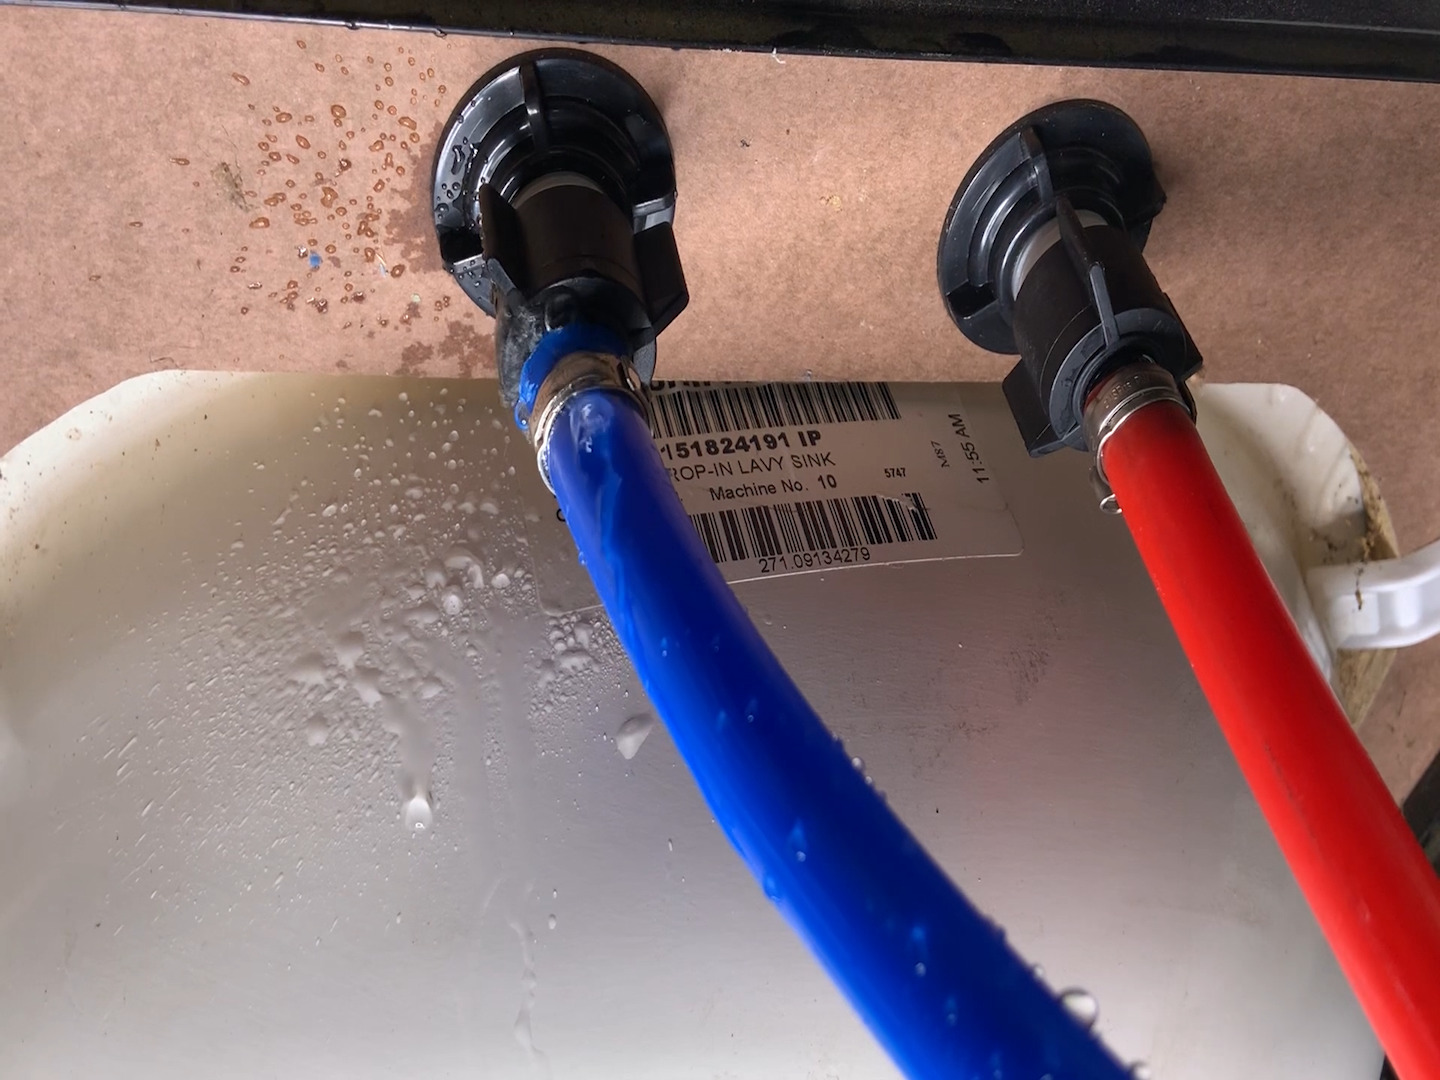
One of the main reasons for leaks under an RV kitchen sink is loose connections. Over time, the vibrations from traveling can loosen the connections of the pipes and fittings. These vibrations occur as the RV moves over various terrains. Loose connections can cause water to seep out, creating puddles under the sink.
To fix this issue, inspect the connections regularly. Tighten any loose fittings with a wrench. Ensure all the pipes are securely connected. This simple maintenance step can prevent leaks and save you from future headaches.
Worn-out Seals
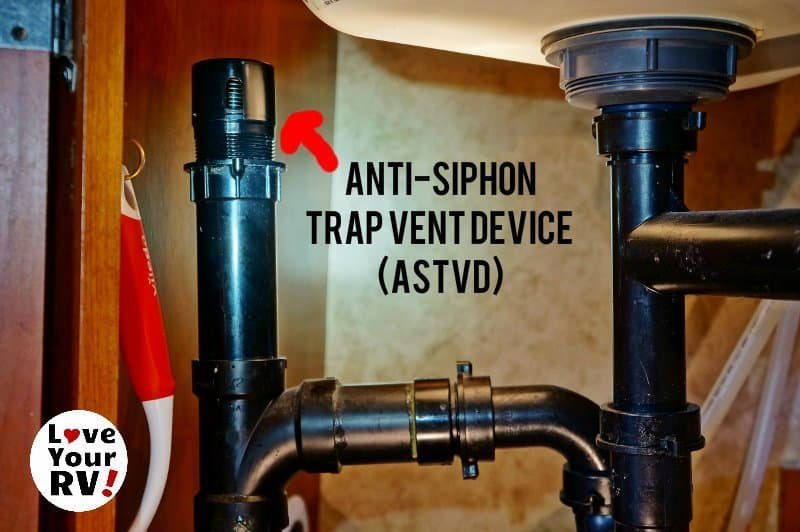
Another common cause of leaks is worn-out seals. Seals or gaskets prevent water from leaking at the joints and connections. Over time, these seals can degrade due to wear and tear. Exposure to water and cleaning chemicals can also weaken them.
Check the seals around your sink and pipes. If they look cracked or worn, replace them. Use high-quality seals designed for RVs. This will ensure a better fit and longer-lasting protection against leaks.
Tools You Need
Fixing a leaking RV kitchen sink can seem daunting. Having the right tools makes the job much easier. Here, we’ll break down the essential tools you need. This will help you tackle the problem efficiently.
Basic Tools
First, gather some basic tools. A wrench set is a must. It helps tighten or loosen nuts and bolts. A screwdriver is also essential. You might need both flathead and Phillips types. These help remove screws holding parts together. Next, have a flashlight handy. It will illuminate dark areas under the sink. A bucket is useful too. It catches any leaking water during the repair.
Specialized Tools
Now, let’s talk about specialized tools. A pipe wrench is crucial. It grips and turns pipes securely. Teflon tape is also important. It seals pipe threads and prevents leaks. A basin wrench is another specialized tool. It reaches nuts in tight spaces under the sink. You may also need plumber’s putty. It seals joints and prevents water from seeping through. Lastly, consider a plumbing snake. It clears blockages in the pipes.
Initial Inspection
Dealing with a leaking RV kitchen sink can be frustrating. To fix it, an initial inspection is essential. This helps you understand the problem and plan a solution. Let’s go through the steps.
Check For Leaks
First, turn on the water. Look closely under the sink. Check if you see any drips or puddles forming. Pay attention to the pipes and connections. Sometimes, leaks are small and hard to spot. Use a flashlight for better visibility.
Identify Damage
Next, examine the area for any visible damage. Look at the pipes, seals, and fittings. Check for cracks, corrosion, or loose parts. Damaged components often cause leaks. Replacing them might be necessary.
Tightening Connections
Experiencing a leak under your RV kitchen sink can be frustrating. Tightening connections usually solves this common issue quickly. Regular checks can prevent bigger problems later.
When dealing with an RV kitchen sink leaking underneath, one key solution is tightening connections. Loose connections can cause water to drip, leading to damage. This process is simple and can be done with basic tools. Here, we discuss methods to tighten these connections.
Hand-tightening
Start by hand-tightening the connections. Turn off the water supply first. Next, locate the connections under the sink. Use your hands to turn the fittings clockwise. Ensure they are snug but not overly tight. This method is effective for minor leaks.
Using Wrenches
For persistent leaks, use wrenches. Select the correct size wrench for the fittings. Gently tighten the connections, avoiding too much force. Over-tightening can damage the pipes. Check for leaks after adjusting. This ensures the connections are secure. Tightening connections can solve many leaking issues. It’s a quick fix that can prevent further damage. Always check regularly for any new leaks. This will keep your RV kitchen in good condition.
Replacing Seals
Is your RV kitchen sink leaking underneath? Replacing the seals might fix the problem. Over time, seals can wear out and cause leaks. This guide will help you choose the right seal and install it correctly.
Choosing The Right Seal
Finding the right seal for your RV kitchen sink is crucial. Different sinks need different seals. Measure the old seal before buying a new one. Look for seals made from durable materials. Silicone and rubber are popular choices. Check the compatibility with your sink model.
Installation Steps
First, turn off the water supply. Remove the sink from the countertop. Clean the area around the old seal. Use a putty knife to remove any old sealant. Place the new seal around the sink edge. Apply a thin layer of sealant to the new seal. Reinstall the sink in the countertop. Secure it tightly. Turn on the water supply and check for leaks. If there’s no leak, you have successfully replaced the seal.
Credit: www.rvrepairclub.com
Temporary Fixes
Dealing with an RV kitchen sink leaking underneath can be frustrating. You might not have access to a professional right away. Luckily, there are some temporary fixes that can help. These solutions can stop the leak until you can get a permanent repair.
Using Sealant Tape
Sealant tape is a quick and easy fix for leaks. It can be found at most hardware stores. Here’s how to use it:
- Turn off the water supply to the sink.
- Dry the leaking area completely.
- Wrap the sealant tape tightly around the leak.
- Press the tape firmly to ensure it sticks well.
Sealant tape can hold up for a few days or weeks. It gives you enough time to arrange for a permanent fix.
Applying Epoxy
Epoxy is another effective temporary solution. It can seal leaks and cracks. Follow these steps to apply epoxy:
- Turn off the water supply.
- Clean and dry the leaking area.
- Mix the epoxy according to the instructions.
- Apply the epoxy to the leak with a putty knife.
- Let it cure for the recommended time.
Epoxy can offer a more durable solution than sealant tape. It can last longer and withstand more pressure.
Both of these methods can help you manage a leak temporarily. They are easy to apply and can save you from further damage. Make sure to get a permanent fix as soon as possible.
Preventative Maintenance
Preventative maintenance is essential for keeping your RV kitchen sink in good condition. Regular checks can help you avoid leaks and costly repairs. By taking simple steps, you can ensure your RV sink works well.
Regular Inspections
Inspect your sink and plumbing regularly. Look for any signs of wear and tear. Check for rust, cracks, or loose fittings. Early detection can prevent bigger problems later. Make it a habit to inspect every few weeks.
Proper Use And Care
Use your sink with care. Avoid pouring grease or heavy debris down the drain. These can cause clogs and damage. Always use a sink strainer to catch food particles. Clean the strainer often to maintain good flow.
Be gentle with the faucet handles. Don’t force them or turn them too hard. This can cause leaks and damage. Teach everyone in the RV to use the sink properly.
By following these simple tips, you can keep your RV kitchen sink leak-free. Regular maintenance helps you enjoy your travels with less worry.
When To Call A Professional
When dealing with a leaking RV kitchen sink, identifying the right time to call a professional is crucial. Attempting a DIY fix might save you money initially, but if not done correctly, it can lead to further damage and higher repair costs. Below are some indicators that you might need to call in a professional.
Severe Damage
If the area under your RV kitchen sink shows signs of severe damage, it’s time to seek professional help. Look for:
- Warped flooring
- Mold or mildew growth
- Structural damage to the cabinetry
Severe damage might indicate a long-term leak, which can compromise the integrity of your RV. Professionals have the tools and expertise to assess and repair the damage accurately.
Persistent Leaks
If the leak under your RV kitchen sink persists despite your efforts, it’s best to call a professional. Persistent leaks can be due to:
- Faulty plumbing connections
- Worn-out seals
- Hidden cracks in the pipes
A professional can diagnose the exact cause of the leak and fix it efficiently. They can also check other potential problem areas to prevent future leaks.
Knowing when to call a professional can save you time, money, and stress. Don’t hesitate to seek expert help for severe damage or persistent leaks.
Frequently Asked Questions
Why Is My Rv Kitchen Sink Leaking Underneath?
Your RV kitchen sink may leak due to loose connections, worn-out seals, or damaged pipes. Regular maintenance can prevent such leaks.
How Can I Fix A Leaking Rv Kitchen Sink?
To fix a leaking RV kitchen sink, tighten connections, replace damaged seals, or repair broken pipes. Always use RV-specific parts.
What Tools Are Needed To Fix Rv Sink Leaks?
Common tools include a wrench, plumber’s tape, and replacement seals. Ensure you have RV-specific parts for the best results.
Can A Leaking Rv Sink Cause Water Damage?
Yes, a leaking RV sink can cause significant water damage if not addressed promptly. Inspect and fix leaks immediately.
Conclusion
Fixing an RV kitchen sink leak can be straightforward. Check connections and seals. Replace worn-out parts promptly. Regular maintenance helps prevent future leaks. Inspect pipes and fittings often. Address issues early to avoid bigger problems. With these tips, your RV stays dry.
Enjoy your travels without worry. Stay proactive and keep your sink in top shape. Happy camping!


