Replacing RV flooring with vinyl plank can transform your space. It’s durable, stylish, and easy to maintain.
This change can breathe new life into your RV, making it feel more like home on wheels. Many RV owners face the challenge of worn-out or outdated flooring. Vinyl plank flooring offers a practical and attractive solution. It is water-resistant, which is essential for the often humid and variable conditions inside an RV.
Also, vinyl plank flooring is easy to install, even for DIY enthusiasts. The variety of designs can mimic wood, stone, or tile, offering a high-end look without the hefty price tag. In this guide, we’ll explore the benefits and steps to replace your RV flooring with vinyl plank, ensuring a fresh and updated interior.

Credit: thediymommy.com
Materials And Tools Needed
Replacing RV flooring with vinyl plank is a rewarding DIY project. It enhances the look and feel of your RV. Before starting, gather all necessary materials and tools. This ensures a smooth and efficient process. Below, we detail everything you’ll need.
Essential Tools
- Utility knife
- Measuring tape
- Pencil
- Straight edge or T-square
- Rubber mallet
- Pull bar
- Spacers
- Floor scraper
- Vacuum or broom
Required Materials
- Vinyl plank flooring
- Underlayment (if needed)
- Adhesive (for certain vinyl planks)
- Trim or molding
- Floor primer (optional)
- Cleaning supplies
Having these tools and materials ready makes the installation process easier. It saves time and effort, ensuring a professional finish.
Preparation Steps
Preparing your RV for new vinyl plank flooring is essential. Proper preparation ensures a smooth installation process. This will also help your new floor last longer. Follow these steps to get your RV ready.
Clearing The Rv Space
First, clear the RV space. Remove all furniture, appliances, and personal items. This creates a blank canvas for your new flooring. You may need help to move larger items. Consider renting a storage unit if space is limited.
Next, clean the floor thoroughly. Sweep and vacuum to remove dust and debris. This helps the vinyl planks adhere better. Ensure the subfloor is dry and free of moisture. Dampness can cause the vinyl to lift later on.
Removing Old Flooring
Start by removing the old flooring. Begin at one corner and work your way across. Use a utility knife to cut sections if needed. Carefully pull up the old material. Be mindful of nails or staples that may be present.
Once the old flooring is out, inspect the subfloor. Check for damage or uneven areas. Patch any holes or cracks. Sand down high spots to create a smooth surface. This step is crucial for a flawless vinyl plank installation.
Dispose of the old flooring properly. Some materials may be recyclable. Check local guidelines for disposal options.
| Preparation Step | Action |
|---|---|
| Clearing the RV Space | Remove all items, clean thoroughly |
| Removing Old Flooring | Carefully pull up old material, inspect subfloor |
Subfloor Inspection
Before installing new vinyl plank flooring in your RV, the subfloor must be inspected. The subfloor provides the foundation for your new floor. A thorough inspection ensures durability and longevity. Any hidden issues can cause problems later. Let’s dive into the steps for a proper subfloor inspection.
Checking For Damage
Inspect the subfloor for any signs of damage. Look for cracks, soft spots, or water damage. Use a flashlight to check corners and dark areas. Pay special attention to areas under sinks and near windows. These spots are prone to water damage.
Take a screwdriver or a pointed tool and gently press into the subfloor. If it sinks in easily, the subfloor may be rotten. Mark these areas for repair.
Repairing And Cleaning
Once damage is identified, it’s time to repair. Cut out any rotten sections using a saw. Replace them with new plywood. Ensure the new sections are level with the existing subfloor.
Next, clean the subfloor thoroughly. Remove any debris, dust, and old adhesive. A clean surface is essential for vinyl plank adhesion. Use a vacuum and a damp cloth for best results.
By ensuring the subfloor is in good condition, you set the stage for a successful vinyl plank installation in your RV.

Credit: www.youtube.com
Measuring And Cutting Vinyl Planks
Replacing your RV flooring with vinyl plank is a great idea. It is durable and easy to maintain. The most important steps are measuring and cutting the planks. Accurate measurements ensure a good fit. Proper cutting techniques make the job easier.
Accurate Measurements
Start by measuring the length and width of your RV floor. Use a tape measure for precision. Record each measurement carefully. Measure twice to avoid mistakes.
Next, plan the layout of your planks. Decide the direction of the planks. It usually looks best when planks run along the length of the RV.
Consider any obstacles like furniture or built-ins. Measure these areas separately. Create a detailed sketch of your floor plan. This helps in cutting the planks accurately.
| Step | Action |
|---|---|
| 1 | Measure the floor length and width |
| 2 | Record measurements carefully |
| 3 | Plan plank layout direction |
| 4 | Measure obstacles separately |
| 5 | Create a detailed floor plan sketch |
Cutting Techniques
Use a utility knife for cutting vinyl planks. It provides clean cuts. Mark the plank where you need to cut. Use a straight edge to guide the cut. Apply steady pressure to score the plank.
Once scored, bend the plank to snap it. For curved cuts, use a jigsaw. Mark the curve on the plank. Cut slowly for a smooth edge.
Remember to wear safety gear. Gloves protect your hands. Safety glasses protect your eyes.
- Mark the cut line on the plank
- Use a straight edge to guide the cut
- Score the plank with a utility knife
- Bend the plank to snap it
- Use a jigsaw for curved cuts
These techniques will help you cut vinyl planks accurately. Proper cutting ensures a professional-looking floor.
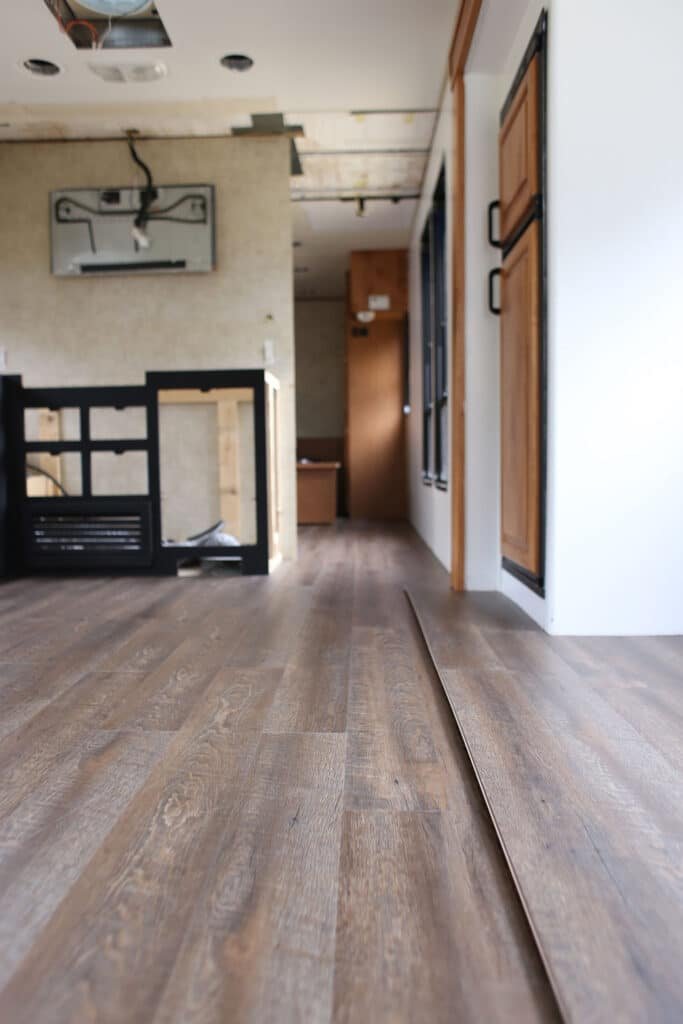
Installing Vinyl Plank Flooring
Replacing your RV flooring with vinyl plank is a great choice. It is durable, easy to clean, and looks fantastic. This guide will help you install vinyl plank flooring step-by-step. Let’s start with laying the first row and then move on to the rest of the installation.
Laying The First Row
The first row is the foundation of your new floor. It is crucial to get it right. Start by measuring the width of your RV. Cut the vinyl planks to fit this measurement. Use a sharp utility knife for clean cuts.
- Prepare the Subfloor: Make sure the subfloor is clean, dry, and smooth.
- Use Spacers: Place spacers between the wall and the planks to allow for expansion.
- Lay the First Plank: Place the first plank in a corner, with the tongue side facing the wall.
After placing the first plank, continue laying the rest of the first row. Ensure the planks are aligned perfectly. Use a tapping block and a rubber mallet to secure the planks together.
Continuing The Installation
Once the first row is complete, you can continue the installation. Follow these steps to ensure a smooth process:
- Stagger the Planks: Start the second row with a plank cut to about two-thirds of its length. This will create a staggered look.
- Click and Lock: Click the new plank into the first row. Use the tapping block to lock it in place.
- Repeat the Process: Continue this process for each row, ensuring the seams are tight.
To finish, trim any excess material around the edges. This will give your floor a clean and professional look. And there you have it! Your RV now has a beautiful and durable vinyl plank floor.

Credit: www.youtube.com
Finishing Touches
Enhance your RV’s interior by replacing old flooring with vinyl plank. Easy to install and durable, vinyl plank flooring adds a modern look. Enjoy a comfortable, stylish space on your travels.
Replacing RV flooring with vinyl plank can greatly improve your RV’s look. The final steps ensure a polished finish. These steps will make your new floor look professional.
Trimming And Molding
Trimming and molding give your floor a neat edge. Use baseboards or quarter round to cover gaps. This also protects the edges from damage. Trim around doors and cabinets for a seamless look.
Sealing And Securing
Sealing and securing the edges is vital. Use caulk to seal gaps around the edges. This prevents water from seeping in. Secure the planks with adhesive where needed. Make sure the floor is stable and won’t move. A well-sealed floor lasts longer and looks better. “`
Maintenance Tips
Vinyl plank flooring is a popular choice for RVs due to its durability and ease of maintenance. Proper upkeep can extend the life of your flooring and keep it looking new. This section provides some essential maintenance tips for your RV’s vinyl plank flooring.
Regular Cleaning
Regular cleaning is essential to maintaining your vinyl plank flooring. Sweep or vacuum the floor daily to remove dirt and debris. This prevents scratches and keeps the surface clean.
For a deeper clean, use a damp mop with a mild cleaning solution. Avoid using harsh chemicals or abrasive cleaners, as they can damage the flooring. Clean up spills immediately to prevent staining and warping.
| Cleaning Item | Purpose |
|---|---|
| Soft-bristle broom | Removing loose dirt |
| Vacuum with soft brush | Detailed cleaning |
| Damp mop | Deeper cleaning |
| Mild cleaning solution | Cleaning without damage |
Handling Repairs
Vinyl plank flooring is durable but not indestructible. Occasionally, you may need to repair minor damage. For small scratches, use a vinyl floor repair kit. These kits usually come with everything you need to fix minor issues.
If a plank is severely damaged, it may need replacing. Follow these steps for replacing a damaged plank:
- Identify the damaged plank.
- Carefully remove the damaged plank.
- Clean the area beneath the plank.
- Install the new plank according to the manufacturer’s instructions.
Always keep extra planks from your initial installation. This ensures you have matching materials for any future repairs.
Frequently Asked Questions
What Tools Are Needed To Install Vinyl Plank Flooring In An Rv?
To install vinyl plank flooring in an RV, you’ll need a utility knife, measuring tape, straight edge, and adhesive. Also, having a rubber mallet and spacers can help. Ensure you have a clean and dry subfloor before starting.
How Do You Prepare The Rv Floor For Vinyl Planks?
Start by removing old flooring and cleaning the subfloor. Check for any damage and repair if needed. Ensure the subfloor is level and dry. Use a moisture barrier if necessary to prevent any future issues.
Can I Install Vinyl Planks Over Existing Rv Flooring?
Yes, you can install vinyl planks over existing RV flooring if it’s in good condition. Ensure the surface is clean, level, and free of debris. If the existing flooring is damaged, it’s best to remove it before installation.
How Durable Is Vinyl Plank Flooring In An Rv?
Vinyl plank flooring is highly durable and suitable for RVs. It’s water-resistant, easy to clean, and can handle high traffic. Its durability makes it ideal for the varying conditions experienced in an RV.
Conclusion
Replacing RV flooring with vinyl plank is a practical choice. It’s durable, easy to clean, and stylish. This upgrade enhances the look and feel of your RV. Enjoy a fresh, modern space while traveling. Installation is straightforward and manageable for most DIY enthusiasts.
Say goodbye to old, worn-out floors. Experience the comfort and beauty of vinyl plank flooring. It’s a smart investment for your RV’s interior. Happy travels with your new, beautiful floor!


