Upgrading your RV toilet to porcelain can bring comfort and hygiene. It’s a popular choice for many RV owners.
Replacing your RV toilet with a porcelain one offers many benefits. Porcelain toilets are more durable and easier to clean. They also give your RV a touch of home-like luxury. Unlike plastic, porcelain does not retain odors. This makes your RV bathroom a fresher, more pleasant space.
Many RV owners find the switch worthwhile. It improves their travel experience significantly. Keep reading to learn why this upgrade might be right for you. Discover the advantages and how to make the change smoothly.
Credit: rvwithus.net
Benefits Of Porcelain Rv Toilets
Upgrading your RV toilet to a porcelain model offers several benefits. This guide explores why many RV owners prefer porcelain RV toilets. Discover the advantages and how they enhance your RV experience.
Enhanced Durability
A porcelain RV toilet is known for its durability. Porcelain is more resilient than plastic. It can withstand frequent use without cracking. This means fewer replacements and repairs. Over time, a porcelain toilet saves you money.
Superior Comfort
Porcelain RV toilets offer greater comfort. They have a similar feel to home toilets. The material is smoother and more substantial. This provides a more comfortable experience. It also helps reduce noise during use.
Easy Maintenance
Maintaining a porcelain RV toilet is simpler. The smooth surface resists stains. It is easier to clean compared to plastic. Regular cleaning keeps it looking new. Here are some tips for maintaining your porcelain RV toilet:
- Use a mild cleaner
- Avoid abrasive tools
- Wipe regularly with a soft cloth
Proper care ensures your toilet remains in top condition.
| Benefit | Description |
|---|---|
| Enhanced Durability | Resists cracks and lasts longer |
| Superior Comfort | Feels like a home toilet |
| Easy Maintenance | Smooth surface resists stains |
Choosing The Right Porcelain Toilet
Replacing your RV toilet with a porcelain one can offer many benefits. Porcelain toilets are durable, easy to clean, and add a touch of luxury to your RV. But how do you choose the right one? Let’s break it down into three important factors: size and fit, design and features, and budget considerations.
Size And Fit
The first thing to consider is the size and fit of the porcelain toilet. RV bathrooms are often small. Measure your space carefully. Note the dimensions of your current toilet. Compare them with the new porcelain model. Ensure there is enough clearance around the toilet. Check both width and height. This will make installation easier and ensure comfort.
Design And Features
Porcelain toilets come in many designs and with various features. Some have a modern look, while others are more traditional. Decide which style matches your RV’s interior. Consider the features you need:
- Foot pedal flush
- Water-saving options
- Soft-close lid
- Built-in sprayer
Each feature can enhance your RV experience. Choose what suits your lifestyle.
Budget Considerations
Budget is another important factor. Porcelain toilets can range in price. Set a budget before you start shopping. Make sure to include installation costs. Compare different models within your price range. Don’t compromise on quality. A well-made toilet will last longer and provide better value.
Here is a simple table to compare:
| Model | Price | Key Features |
|---|---|---|
| Model A | $200 | Foot pedal flush, water-saving |
| Model B | $250 | Soft-close lid, built-in sprayer |
| Model C | $300 | All features |
Use this table to help you compare and decide. Choose a toilet that fits your budget and meets your needs.
Necessary Tools And Materials
Replacing your RV toilet with a porcelain one can enhance your comfort. Before starting, gather the necessary tools and materials. This will ensure a smooth installation process. Let’s look at what you need.
Tool Checklist
Having the right tools is crucial for this task. Here’s a checklist:
- Adjustable wrench
- Screwdriver set
- Utility knife
- Plumber’s tape
- Bucket
- Rubber gloves
Materials List
In addition to tools, you need specific materials. Ensure you have these items ready:
- Porcelain RV toilet
- New flange seal
- Flexible water supply line
- Cleaning supplies
- Sealant
With these tools and materials, you are ready to replace your RV toilet. Follow the instructions carefully for a successful installation.

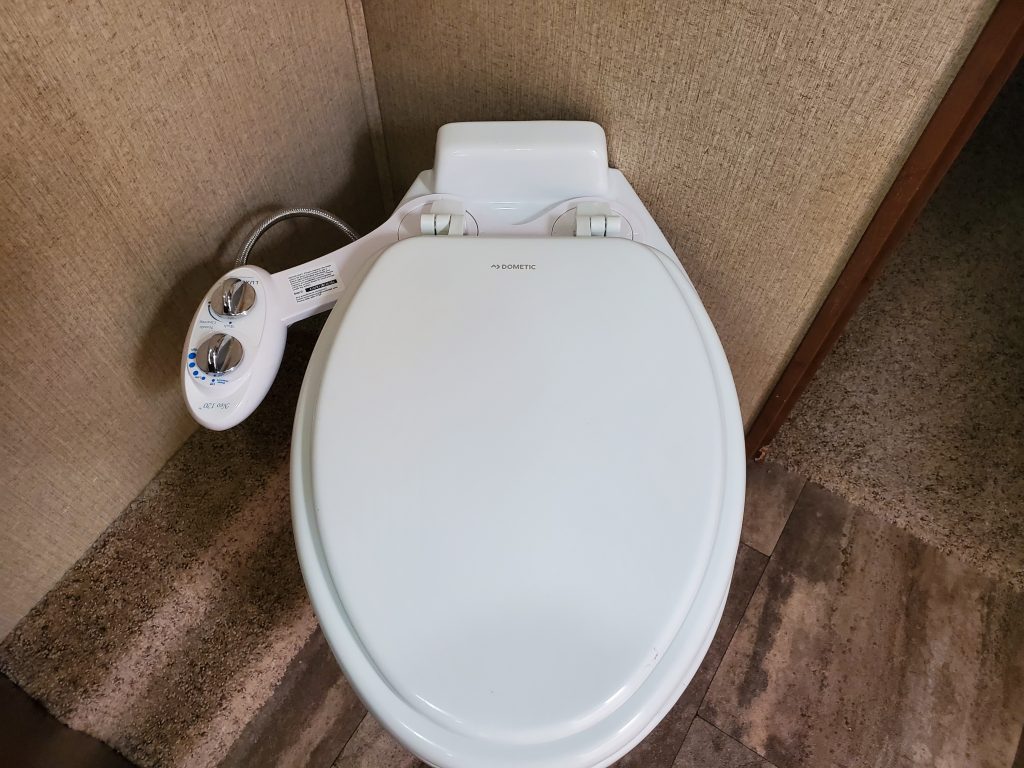
Credit: www.youtube.com
Preparing For Installation
Before you replace your RV toilet with a porcelain model, prepare thoroughly. This ensures a smooth installation. Follow these steps to avoid any issues.
Turn Off Water Supply
First, turn off the water supply to your RV. This step is crucial to prevent leaks and water damage. Locate the main water valve and turn it off completely. Double-check by turning on a faucet to ensure no water flows.
Drain Existing Toilet
Next, drain the existing toilet. Flush it to remove any water left in the bowl. Use a sponge or towel to soak up any remaining water. Dispose of the water safely to avoid spills.
Remove Old Toilet
Now, remove the old toilet. Start by unscrewing the bolts at the base. These bolts hold the toilet to the floor. Once unscrewed, carefully lift the toilet off the flange. Be prepared for some water to spill. Have towels ready to clean up.
Inspect the flange and clean it. Remove any old wax or sealant. This step ensures a proper seal for your new porcelain toilet. If the flange is damaged, replace it before proceeding.
Installing The New Porcelain Toilet
Swapping out your old RV toilet for a new porcelain model is a worthwhile upgrade. A porcelain toilet adds a touch of elegance and is easier to clean. This guide will help you install your new porcelain toilet with ease.
Positioning The Toilet
First, ensure the toilet flange is clean and free of debris. This is where the toilet will connect to the floor. Align the toilet with the flange, making sure the mounting bolts line up with the holes in the toilet base.
Gently lower the toilet onto the flange, taking care not to damage the wax ring. Check the alignment and ensure the toilet is level before moving on to the next step.
Securing The Toilet
Once the toilet is in position, secure it with the mounting bolts. Tighten the bolts gradually, alternating from one side to the other to keep the pressure even.
Do not over-tighten the bolts as this can crack the porcelain. Place the bolt covers on to hide the bolts and give a clean look.
Connecting The Water Supply
With the toilet secured, it’s time to connect the water supply. Attach the water supply line to the inlet on the toilet tank. Hand-tighten the connection and then use a wrench to make it snug.
Turn on the water supply and check for leaks. If there are no leaks, you are all set. Your new porcelain toilet is now installed and ready for use.

Credit: www.youtube.com
Testing And Adjustments
After installing a new porcelain RV toilet, it is crucial to perform testing and adjustments. This ensures everything works properly and avoids future issues. Let’s dive into the steps involved.
Check For Leaks
First, check for any leaks around the new toilet. Turn on the water supply and observe the area closely.
- Look for water pooling around the base.
- Check the connections for any drips.
If you find any leaks, tighten the connections or reseal the joints. Water leaks can cause serious damage if left unchecked.
Adjust Flushing Mechanism
Next, adjust the flushing mechanism to ensure it works properly. Test the flush by pressing the handle or button.
- Ensure the toilet flushes completely.
- Check that the water refills properly.
If the flush is weak or the water doesn’t refill, adjust the mechanism. Follow the manufacturer’s instructions for specific adjustments.
Ensure Stability
Finally, ensure the toilet is stable. Sit on the toilet and move slightly to test its stability.
- If the toilet wobbles, tighten the mounting bolts.
- Use a level to check the toilet’s alignment.
A stable toilet prevents future issues and provides comfort.
Maintaining Your Porcelain Rv Toilet
Maintaining your porcelain RV toilet is crucial for a pleasant travel experience. Regular upkeep ensures longevity and a hygienic environment. Let’s dive into some useful tips for keeping your porcelain RV toilet in top shape.
Regular Cleaning Tips
Clean your porcelain RV toilet weekly with mild, non-abrasive cleaners. Use a soft brush or sponge to avoid scratches. Rinse thoroughly after cleaning to remove all residue. Avoid harsh chemicals as they can damage the porcelain surface.
Preventing Clogs
Use RV-friendly toilet paper to prevent clogs. This type of paper dissolves quickly and reduces the risk of blockage. Educate everyone on the RV to use minimal toilet paper. Dispose of other waste items in a trash bin, not the toilet.
Winterizing Procedures
If you are storing your RV for winter, winterize the toilet. Start by draining all water from the toilet bowl and the tank. Add RV antifreeze to the toilet to prevent freezing. Follow the manufacturer’s guidelines to ensure proper protection during the cold months.
Troubleshooting Common Issues
Replacing your RV toilet with a porcelain one can enhance your comfort. But, you might face some common issues. This guide will help you troubleshoot these problems effectively.
Addressing Leaks
Leaks are a common issue with RV toilets. To solve this:
- Check the seal: Ensure the seal between the toilet and floor is tight.
- Inspect the water line: Look for any cracks or loose connections.
- Replace damaged parts: If parts are worn out, replace them promptly.
If leaks persist, consider using a waterproof sealant around the base. This can provide an extra layer of protection.
Fixing Flushing Problems
If your porcelain RV toilet has flushing problems, follow these steps:
- Check the water supply: Ensure the water valve is open and there is sufficient water pressure.
- Clean the flush valve: A dirty flush valve can cause flushing issues. Clean it thoroughly.
- Inspect the handle: Make sure the handle moves freely and isn’t stuck.
These steps can often solve most flushing problems. If not, you might need to replace the flush valve.
Dealing With Odors
Odors can be unpleasant. To manage odors:
- Ventilation: Ensure your RV has proper ventilation.
- Clean regularly: Clean the toilet and holding tank frequently.
- Use deodorizers: Add RV-specific deodorizers to the tank.
Regular maintenance can significantly reduce odors and keep your RV smelling fresh.
Frequently Asked Questions
How To Replace An Rv Toilet With Porcelain?
Replacing an RV toilet with porcelain involves removing the old toilet, installing a new flange, and securing the new porcelain toilet. Ensure all connections are tight to prevent leaks.
Are Porcelain Rv Toilets Better?
Yes, porcelain RV toilets are more durable, easier to clean, and offer a more residential feel compared to plastic ones.
What Tools Are Needed For Rv Toilet Replacement?
You will need a wrench, screwdriver, sealant, and possibly a new flange. Always refer to the toilet’s installation manual for specific tools.
Can I Install A Porcelain Toilet Myself?
Yes, you can install a porcelain toilet yourself with basic tools and plumbing knowledge. Follow the manufacturer’s instructions carefully.
Conclusion
Upgrading your RV toilet to porcelain offers many benefits. It enhances comfort. It adds a touch of home. Cleaning becomes easier. Durability improves. Installation is straightforward. Your RV experience will feel more luxurious. Invest in a porcelain toilet today. Enjoy the road with added comfort.


