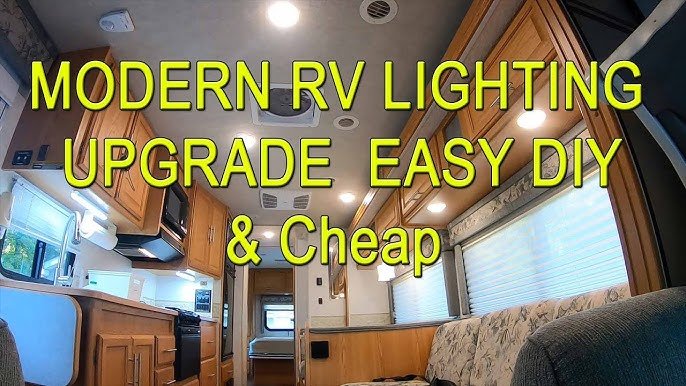
Replacing RV interior lights with LED bulbs is a smart move. It’s energy-efficient and offers bright, clear lighting.
Are you tired of dim lights in your RV? Switching to LED lights can transform your space. LED lights use less energy, last longer, and provide better illumination. They are also cooler to the touch, reducing the risk of heat build-up.
LEDs come in various styles and colors, perfect for setting the right mood. Whether you’re on a long road trip or parked at a campsite, LED lights can enhance your RV experience. Let’s explore why upgrading to LED is a great choice for your RV lighting needs.
Credit: mountainmodernlife.com
Benefits Of Led Lights
Replacing your RV interior lights with LED lights can offer many benefits. LED lights are known for their energy efficiency and long lifespan. This can make them a great choice for your RV. Let’s explore these benefits in more detail.
Energy Efficiency
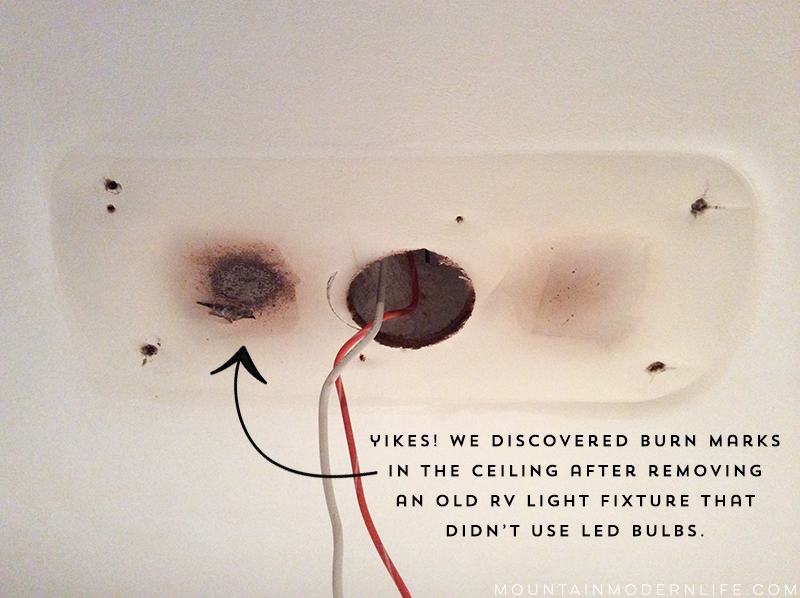
LED lights use less energy compared to traditional bulbs. This can help you save on power costs. LEDs convert most of their energy into light, not heat. This means they are more efficient and produce less heat. Your RV stays cooler, and your air conditioner works less.
| Type of Light | Energy Used | Heat Produced |
|---|---|---|
| LED | Low | Low |
| Incandescent | High | High |
| Fluorescent | Medium | Medium |
LED lights also help in reducing your carbon footprint. They are eco-friendly and can last much longer than other types of lights.
Longer Lifespan
LED lights have a longer lifespan compared to traditional bulbs. While incandescent bulbs may last 1,000 hours, LED lights can last up to 50,000 hours. This means you will spend less time and money on replacements.
- Incandescent bulbs: Up to 1,000 hours
- Fluorescent bulbs: Up to 10,000 hours
- LED bulbs: Up to 50,000 hours
Having LED lights in your RV means fewer replacements. This can save you money in the long run. Plus, it reduces the hassle of changing bulbs often.
LED lights are also more durable. They are less likely to break during travel. This makes them ideal for RV use.

Credit: leisurervparts.com
Choosing The Right Led Lights
Choosing the right LED lights for your RV interior is crucial. The right LED lights can enhance your RV experience. This section will help you understand key factors. We will focus on brightness levels and color temperature.
Brightness Levels
Brightness levels refer to how much light the LED emits. It’s measured in lumens. Higher lumens mean brighter lights. Consider the purpose of each light in your RV.
- For reading: Choose LEDs with 450-800 lumens.
- For general lighting: Choose LEDs with 800-1200 lumens.
- For accent lighting: LEDs with 200-400 lumens work well.
Matching brightness to your needs is key. Too bright can be harsh. Too dim can be ineffective.
Color Temperature
Color temperature affects the mood of your space. It’s measured in Kelvin (K). Lower Kelvin means warmer light. Higher Kelvin means cooler light.
| Kelvin (K) | Light Color | Best Use |
|---|---|---|
| 2700K-3000K | Warm White | Living areas, bedrooms |
| 3500K-4100K | Neutral White | Kitchens, workspaces |
| 5000K-6500K | Cool White | Bathrooms, garages |
Choose a color temperature that suits your needs. Warm white for a cozy feel. Cool white for a modern look.
Tools And Materials Needed
Replacing your RV interior lights with LED is a simple DIY project. Before starting, gather all the necessary tools and materials. This ensures a smooth process and avoids interruptions.
Required Tools
- Screwdriver: Essential for removing old light fixtures.
- Wire strippers: Needed to strip wires for connecting LEDs.
- Voltage tester: Ensures there is no power running through the wires.
- Electrical tape: Useful for securing wire connections.
- Drill: For making new holes if needed.
Led Light Options
Choosing the right LED lights is important. Different options are available, each with unique features.
| LED Type | Description |
|---|---|
| Panel LEDs | Provide bright, even lighting. Ideal for large spaces. |
| Strip LEDs | Flexible and can be cut to size. Great for accent lighting. |
| Bulb LEDs | Direct replacement for traditional RV bulbs. Simple to install. |
Preparing For Installation
Replacing your RV interior lights with LEDs is a smart choice. LEDs are energy-efficient and long-lasting. The first step in this process is preparing for installation. This step ensures safety and smooth transition.
Safety Precautions
Before starting, ensure the RV is off. Turn off all electrical circuits. This prevents any accidents. Use gloves to protect your hands. Make sure the area is well-lit. Gather all needed tools. These include screwdrivers and pliers. Check the LED light specifications. They should match your RV’s requirements.
Removing Old Lights
Start by unscrewing the old light fixtures. Carefully remove the cover. Disconnect the wires attached to the old light. Note the wire connections. You will need this info later. Remove the old light completely. Clean the area where the new LED will go. This ensures a good fit. Double-check the wires for any damage. If you see any, repair them before continuing.
Installing Led Lights
Installing LED lights in your RV can improve both aesthetics and functionality. LED lights are energy-efficient, long-lasting, and provide bright illumination. In this section, we will guide you through the process of installing LED lights in your RV. We will cover wiring and connections, as well as mounting the lights.
Wiring And Connections
Proper wiring is essential for a successful LED light installation. Start by turning off the power supply to avoid any electrical hazards. Identify the existing wiring and connections in your RV.
Follow these steps for wiring and connections:
- Strip the insulation from the ends of the wires.
- Connect the positive wire to the positive terminal of the LED light.
- Connect the negative wire to the negative terminal of the LED light.
- Use wire connectors to secure the connections.
- Wrap the connections with electrical tape for insulation.
Ensure all connections are tight and secure. Loose connections can cause flickering or other issues.
Mounting The Lights
Mounting the LED lights is the next step. Choose a suitable location for each light. Ensure the lights are evenly spaced and provide adequate illumination.
Here are the steps to mount the lights:
- Mark the mounting locations with a pencil.
- Drill pilot holes for the screws.
- Align the LED light with the pilot holes.
- Secure the light in place with screws.
- Repeat for all other lights.
Check that all lights are securely mounted. Make any adjustments if needed. Test the lights to ensure they are working properly.
By following these steps, you can successfully install LED lights in your RV. Enjoy the benefits of bright and energy-efficient lighting.
Testing And Adjustments
After installing LED lights in your RV, it’s essential to test and make adjustments. Proper testing ensures your new lights work correctly. Adjusting the brightness can enhance your RV’s ambiance. Below are steps to help you in this process.
Checking Functionality
First, turn on the power supply to your RV’s electrical system. Switch on each newly installed LED light. Observe if they all light up correctly. If any lights do not turn on, check the wiring connections. Ensure all plugs are secure and wires are not damaged.
Use a multimeter to test the voltage at each light socket. Ensure the voltage matches the LED light requirements. This step helps to identify any electrical issues. If the voltage is too low or too high, adjust the power supply accordingly.
Adjusting Brightness
Most LED lights have adjustable brightness. Use the dimmer switch to set your preferred lighting level. Dimming can create a cozy atmosphere in your RV. Increase brightness for activities like reading or cooking.
Some LEDs come with remote controls. Use the remote to test different brightness levels. Ensure the light spreads evenly across the RV interior. If any areas are too dark or too bright, reposition the lights.
Consider using a table to compare the brightness levels:
| Activity | Recommended Brightness Level |
|---|---|
| Reading | High |
| Relaxing | Medium |
| Sleeping | Low |
Test the lights during both day and night. This helps ensure the brightness is suitable for all times. Adjust as needed to achieve the best lighting for your RV.
Maintenance Tips
Maintaining your RV’s LED interior lights is essential for their longevity. Regular care ensures they remain bright and energy-efficient. Follow these simple maintenance tips to keep your LED lights in top condition.
Cleaning Led Lights
Dust and dirt can reduce the brightness of your LED lights. Use a soft cloth to wipe the lights gently. Avoid using water or cleaning solutions directly on the LEDs. A light touch is all you need to keep them clean.
Replacing Faulty Units
LED lights can last a long time, but sometimes, they may fail. If a light stops working, replace it with a new LED unit. Ensure the new unit matches the old one’s specifications. This guarantees compatibility and performance.
Enhancing Rv Interior
Enhancing the interior of your RV can make trips more enjoyable. One effective way is by replacing traditional lights with LED lights. LEDs provide better illumination, are energy-efficient, and offer a modern look.
Decorative Lighting Ideas
Consider adding LED strip lights under cabinets. These strips add a soft glow and are perfect for evenings. Use LED puck lights for spotlighting areas like the kitchen or reading nooks. They bring focus to specific spots, making the space functional and cozy.
LED fairy lights can create a magical atmosphere. Place them around windows or along the ceiling. They add a whimsical touch to your RV interior, perfect for relaxing nights.
Optimizing Light Placement
Place LED lights strategically for the best results. Position LED strip lights under shelves or along the floor. This provides gentle, ambient lighting without being harsh.
Install brighter LED panels on the ceiling. This ensures your RV is well-lit during the day. Use adjustable LED lamps for areas where you read or work. This flexibility allows you to change the light direction as needed.
Think about the RV’s layout. Place lights where they highlight important areas. This ensures you make the most of your space and lighting.

Credit: www.youtube.com
Frequently Asked Questions
Why Switch Rv Lights To Led?
Switching to LED lights reduces energy consumption and extends battery life. LED lights also provide brighter, clearer illumination. They have a longer lifespan compared to traditional lights.
How To Choose The Right Led Lights?
Choose LED lights compatible with your RV’s electrical system. Ensure they match the existing fixtures. Consider brightness, color temperature, and energy efficiency.
Are Led Lights Dimmable?
Many LED lights are dimmable, providing adjustable brightness levels. Check the product specifications to ensure compatibility with dimmer switches.
How To Install Led Lights In An Rv?
Turn off the power supply before installing. Remove old lights, connect new LED lights to existing wiring, and secure them in place. Follow the manufacturer’s instructions.
Conclusion
Switching to LED lights in your RV brings many benefits. You save energy, money, and enjoy brighter interiors. LED lights last longer, reducing the need for replacements. Installation is easy and enhances your RV’s look. Make the smart choice today for a brighter, more efficient RV experience.
Your adventures will shine with LED lights. Enjoy the comfort and savings they bring. Happy travels!


