Peel and stick tiles are a great option for RV showers. They are easy to install and offer a stylish upgrade.
Revamping your RV shower doesn’t have to be hard. Peel and stick tiles are a simple solution. These tiles are self-adhesive, making them perfect for DIY projects. No grout, no mess, just peel and stick. They come in various colors and designs to match your style.
Their waterproof nature makes them ideal for shower areas. Plus, they are lightweight, which is perfect for RVs. Transform your RV shower quickly and affordably with peel and stick tiles. Ready to learn more? Let’s dive in.

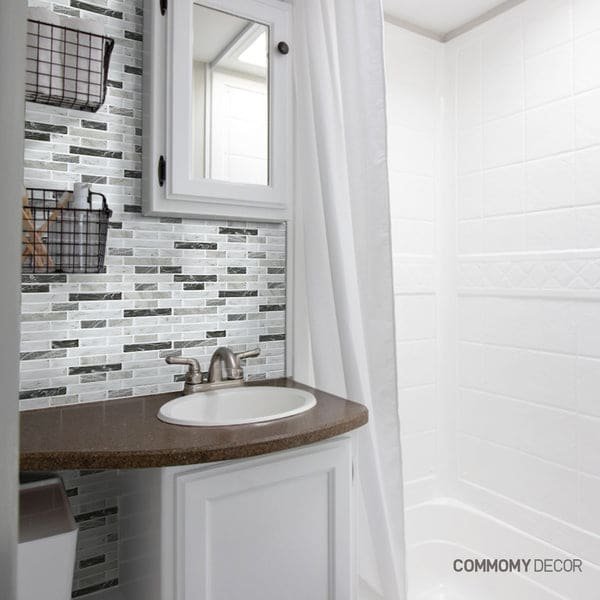
Credit: commomy.com
Introduction To Peel And Stick Tiles
Peel and stick tiles offer a simple solution for updating your RV shower. These tiles are easy to install and waterproof, making them ideal for the space. Enhance your RV shower with minimal effort and cost.
Peel and stick tiles have become a popular choice for RV showers. They offer an easy and quick solution for a stylish upgrade. These tiles are versatile and user-friendly. You can install them without professional help.
What Are Peel And Stick Tiles?
Peel and stick tiles are adhesive-backed tiles. You can stick them directly onto a clean surface. They come in various materials like vinyl, metal, and glass. The tiles are available in many colors and patterns. This makes them suitable for different styles.
Benefits Of Using Peel And Stick Tiles
Peel and stick tiles are easy to install. You do not need special tools. This saves time and effort. They are also cost-effective. You can achieve a high-end look without spending much. These tiles are durable and water-resistant. This makes them perfect for RV showers. They can withstand moisture and humidity. The tiles are also easy to clean. A simple wipe is enough to keep them looking new. Peel and stick tiles are removable. You can replace or update them easily. This flexibility is ideal for RV owners. It allows for frequent style changes. It also makes repairs simple and hassle-free. “`
Why Choose Peel And Stick For Rv Showers
Choosing the right material for your RV shower can be challenging. Peel and stick tiles have become a popular choice for many RV owners. These tiles offer a blend of practicality and style. They are easy to install and provide a modern look to your RV shower.
Convenience And Simplicity
Peel and stick tiles are easy to install. They do not require special tools or expertise. You can cut them to fit any size or shape. This makes them perfect for the unique dimensions of RV showers. No need to hire a professional. Save time and money by doing it yourself.
These tiles adhere to most surfaces. Whether you have a smooth or textured wall, peel and stick tiles will stick firmly. They are also waterproof and resistant to mold. This makes them ideal for the moist environment of an RV shower.
Aesthetic Appeal
Peel and stick tiles come in various designs and colors. You can choose a style that matches your taste. From classic subway tiles to modern mosaic patterns, the options are endless. This allows you to create a customized look for your RV shower.
These tiles also add a touch of elegance. They can transform a plain shower into a stylish space. With their sleek appearance, peel and stick tiles enhance the overall look of your RV. Enjoy a beautiful and functional shower without breaking the bank.
Selecting The Right Tiles
Selecting the right tiles for your RV shower can be challenging. Peel and stick tiles offer a quick and easy solution. They are simple to install and come in various materials and designs. Understanding your options will help you make the best choice for your RV shower.
Material Options
Different materials offer different benefits. Here are some options to consider:
- Vinyl: Durable and water-resistant. Easy to clean.
- Glass: Offers a sleek, modern look. Resistant to stains and water.
- Metal: Adds a unique, industrial feel. Very durable.
- Ceramic: Classic and timeless. Easy to maintain.
Each material has its pros and cons. Vinyl tiles are the most popular due to their flexibility and cost-effectiveness. Glass tiles can create a luxurious feel but are more expensive. Metal tiles are perfect for a modern look, while ceramic tiles offer a traditional appeal.
Design Choices
Design is key to creating a space you love. Here are some design options:
| Design Type | Description |
|---|---|
| Subway | Classic and versatile. Works with any decor style. |
| Mosaic | Small tiles that create intricate patterns. Adds texture. |
| Hexagon | Modern and trendy. Unique geometric shape. |
| Herringbone | Zig-zag pattern. Adds visual interest. |
Subway tiles are timeless and blend well with any style. Mosaic tiles add a touch of elegance. Hexagon tiles are perfect for a bold statement. Herringbone tiles offer a sophisticated look. Choose a design that matches your personality and the overall theme of your RV.
Remember, the right tiles will not only enhance the look of your RV shower but also ensure it is functional and easy to maintain.
Preparation Before Installation
Installing peel and stick tiles in your RV shower can refresh its look. Proper preparation before installation ensures the tiles adhere well and last longer. This step-by-step guide will help you get started.
Cleaning The Surface
Begin by cleaning the shower surface thoroughly. Remove any dirt, soap scum, and residue. Use a mild cleaner and a non-abrasive sponge. Scrub the surface gently. Rinse with water and let it dry completely. A clean surface helps the tiles stick better.
Measuring The Area
Next, measure the area where you will install the tiles. Use a tape measure for accuracy. Note the height and width of the shower walls. Calculate the total square footage. This helps you know how many tiles to buy. Always get a few extra tiles for any mistakes or future repairs.
Step-by-step Installation Guide
Transforming your RV shower with peel and stick tiles is an easy DIY project. This step-by-step installation guide will help you get started. Follow these instructions for a smooth and successful installation.
Tools Needed
Before you start, gather these tools:
- Measuring tape
- Pencil
- Utility knife or scissors
- Level
- Ruler or straight edge
- Clean cloth
- Adhesive primer (optional)
Applying The Tiles
Begin by cleaning the shower wall. Use a clean cloth to remove dirt and grease. Ensure the surface is dry and smooth.
Next, measure the wall area. Use a measuring tape for accuracy. Mark your measurements with a pencil.
Cut the tiles to fit. Use a utility knife or scissors. Ensure the cuts are straight using a ruler or straight edge.
Peel off the backing. Carefully align the tile with your markings. Press the tile firmly onto the wall. Use a level to ensure it’s even.
Continue applying tiles. Work from bottom to top. Overlap edges for a seamless look. Press down firmly to secure each tile.
Check for any gaps. Adjust tiles as needed. Press again to ensure a strong bond.
If using adhesive primer, apply it before placing the tiles. This ensures better adhesion.
Once all tiles are in place, let them set for 24 hours. This ensures they stick properly.
Enjoy your new RV shower look! It’s now ready for use.
Tips For A Smooth Installation
Installing peel and stick tile in your RV shower can transform its look. To ensure a smooth installation, follow these simple tips. A little preparation goes a long way. Let’s dive into the details.
Avoiding Common Mistakes
Measure the area accurately. Ensure you have enough tiles to cover the space. Clean the shower walls thoroughly. Any residue can affect the tiles’ adhesion. Let the walls dry completely before starting. This prevents moisture from weakening the adhesive.
Plan your layout. Start from the bottom and work your way up. This helps tiles stay aligned. Use a level to keep tiles straight. Avoid stretching or pulling the tiles. This can cause bubbles or gaps.
Ensuring Proper Adhesion
Use a primer if the walls have a glossy finish. This helps the tiles stick better. Press each tile firmly for a few seconds. This ensures good contact with the wall. Smooth out any air bubbles immediately. Use a roller or a flat object.
Check the edges. Make sure they are firmly attached. If any tile starts peeling, press it back immediately. Avoid using the shower for 24 hours after installation. This allows the adhesive to set properly.
Maintaining Your Peel And Stick Tiles
Peel and stick tiles are a great choice for RV showers. They are easy to install and look fantastic. But, they need proper care to stay in good shape. Let’s dive into some useful tips to keep your tiles looking new.
Cleaning Tips
Regular cleaning is crucial for peel and stick tiles. Use a soft cloth and mild soap. Avoid harsh chemicals. They can damage the adhesive. Wipe the tiles gently. Clean the grout lines too. This prevents mold and mildew.
- Use a soft, damp cloth.
- Opt for mild soap.
- Avoid abrasive cleaners.
- Dry tiles after cleaning.
Handling Wear And Tear
Tiles in an RV shower can face wear and tear. Inspect the tiles regularly. Look for loose corners or edges. If you find any, press them back down. Use a hairdryer to warm the adhesive. This helps the tile stick better.
- Check tiles for damage weekly.
- Press down any loose corners.
- Use a hairdryer to heat the adhesive.
If a tile gets damaged, replace it quickly. Peel off the old tile carefully. Clean the area before sticking a new tile. This ensures a strong bond.

Credit: lovethatrv.com
Real-life Transformations
Real-life transformations of RV showers with peel and stick tiles are truly inspiring. These tiles provide a quick, easy, and affordable way to refresh your RV shower. You’ll be amazed at how a small change can make a huge impact. Let’s explore some real-life examples and hear from customers who have experienced this transformation.
Before And After Examples
One RV owner had an outdated and dull shower. The walls were plain and lacked personality. They decided to use peel and stick tiles to give the space a fresh look. The result? A bright, modern shower that feels like a spa.
Another customer had a shower with cracked tiles. They worried about water damage. By using peel and stick tiles, they covered the cracks and created a waterproof barrier. The shower now looks brand new and is protected from leaks.
Customer Testimonials
Jane from Texas says, “I was skeptical at first, but peel and stick tiles transformed my RV shower. The installation was simple, and the results are stunning. It feels like a new space.”
Tom from California shares, “Our shower was an eyesore. The tiles were old and stained. We used peel and stick tiles, and it looks incredible now. Plus, it was so easy to do ourselves.”
Lisa from Florida adds, “We love our new RV shower. The peel and stick tiles gave it a modern touch. It’s amazing how much of a difference they made.”

Credit: www.pinterest.com
Frequently Asked Questions
Are Peel And Stick Tiles Waterproof For Rv Showers?
Yes, peel and stick tiles designed for showers are waterproof. They are made to withstand moisture and humidity.
How Long Do Peel And Stick Tiles Last?
Peel and stick tiles can last up to 10 years. Proper installation and maintenance ensure their longevity.
Can I Install Peel And Stick Tiles Myself?
Yes, you can easily install peel and stick tiles yourself. They are designed for simple DIY application.
Do Peel And Stick Tiles Need Special Cleaning?
No, standard cleaning methods work for peel and stick tiles. Just use mild soap and water for cleaning.
Conclusion
Peel and stick tiles offer a simple solution for RV showers. They are easy to install, which saves time and effort. These tiles come in various styles to match your taste. They are also waterproof, making them ideal for shower areas.
Maintenance is minimal, so you can focus on enjoying your travels. With their affordability and versatility, peel and stick tiles are a smart choice. Transform your RV shower quickly and easily. Enjoy a refreshed space without the hassle.


