Removing an RV bathroom vent screen may seem tricky. But with the right steps, it’s simple and quick.
RV bathroom vent screens can get dirty or clogged over time. Cleaning or replacing them keeps your RV fresh and ventilated. In this guide, we will walk you through the process of removing the vent screen. This ensures your RV stays in top shape.
Whether you are a seasoned RVer or a newbie, these easy steps will help you maintain your bathroom vent. Let’s dive into the details and get your RV bathroom vent screen cleaned or replaced efficiently.

Credit: www.nepal.ubuy.com
Gather Necessary Tools
Gathering the necessary tools is the first step in removing your RV bathroom vent screen. Having everything on hand makes the process smoother and faster. Let’s dive into what you’ll need.
Required Tools
For this task, you’ll need a few basic tools. A screwdriver is essential. Make sure it matches the screws on your vent screen. You might need both Phillips and flat-head types. A small wrench can also be useful. Sometimes, vent screens have nuts that need loosening. A putty knife helps to gently pry the screen if it’s stuck. Have a flashlight handy too. It helps you see small screws and tight corners.
Safety Equipment
Safety should always come first. Wear safety goggles to protect your eyes from dust and debris. Gloves are also important. They keep your hands safe from sharp edges and dirt. A dust mask helps if you are sensitive to dust. It prevents you from inhaling particles while working.
Ensure Safety
Ensuring safety is crucial when removing your RV bathroom vent screen. It prevents accidents and protects your RV. Follow these steps to stay safe and avoid damage.
Power Off
First, turn off the power to the RV bathroom. This step is essential to prevent electrical shocks. Locate the circuit breaker panel and switch off the power to the bathroom area.
Next, ensure all lights and appliances in the bathroom are off. This confirms the power is completely disconnected. Double-check to be sure.
Protective Gear
Wear proper protective gear to safeguard yourself. Use gloves to protect your hands from sharp edges. Safety glasses are also necessary to shield your eyes from debris.
Ensure you have a stable ladder if needed. A stable ladder prevents falls and provides a secure platform. Place the ladder on a flat surface.
Here’s a quick summary in a table:
| Step | Action |
|---|---|
| Power Off | Turn off the power at the circuit breaker panel. |
| Protective Gear | Wear gloves, safety glasses, and use a stable ladder. |
By following these steps, you ensure your safety while working. Always prioritize safety to prevent accidents and damage.
Locate The Vent Screen
Locate the Vent Screen: To remove the RV bathroom vent screen, first locate it. This might seem simple, but it’s crucial to know where to start. The vent screen is typically found on the ceiling of your RV bathroom. Understanding its location helps in planning the next steps. Let’s break this down with the following subheadings.
Bathroom Vent Location
The bathroom vent is usually placed on the ceiling. This location helps to expel moisture and odors effectively. Look for a small, often square, cover on your ceiling. This is where the vent screen is housed.
If you can’t find it, look near the shower area. This is because moisture from the shower is the main reason for the vent. The vent should be directly above or close to this spot.
Accessing The Vent
To access the vent, you might need a step stool or ladder. Ensure it’s stable before climbing. Safety first!
Once you’re at the vent level, inspect the cover. Most RV vent covers have screws or clips. Check around the edges to see how it’s attached. Use a screwdriver if screws are present. If it has clips, carefully unclip them.
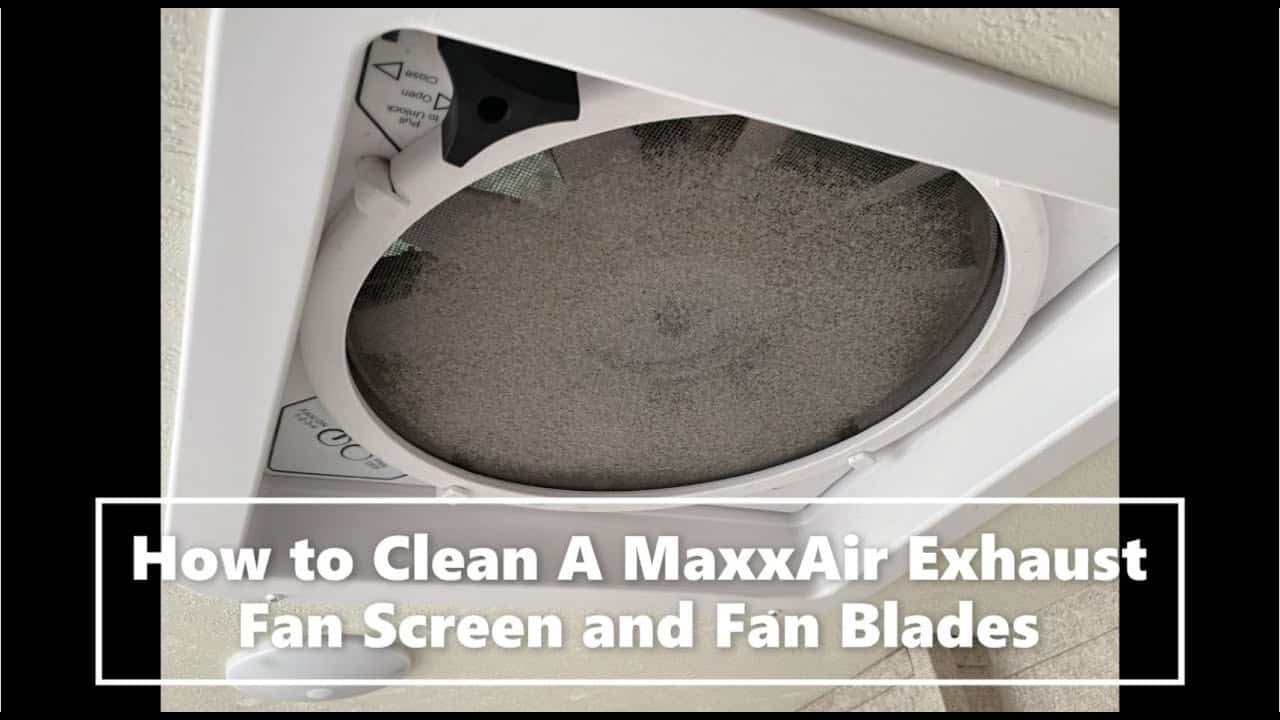
After removing the cover, you will see the screen. It might be dusty or have debris. The screen is usually held in place by small tabs or additional screws. Carefully note how the screen is fixed to avoid damage.
Now, you are ready to move to the next step: removing the vent screen. With the cover off and the screen exposed, you’re halfway there!

Credit: www.youtube.com
Remove Vent Cover
Removing the RV bathroom vent screen is a simple task. It ensures that your vent stays clean and functions well. The first step is to remove the vent cover. Here’s how to do it:
Unscrewing The Cover
To begin, you will need a screwdriver. Most vent covers are secured with screws. Use the screwdriver to unscrew each screw. Be careful not to drop them. Place the screws in a small container so they do not get lost. Some RV models may have four screws, while others might have more. Check your vent to see how many screws you need to remove.
Lifting The Cover
Once the screws are removed, gently lift the vent cover. If the cover is stuck, use a flat tool to pry it loose. Be gentle to avoid breaking the cover. Lift the cover off completely and set it aside. Now, you can see the vent screen. This screen protects the vent from debris and insects.
If the screen is dirty, you can clean it. If it is damaged, consider replacing it. This simple step keeps your RV bathroom vent working well. It also helps maintain good air quality inside your RV. With the cover removed, you can proceed to the next steps in your maintenance routine.
Detach The Screen
Removing the RV bathroom vent screen can be a simple task. With the right steps, you can ensure a clean and functional vent. This section will guide you on how to detach the screen without any hassle.
Identifying Fasteners
First, locate the fasteners holding the screen. These are usually screws or clips. Check the edges of the vent screen carefully. Make sure you have the right tools to remove them.
Removing The Screen
Once you have identified the fasteners, start removing them. Use a screwdriver if they are screws. For clips, gently pry them off with a flat tool. Be careful not to damage the vent or screen.
After removing all fasteners, lift the screen out of the vent. Clean the screen and the vent area before reattaching it. This ensures optimal airflow and hygiene in your RV bathroom.
Clean The Vent Area
To keep your RV bathroom vent working well, clean the vent area. This step helps prevent blockages and keeps the air flowing. A clean vent means better ventilation and less buildup of grime. Let’s dive into the steps needed for a clean vent area.
Debris Removal
First, remove any visible debris from the vent area. Use a small brush or cloth. This helps clear out leaves, dust, and dirt. Regular debris removal keeps the vent clear. A clean vent can improve air quality.
Cleaning Solutions
Next, use a gentle cleaning solution to wipe the vent. Mix mild soap with warm water. Dip a cloth in the solution and clean the vent. Make sure to reach all corners and crevices. Let the vent dry completely before reattaching the screen.
Install New Screen
Replacing the RV bathroom vent screen can be a simple task. After removing the old screen, it’s time to install the new one. This step-by-step guide will help you position and secure your new screen effectively.
Positioning The Screen
First, ensure the new screen matches the size of the vent. Clean the vent area to remove any dust or debris. This helps in proper positioning. Place the screen over the vent and align it with the edges. Make sure it covers the vent opening completely. This is crucial for preventing insects and debris from entering.
Securing The Screen
Once the screen is in position, it’s time to secure it. You will need screws and a screwdriver. Hold the screen in place and start securing it with screws. Insert screws in each corner and then in the center of each side. This ensures the screen stays tight and secure. If your vent has clips, use them to hold the screen firmly. Make sure the screen is tight and there are no gaps. This helps in proper ventilation and keeps pests out.
Here is a simple table to summarize the steps:
| Step | Description |
|---|---|
| 1 | Ensure the new screen matches the vent size. |
| 2 | Clean the vent area to remove dust and debris. |
| 3 | Position the screen over the vent. |
| 4 | Secure the screen with screws or clips. |
| 5 | Ensure there are no gaps and the screen is tight. |
Following these steps will help you install the new screen easily. Enjoy a clean and well-ventilated RV bathroom!
Reattach Vent Cover
After cleaning or replacing your RV bathroom vent screen, the next step is to reattach the vent cover. This step ensures your vent is secure and functions properly. Follow the steps below to reattach the cover easily.
Aligning The Cover
First, ensure the vent cover aligns with the vent opening. Proper alignment is crucial for a tight seal. Hold the cover above the opening and check the edges.
Look for any misalignment. Adjust the cover until it fits correctly. A well-aligned cover prevents leaks and keeps out debris.
Screwing Back The Cover
Once aligned, start screwing the cover back. Use the same screws you removed earlier. Begin with the screws in the corners. This helps secure the cover evenly.
Next, screw in the remaining screws. Tighten each screw carefully. Avoid over-tightening as it may damage the cover or vent frame.
Ensure all screws are securely in place. This step completes the reattachment of your RV bathroom vent cover.
Test The Ventilation
After removing the RV bathroom vent screen, it’s crucial to test the ventilation. This ensures the system works well and keeps the air flowing. Follow these steps to make sure your RV bathroom vent is functioning properly.
Power On
First, power on the ventilation system. This is an important step to check if the fan and other components are working correctly. Follow these steps:
- Locate the switch for the vent fan.
- Turn the switch to the “on” position.
- Listen for the fan to start running.
If the fan doesn’t start, check the power source and connections. Ensure everything is properly connected.
Checking Airflow
Next, check the airflow to ensure the vent is functioning correctly. Proper airflow indicates that the vent is clear and working well.
| Step | Action |
|---|---|
| 1 | Place your hand near the vent opening. |
| 2 | Feel for air movement. |
| 3 | If there’s no airflow, inspect the vent and ducts. |
If you feel strong airflow, the vent is working properly. If the airflow is weak or nonexistent, there may be a blockage. Check for any obstructions in the vent ducts.
Regularly testing the ventilation system ensures your RV bathroom stays fresh and odor-free. This simple maintenance step can prevent larger issues down the road.

Credit: www.amazon.com
Frequently Asked Questions
How Do You Remove An Rv Bathroom Vent Screen?
To remove an RV bathroom vent screen, first, locate the vent. Unscrew the fasteners holding the screen in place. Carefully detach the screen, ensuring not to damage it. Clean the screen or replace if necessary.
What Tools Do I Need To Remove Rv Vent Screen?
You typically need a screwdriver to remove the screws holding the vent screen. Depending on your RV model, pliers might also be helpful to loosen any tightly-fixed parts.
Can I Clean The Vent Screen After Removal?
Yes, you can clean the vent screen once removed. Use mild soap and water to gently clean the screen. Ensure it is completely dry before reinstalling to prevent mold growth.
How Often Should I Clean My Rv Bathroom Vent Screen?
It is recommended to clean your RV bathroom vent screen every three to six months. Regular cleaning ensures proper ventilation and prevents buildup of dust and debris.
Conclusion
Removing your RV bathroom vent screen is easier than it seems. Follow simple steps, keep tools handy, and stay safe. Regular cleaning prevents issues. Your RV will stay fresh and comfortable. Enjoy your travels!


