Understanding the electrical system of your Fleetwood RV can seem daunting. Yet, having a clear schematic simplifies this task.
An electrical schematic is a crucial tool for any RV owner. It’s a detailed map that shows how the electrical components connect and function. With this guide, you can troubleshoot issues, perform maintenance, and even make upgrades. Whether you are a seasoned RV owner or a newcomer, this schematic helps ensure your travels are smooth and safe.
Dive into this guide to understand your Fleetwood RV’s electrical system better and gain confidence in managing it.
Introduction To Fleetwood Rv Electrical Systems
Fleetwood RV Electrical Schematic offers a clear layout of the vehicle’s wiring and components. It helps users understand their RV’s electrical system. Simplified diagrams ensure easy troubleshooting and maintenance.
Fleetwood RVs offer a range of comforts and amenities. These depend on a well-designed electrical system. Understanding this system can enhance your RV experience. It helps in troubleshooting and maintaining your vehicle.
Overview Of Electrical Components
Fleetwood RVs have several key electrical components. These include batteries, inverters, and converters. Solar panels are also common in modern RVs. Each component plays a crucial role. Batteries store energy for later use. Inverters change DC power to AC power. Converters do the opposite, changing AC to DC. Solar panels provide renewable energy. They are useful for off-grid adventures. Fuses and circuit breakers protect the system. They prevent overloads and short circuits.
Importance Of Schematics
Schematics are vital for understanding your RV’s electrical system. They provide a visual map of wiring and connections. This map simplifies troubleshooting. It helps locate faults quickly. Schematics also guide installation of new components. They ensure compatibility and safety. Schematics offer a clear picture of complex systems. They reduce the guesswork involved in repairs. Understanding schematics can save time and money. It empowers you to handle minor issues yourself. “`
Essential Tools For Electrical Repairs
Working on a Fleetwood RV electrical schematic requires the right tools. Knowing the essential tools for electrical repairs can save you time and frustration. This guide will help you understand what you need to get started.
Basic Tools Needed
Starting with the basics is crucial for any electrical repair. Here are some basic tools you should have:
- Multimeter: Measures voltage, current, and resistance.
- Wire Strippers: Essential for cutting and stripping wires.
- Crimping Tool: Useful for attaching connectors to wires.
- Screwdrivers: Both flathead and Phillips for various screws.
- Electrical Tape: Insulates and protects electrical connections.
- Flashlight: Helps see in low-light conditions.
Advanced Diagnostic Tools
For more complex issues, advanced diagnostic tools are necessary:
- Circuit Tester: Checks the integrity of electrical circuits.
- Oscilloscope: Measures voltage waves over time.
- Clamp Meter: Measures current without touching wires.
- Wire Tracer: Locates breaks and shorts in wires.
- Thermal Camera: Detects overheating in electrical components.
Having the right tools can make a huge difference. Basic tools cover most simple tasks. Advanced diagnostic tools help with more complicated problems. Equip yourself well to handle any electrical repair on your Fleetwood RV.
Safety Precautions
Understanding the electrical schematic of your Fleetwood RV is crucial. It ensures everything works correctly. More importantly, it keeps you safe. Missteps can be dangerous. Follow these safety precautions to protect yourself and your RV.
Personal Safety Measures
Always prioritize personal safety when dealing with RV electrical systems.
- Wear insulated gloves to prevent electric shocks.
- Use protective eyewear to shield your eyes from sparks.
- Ensure the RV is disconnected from any power source.
- Check for clear markings on electrical components.
Work in a well-ventilated area. It reduces the risk of inhaling harmful fumes. Keep a fire extinguisher nearby. It is a crucial safety measure.
Protecting Your Rv
Protecting your RV is equally important. Here are some key points:
- Always follow the manufacturer’s guidelines for electrical work.
- Use the correct tools and equipment.
- Double-check connections and wires for any wear or damage.
- Label wires clearly. It avoids confusion during repairs.
Install a surge protector. It helps in preventing damage from electrical surges. Regularly inspect the electrical systems. This ensures everything remains in good condition.
By following these safety precautions, you can work on your Fleetwood RV’s electrical schematic with confidence.
Credit: sotasolar.com
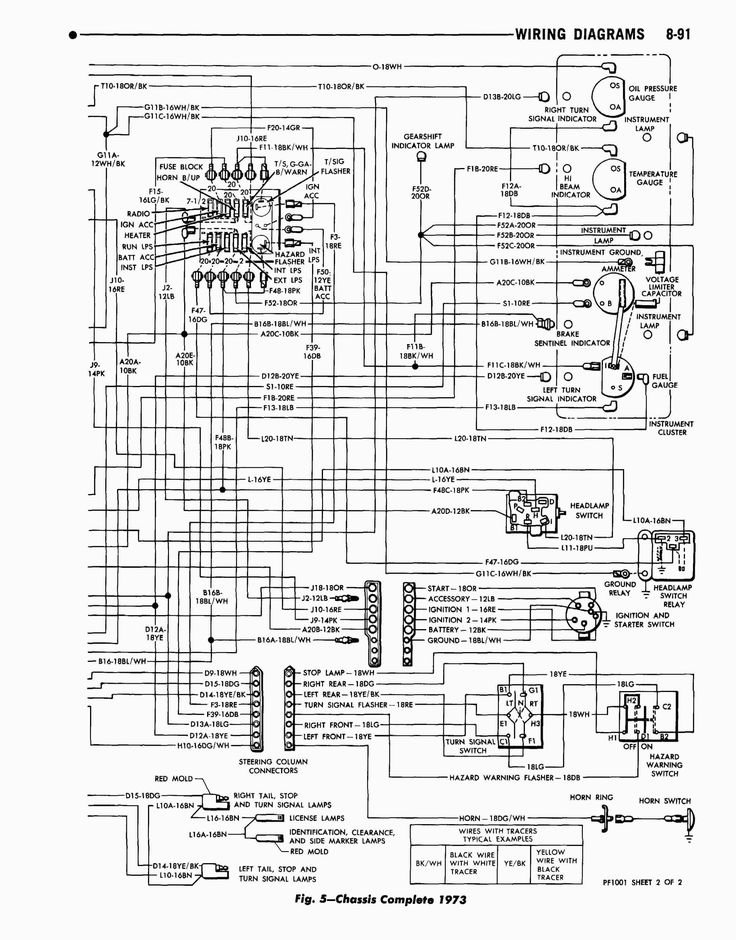
Reading And Interpreting Schematics
Reading and interpreting electrical schematics for a Fleetwood RV can seem daunting. But with a basic understanding of the symbols and wiring paths, it becomes easier. This guide will help you navigate these schematics with confidence.
Understanding Symbols
Schematics use symbols to represent components. These symbols look like small pictures. For example, a resistor might look like a zigzag line. A battery symbol often looks like a set of short and long lines. Knowing these symbols is crucial. They help you identify the parts of the circuit quickly.
Refer to the legend or key on the schematic. It explains what each symbol means. Keep this reference handy. It will save time and reduce confusion.
Following Wiring Paths
Wiring paths show how the components connect. These are usually lines on the schematic. Follow these lines carefully. They guide you through the circuit’s flow. Start from the power source. Trace the path to each component. This method ensures you understand the circuit’s operation.
Look for junctions where wires split. These points can show connections or branches in the circuit. Note any labels or numbers. They often indicate wire colors or connection points. This information is vital. It helps you connect the physical wires correctly.
Common Electrical Issues
Understanding common electrical issues in your Fleetwood RV can save time and frustration. These issues can range from battery problems to lighting issues. Knowing what to look for helps you fix the problems quickly.
Battery Problems
Batteries are vital for your RV’s electrical system. Common battery problems include:
- Dead Batteries: This happens when batteries are not charged properly.
- Corroded Terminals: Corrosion reduces the battery’s efficiency.
- Faulty Connections: Loose or damaged wires can cause power loss.
To avoid these issues:
- Check the battery charge regularly.
- Clean the terminals to prevent corrosion.
- Inspect wires and connections for damage.
Lighting Issues
Lighting problems can affect your RV’s comfort and safety. Common issues include:
| Issue | Description |
|---|---|
| Flickering Lights | Caused by loose connections or bad bulbs. |
| Dim Lights | Often due to weak batteries or poor wiring. |
| Non-Working Lights | Could be a blown fuse or a faulty switch. |
To maintain your RV’s lighting:
- Replace old bulbs regularly.
- Tighten loose connections.
- Check fuses and switches often.
Step-by-step Repair Procedures
Repairing an RV’s electrical system can seem daunting. With the right guidance, it becomes manageable. This section covers the essential steps to fix common issues. Follow each step carefully to ensure safety and efficiency. Let’s dive into the procedures.
Fixing Short Circuits
Short circuits can cause major problems in your RV. First, identify the source of the short circuit. Use a multimeter to check for continuity. Disconnect the battery to ensure safety. Inspect wires for damage or burns. Replace any damaged wires immediately. Reconnect the battery and test the system.
If the problem persists, check the fuses. Replace any blown fuses with the correct rating. Test the system again. If the short circuit continues, it might be deeper in the wiring. In this case, consult a professional for further inspection.
Replacing Faulty Components
Faulty components can disrupt your RV’s electrical system. Identify the faulty component first. Common culprits include lights, switches, and outlets. Disconnect the power source before starting any repairs. Use a multimeter to test the component’s functionality.
If the component is faulty, remove it carefully. Check the connections and wires for any damage. Install the new component by following the manufacturer’s instructions. Double-check all connections before reconnecting the power. Test the new component to ensure it works properly.
Regular maintenance can prevent many issues. Inspect your RV’s electrical system periodically. Replace any worn-out components promptly. This ensures your RV remains in top condition.
Preventative Maintenance Tips
Maintaining the electrical system of your Fleetwood RV ensures a safe and enjoyable trip. Proper upkeep prevents unexpected issues and extends the lifespan of your vehicle. Here are some essential preventative maintenance tips to keep your RV’s electrical system in top shape.
Regular Inspections
Conduct regular inspections of your RV’s electrical system. Check wires, fuses, and connections for any signs of wear or damage. Early detection of issues can save you from costly repairs. Use a flashlight to inspect areas that are hard to see. Look for frayed wires or loose connections. If you find any damage, repair it immediately.
Cleaning Electrical Connections
Cleaning electrical connections is crucial for maintaining a reliable power supply. Dirt and corrosion can cause poor connections. Use a wire brush or contact cleaner to remove any buildup. Ensure connections are tight and secure. A clean connection prevents electrical failures and enhances performance. Do this regularly to keep your system running smoothly.
Resources For Further Assistance
When working with Fleetwood RV electrical schematics, sometimes you need extra help. Luckily, there are several resources available for further assistance. Below, you will find valuable information that can guide you in understanding and troubleshooting your RV’s electrical system.
Manufacturer Manuals
Fleetwood RVs come with detailed manufacturer manuals. These manuals provide essential information about your RV’s electrical schematics. They include diagrams, step-by-step instructions, and troubleshooting tips. You can usually find these manuals online on the official Fleetwood RV website. They are a great starting point for any electrical issues you may face.
Online Forums And Communities
Many RV enthusiasts share their experiences and solutions in online forums and communities. Websites like iRV2 and RV.net are popular for Fleetwood RV owners. You can ask questions, share your problems, and get advice from other RV owners. These communities are valuable resources because they offer real-world solutions and practical tips.
Conclusion And Final Thoughts
Understanding the Fleetwood RV electrical schematic ensures a safer and more efficient RV experience. These diagrams help identify each component’s function and connection.
The Fleetwood RV electrical schematic offers a clear view of your RV’s wiring. It simplifies troubleshooting and helps in making repairs. Understanding this schematic can save time and avoid frustration.
Summary Of Key Points
The Fleetwood RV electrical schematic is a vital tool. It shows how the RV’s electrical system is connected. Key components include the battery, inverter, and circuit breakers. Knowing these parts helps in diagnosing issues quickly. This knowledge can prevent costly repairs and enhance safety.
Encouragement For Diy Enthusiasts
For DIY enthusiasts, the electrical schematic is a goldmine. It empowers you to handle minor electrical issues. With the right tools, many tasks become manageable. This hands-on approach boosts confidence. You’ll gain a deeper understanding of your RV. This makes your travels smoother and more enjoyable.

Credit: in.pinterest.com
Frequently Asked Questions
What Is A Fleetwood Rv Electrical Schematic?
A Fleetwood RV electrical schematic is a detailed diagram. It shows the electrical system and wiring layout of Fleetwood RVs.
How To Read A Fleetwood Rv Electrical Schematic?
To read a Fleetwood RV electrical schematic, understand the symbols and lines. Follow the wiring paths to see connections.
Where To Find Fleetwood Rv Electrical Schematics?
You can find Fleetwood RV electrical schematics in the owner’s manual. They are also available on the Fleetwood RV website.
Why Is An Electrical Schematic Important For Rvs?
An electrical schematic is crucial for troubleshooting electrical issues. It helps understand the wiring and connections in your RV.
Conclusion
Understanding the Fleetwood RV electrical schematic helps ensure smooth travels. Knowing the wiring layout can prevent many issues. Regularly check and maintain your RV’s electrical system. This can avoid costly repairs and keep your adventures stress-free. Familiarize yourself with the schematic to troubleshoot problems quickly.
A well-maintained RV means more enjoyable trips. Enjoy the journey with confidence, knowing your RV’s electrical system is in top shape.


