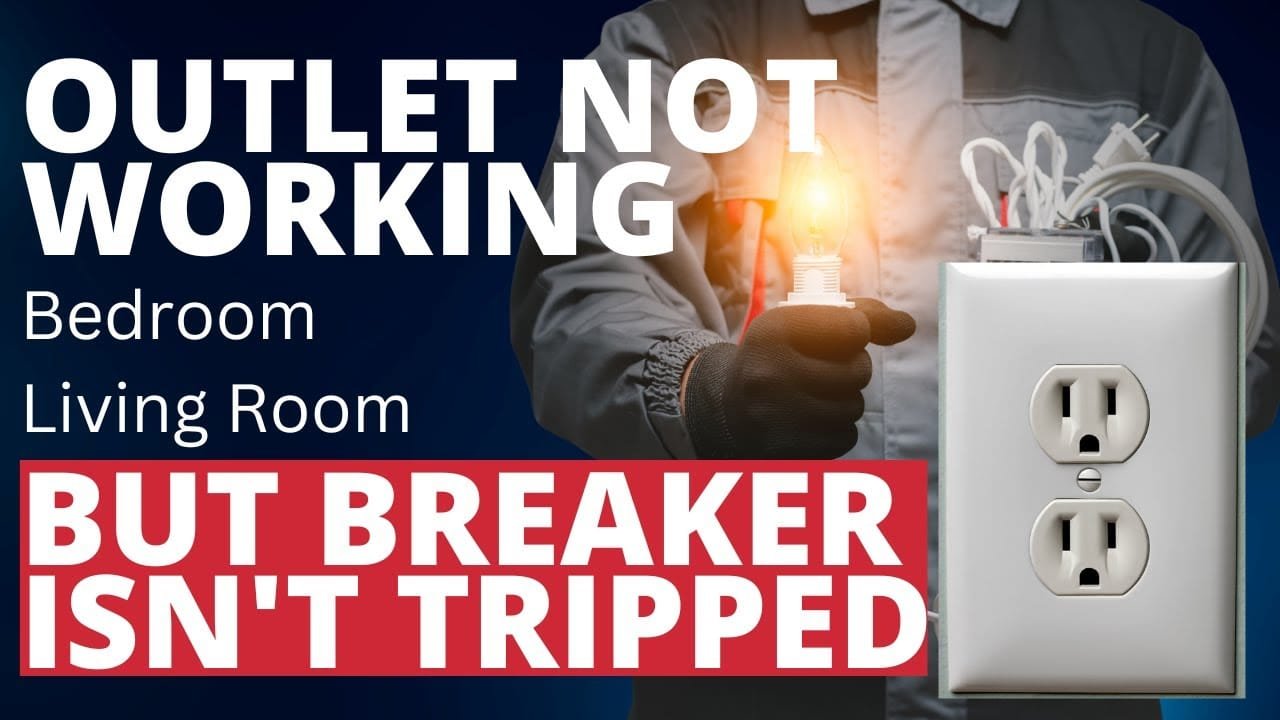
RV electrical outlets not working can be frustrating. Especially when the breaker hasn’t tripped.
This issue can leave you puzzled and in need of a quick solution. When your RV electrical outlets stop working, many assume it’s a tripped breaker. But what if the breaker is fine? There are several reasons why this might happen.
It could be a wiring problem, a faulty outlet, or an issue with the power source. Understanding these potential causes can help you troubleshoot and fix the problem. In this blog, we will explore common reasons for this issue and provide practical solutions. Whether you’re on the road or parked, getting your RV outlets back in working order is essential. Let’s dive into the details and get your RV powered up again.
Common Causes
Experiencing issues with your RV electrical outlets not working while the breaker is not tripped can be frustrating. Understanding common causes can help you quickly identify and resolve the problem. This section covers the most frequent causes: loose connections, faulty outlets, and GFCI issues.
Loose Connections
Loose connections are a common cause of electrical problems in RVs. Over time, vibrations from driving can loosen connections. This can result in outlets not working properly. Regularly check and tighten all electrical connections.
- Check outlet screws
- Inspect wiring connections
- Tighten any loose connections
Faulty Outlets
Faulty outlets can also cause issues. Outlets in RVs can wear out faster due to constant use and movement. Replace any damaged or worn-out outlets to ensure proper functionality.
To identify a faulty outlet:
- Test the outlet with a multimeter
- Check for visible damage
- Replace the outlet if necessary
Gfci Issues
Ground Fault Circuit Interrupter (GFCI) outlets are designed to protect against electrical shocks. A tripped GFCI outlet can cause other outlets to stop working. Reset the GFCI outlet to restore power.
Steps to reset GFCI:
- Locate the GFCI outlet
- Press the “Reset” button
- Check if other outlets work
If the GFCI outlet keeps tripping, there may be a deeper issue. Consult a professional for further inspection.
Initial Checks
Experiencing issues with your RV electrical outlets not working can be frustrating. Especially if the breaker has not tripped. To resolve this, start with some initial checks. These checks can help you identify and fix the issue quickly.
Inspect Breaker Panel
First, check the breaker panel. Even if the breaker has not tripped, it might still be the source of the problem. Here’s what you should do:
- Open the breaker panel.
- Look for any loose connections.
- Ensure all breakers are fully switched on.
If everything looks fine, reset each breaker. Turn it off and then back on. This can sometimes resolve the issue.
Test All Outlets
Next, test all the outlets in your RV. Use a plug-in circuit tester. This tool will help you identify if the outlet is getting power. Follow these steps:
- Plug the tester into each outlet.
- Check the indicator lights on the tester.
- Note any outlets that do not show power.
Testing all outlets ensures you do not miss any that might be causing the problem. If some outlets work while others do not, it could point to a wiring issue.
Completing these initial checks can save time and effort. They help you identify the root cause of your RV electrical outlet problem. If the issue persists, you may need further diagnostics or professional help.
Testing Gfci Outlets
When RV electrical outlets are not working, but the breaker is not tripped, the issue might be with the GFCI outlets. GFCI (Ground Fault Circuit Interrupter) outlets are designed to protect you from electrical shocks. Testing these outlets can often resolve the problem.
Locate Gfci Outlets
First, locate all the GFCI outlets in your RV. They are typically found in areas where water and electricity might come into contact, like kitchens and bathrooms. GFCI outlets have two buttons in the middle, usually labeled “Test” and “Reset”.
- Check the kitchen area
- Inspect the bathroom
- Look near the sink
- Check outside outlets
Resetting Gfci
Once you have located the GFCI outlets, you need to reset them. Press the “Reset” button firmly. If the outlet was tripped, you will hear a click, and the power should be restored. Test the outlet by plugging in a device. If it works, the problem is resolved.
- Locate the GFCI outlet
- Press the “Reset” button
- Listen for a click
- Plug in a device to test
If resetting the GFCI does not work, there might be a deeper electrical issue. In such cases, consult a professional electrician to inspect your RV’s electrical system.
Credit: www.youtube.com
Using A Multimeter
If your RV electrical outlets are not working but the breaker is not tripped, using a multimeter can help you diagnose the issue. A multimeter is a handy tool that can measure voltage, current, and resistance. Here’s how you can use it safely and effectively.
Safety Precautions
Before you start, take some safety precautions to avoid accidents. Always make sure your hands are dry. Wear rubber-soled shoes to prevent electrical shock. Keep your RV parked on a stable surface. Ensure the area is well-lit so you can see clearly.
Turn off all appliances in your RV. Unplug any devices connected to the outlets. This reduces the risk of electrical shock. If you are unsure about any step, consult a professional. Safety is the top priority.
Measuring Voltage
To measure voltage, set your multimeter to the AC voltage setting. Insert the black probe into the common (COM) port. Insert the red probe into the VΩma port. This setup will allow you to measure the voltage in the outlet.
Follow these steps to measure the voltage:
- Insert the probes into the outlet slots. The black probe goes into the larger slot. The red probe goes into the smaller slot.
- Read the voltage on the multimeter display. A normal outlet should read between 110-120 volts.
- If the reading is zero, there may be a wiring issue. Check other outlets to see if they have power.
If the multimeter shows a proper voltage but the outlet is not working, the outlet itself may be faulty. Consider replacing it or calling a professional for further inspection.
Using a multimeter can help you identify the root cause of electrical issues in your RV. Follow these steps carefully and prioritize safety.
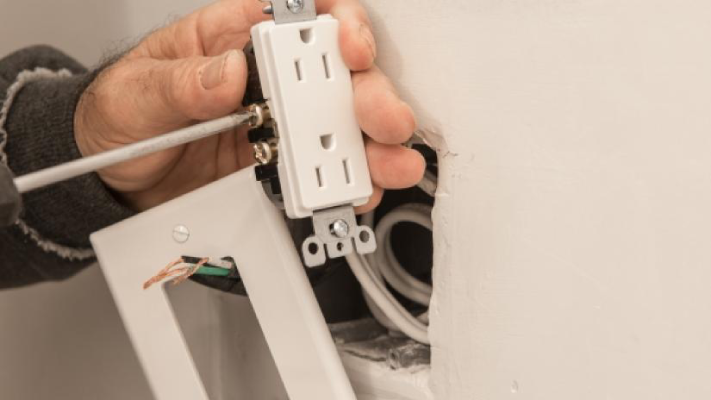
Inspecting Wiring
When your RV electrical outlets stop working but the breaker isn’t tripped, you need to inspect the wiring. Faulty wiring can disrupt power flow. This step-by-step guide will help you check and diagnose any wiring issues.
Accessing Wiring
First, access the wiring behind the outlets. Turn off the main power supply to avoid any shocks. Remove the outlet cover using a screwdriver. Gently pull out the outlet to expose the wires. Be careful not to damage the connections.
Checking For Damage
Next, check the wires for visible damage. Look for frayed or burnt wires. Inspect the wire insulation. It should be intact and not melted. Damaged wires need replacement. Secure connections can also cause issues. Ensure all wires are tightly connected to the outlet.

Credit: www.reddit.com
Replacing Faulty Outlets
Sometimes, RV electrical outlets may stop working even if the breaker is not tripped. This could mean the outlet itself is faulty. Replacing the outlet is a straightforward solution. This guide will show you how to choose and install replacement outlets.
Choosing Replacement Outlets
Ensure you select outlets designed for RV use. These outlets are built to withstand vibrations and wear. Look for outlets that match the existing ones in your RV. Check the voltage and amperage ratings. These ratings should align with your RV’s electrical system.
Consider outlets with built-in USB ports. These can be handy for charging devices. Choose outlets from trusted brands. This ensures durability and safety.
Installation Steps
Before starting, turn off the power. Use a voltage tester to confirm there is no electricity. Gather all necessary tools. You will need a screwdriver, wire stripper, and the new outlet.
- Remove the old outlet cover plate using a screwdriver.
- Unscrew the outlet from the wall.
- Carefully pull the outlet out to expose the wires.
- Disconnect the wires from the old outlet.
- Connect the wires to the new outlet. Ensure each wire is connected to the correct terminal.
- Secure the new outlet to the wall with screws.
- Replace the cover plate.
- Turn the power back on and test the new outlet.
If you are unsure about any step, consult a professional. Safety is the top priority when dealing with electricity.
When To Call A Professional
Experiencing RV electrical outlets not working despite the breaker not being tripped? Call a professional to inspect the wiring. They ensure safe and accurate diagnosis, preventing further issues.
Dealing with RV electrical outlets not working can be frustrating. Sometimes, the issue might not be obvious. If the breaker is not tripped, it might be time to call a professional. This can save you time and prevent further damage. Professionals have the skills to diagnose and fix complex electrical problems.
Identifying Complex Issues
Some electrical problems are hard to identify. Wiring issues, faulty outlets, or hidden damage can be tricky. A professional can spot these problems quickly. They have the tools and knowledge to test and repair the electrical system. This ensures your RV is safe and functional.
Finding A Qualified Electrician
Not all electricians have experience with RVs. Look for someone with RV-specific training. Check reviews and ask for recommendations. Make sure they have the right certifications. This guarantees they know how to handle RV electrical systems. Ask about their experience with similar issues. A good electrician will have solved many RV electrical problems before. “`
Credit: mrelectric.com
Preventive Maintenance
Preventive maintenance plays a vital role in ensuring the RV electrical system functions well. Regular checks help in identifying issues early. This avoids bigger problems down the road. Keeping an eye on the electrical outlets can save time, money, and stress.
Regular Inspections
Conduct regular inspections to identify potential issues. Check all electrical outlets. Ensure they are functioning properly. Look for signs of wear and tear. Replace any damaged components immediately. Regular inspections help catch problems early. This prevents them from becoming major issues.
Upgrading Electrical System
Consider upgrading your RV’s electrical system. Newer systems are more efficient. They handle higher loads and reduce risks. Upgrades can include modern outlets. They offer better safety features. An upgraded system can prevent future problems. It ensures a smooth and safe travel experience.
Frequently Asked Questions
Why Are My Rv Outlets Not Working?
Your RV outlets might not work due to a loose connection, faulty GFCI outlet, or a blown fuse.
How Do I Reset A Gfci Outlet In My Rv?
Locate the GFCI outlet and press the reset button. This should restore power to the outlets.
Can A Blown Fuse Cause Rv Outlets To Stop Working?
Yes, a blown fuse can interrupt power to your RV outlets. Check and replace any blown fuses.
What Should I Check If Rv Outlets Fail?
Check the GFCI outlet, fuses, and circuit connections. Ensure all are functioning properly to restore power.
Conclusion
Solving RV electrical outlet issues can be straightforward. Start by checking connections. Inspect for loose wires or damaged outlets. Ensure the GFCI outlet isn’t tripped. Test all outlets with a voltage meter. Replace faulty components as needed. Regular maintenance helps prevent future problems.
Keep tools and a basic knowledge of RV electrical systems handy. Staying proactive ensures a smooth RV experience. Remember, safety always comes first. If unsure, consult a professional. Enjoy your time on the road with a reliable electrical system.


