A leaking RV water heater relief valve can be troubling. It might signal a bigger issue.
Your RV water heater keeps your trips comfortable. A relief valve leak can dampen your adventures. Understanding why this happens and how to address it is crucial. Is it a minor fix or a sign of something more serious? This guide will explore common causes and solutions.
You’ll learn how to handle leaks and prevent future problems. Whether you’re a seasoned RVer or a newbie, you’ll find useful tips here. Don’t let a leaking valve spoil your trip. Read on to keep your water heater in top shape and enjoy your travels worry-free.
Common Causes
When your RV water heater relief valve starts leaking, it can be stressful. Understanding the common causes can help you address the problem swiftly. Let’s explore some typical reasons why your RV water heater relief valve might be leaking.
High Pressure
High water pressure is one of the leading causes of a leaking relief valve. When the pressure inside the water heater exceeds the safe limit, the relief valve opens to release the excess pressure. If the pressure is constantly high, the valve will keep leaking.
- Water pressure regulator failure
- City water supply pressure too high
- Blocked or restricted pressure relief valve
Temperature Issues
Temperature issues can also cause the relief valve to leak. If the water heater’s thermostat is set too high, the water inside can overheat. Overheated water increases the pressure inside the tank, causing the relief valve to open.
- Thermostat set above 140°F
- Malfunctioning thermostat
- Inadequate ventilation around the water heater
Faulty Valve
A faulty relief valve can be another culprit. Over time, the valve can wear out or get damaged, leading to leaks. A faulty valve might not close properly, causing continuous dripping.
- Corroded valve components
- Debris or sediment build-up
- Wear and tear from frequent use
Understanding these common causes can help you troubleshoot and fix the problem effectively. If you are unsure, consider consulting a professional for assistance.
Identifying The Problem
A leaking RV water heater relief valve can be a sign of several issues. Identifying the problem early can save you time and money. This guide will help you pinpoint the cause of the leak.
Visual Inspection
Start with a visual inspection. Look at the relief valve. Check for any visible signs of damage. Look for water stains or corrosion around the valve. These are indicators of a problem.
Listening For Sounds
Next, listen for any unusual sounds. Hissing or dripping sounds could signal a leak. These sounds often indicate pressure issues or a faulty valve. Pay close attention to the area around the valve.
Testing The Pressure
Testing the pressure is crucial. Use a pressure gauge to check the water heater’s pressure. High pressure can cause the relief valve to leak. If the pressure is too high, it may need adjusting.
Safety Precautions
When dealing with a leaking RV water heater relief valve, safety is crucial. Always follow proper procedures to prevent accidents. Here are some key safety precautions to consider.
Turn Off Power
First, switch off the power to your water heater. If it’s electric, disconnect it from the power source. If it’s gas, turn off the gas supply. This step is vital to avoid electrical shocks or gas leaks.
Release Pressure Safely
Next, you need to release the pressure from the tank. Open the hot water tap in your RV. This will reduce the internal pressure. Be cautious, as the water may be hot.
Wear Protective Gear
Always wear protective gear. Gloves and safety goggles are essential. They protect you from hot water and potential burns. Safety should always come first.
Tools Needed
Fixing a leaking RV water heater relief valve requires the right tools. Without them, you might not fix the problem correctly. Having the right tools makes the job easier and safer.
Wrenches
A set of wrenches is essential. You need them to loosen and tighten nuts and bolts. Different sizes of wrenches ensure you can handle various fittings. An adjustable wrench is also useful.
Pressure Gauge
A pressure gauge helps check the water pressure. High pressure can cause leaks. It is crucial to measure the pressure accurately. This ensures you can diagnose the issue properly.
Replacement Valve
You will need a replacement valve. The old valve might be faulty. Having a new valve ready ensures a smooth repair process. Ensure the new valve matches your water heater’s specifications.
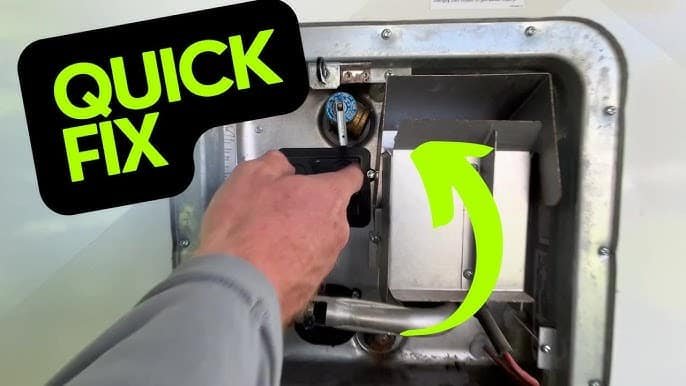
Quick Fixes
RV water heater relief valve leaking? Don’t panic. Quick fixes can help. Follow these steps to stop the leak fast.
Tightening Connections
First, check the connections. A loose connection can cause leaks. Use a wrench to tighten the valve. Make sure not to overtighten. It can damage the valve.
Flushing The Tank
Over time, sediment can build up in the tank. This buildup can cause the valve to leak. Flushing the tank can remove sediment. Turn off the water supply and power. Attach a hose to the drain valve. Open the valve and let the water flow out. Close the valve and refill the tank.
Adjusting Pressure Settings
High water pressure can make the valve leak. Check the pressure settings on your RV water heater. Adjust the pressure to a lower setting if needed. This can stop the leak and prevent future problems.
Replacing The Valve
If your RV water heater relief valve is leaking, it might be time to replace it. A leaking valve can cause water damage and reduce the efficiency of your water heater. Replacing the valve is a straightforward process. Follow these simple steps to get your RV water heater working properly again.
Removing The Old Valve
First, ensure the water heater is off and the water is cool. Locate the relief valve, usually found on the top or side of the heater. Use a wrench to loosen the valve. Turn it counterclockwise to remove it. Be careful, as some water may still be present in the system.
Installing The New Valve
Take the new valve and wrap the threads with plumber’s tape. This helps create a good seal. Insert the new valve into the opening. Use the wrench to tighten the valve, turning it clockwise. Make sure it is snug but do not over-tighten.
Testing The New Valve
Turn the water heater back on and let it heat up. Check the new valve for leaks. If there are no leaks, the installation was successful. If you see water, tighten the valve a bit more.
Testing ensures your new valve works correctly. It also confirms there are no leaks. Enjoy a properly functioning RV water heater once again.
Preventive Maintenance
Preventive maintenance is crucial for keeping your RV water heater relief valve in top condition. Regular maintenance helps prevent leaks and ensures the longevity of your system. By following a few simple steps, you can avoid costly repairs and enjoy your travels worry-free.
Regular Inspections
Check your RV water heater relief valve regularly. Look for any signs of wear or damage. Inspect the area around the valve for leaks or corrosion. A quick visual check can help spot potential problems early.
Pressure Checks
Monitor the pressure in your water heater tank. High pressure can cause the relief valve to leak. Use a pressure gauge to check the tank pressure. Ensure it stays within the recommended range. If the pressure is too high, adjust the settings or release some pressure.
Tank Flushing
Flush your water heater tank periodically. Sediment buildup can lead to valve leaks. Draining and flushing the tank removes sediment and keeps the system clean. This simple task can extend the life of your water heater and prevent leaks.
When To Call A Professional
A leaking RV water heater relief valve can cause stress. Many owners try to fix it themselves. Yet, there are times when calling a professional is best. This section will guide you on when to seek expert help.
Persistent Leaks
You might notice water leaking even after you tighten the valve. This is a sign of a deeper issue. Persistent leaks can indicate worn-out parts. They might need replacing. A professional can identify and fix the problem quickly.
Complex Repairs
Some repairs are beyond basic skills. If you need to replace the valve or other components, it can get tricky. Mistakes can lead to more damage. Professionals have the right tools and knowledge. They can perform complex repairs safely.
Safety Concerns
Water heaters can be dangerous if not handled correctly. They involve high pressure and hot water. Improper handling can cause injuries. Professionals are trained to deal with these risks. They ensure your safety and that of your RV.

Credit: www.youtube.com
Frequently Asked Questions
Why Is My Rv Water Heater Relief Valve Leaking?
The RV water heater relief valve may leak due to excessive pressure or temperature. Regular maintenance can help prevent leaks. Checking the valve for debris and ensuring proper pressure settings is essential.
How Do I Fix A Leaking Rv Water Heater Valve?
To fix a leaking RV water heater valve, first, turn off the heater. Release the pressure by opening a faucet. Then, inspect and clean the valve. If it continues leaking, consider replacing it.
Can A Leaking Relief Valve Cause Damage?
Yes, a leaking relief valve can cause water damage to your RV. It can also indicate underlying issues with the heater. Addressing the leak promptly prevents potential damage and ensures safe operation.
How Often Should I Check My Rv Water Heater Valve?
Check your RV water heater valve at least once a year. Regular inspections can help identify potential issues early. Routine maintenance ensures the valve functions correctly and prevents leaks.
Conclusion
Fixing a leaking RV water heater relief valve is crucial. It prevents bigger issues. Regular maintenance helps. Check the valve often. Replace if necessary. A small effort now saves money later. Enjoy safe and worry-free travels. Remember to follow the steps carefully.
Your RV will thank you. Happy camping!


