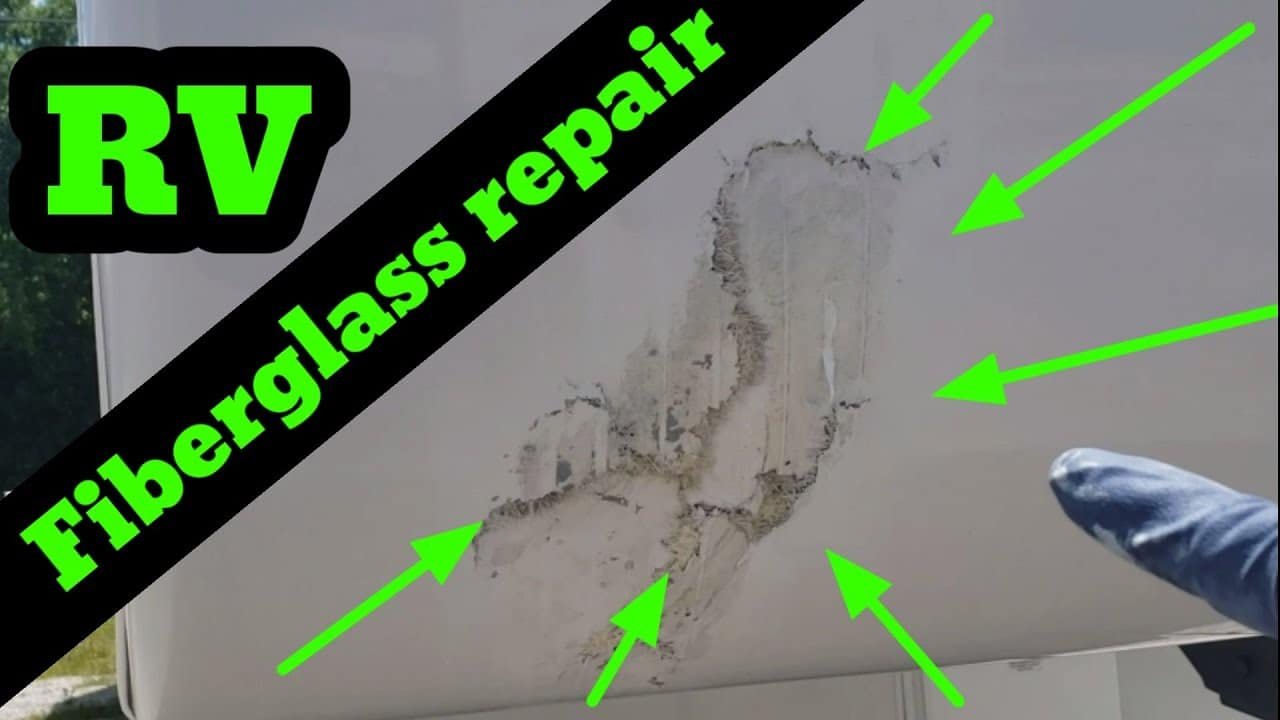
Replacing fiberglass siding on an RV can seem daunting. But with the right steps, it’s manageable.
Fiberglass siding protects your RV from weather and wear. Over time, it may need replacing due to damage or aging. This guide will help you understand the process of replacing fiberglass siding on your RV. You’ll learn what tools you need, how to remove old siding, and how to install new panels.
Properly replacing the siding will keep your RV looking great and functioning well. Whether you’re a seasoned DIYer or a beginner, this step-by-step guide will simplify the task. Let’s dive in and get your RV back to looking its best!
Credit: rvroofandwall.com
Essential Tools And Materials
Replacing fiberglass siding on your RV is a manageable task. But, it’s crucial to have the right tools and materials. This guide will help you gather everything you need. This ensures a smooth and successful replacement process.
Must-have Tools
- Utility Knife: For precise cutting of the fiberglass sheets.
- Measuring Tape: To measure the exact dimensions needed.
- Power Drill: Essential for making holes for screws.
- Screwdriver Set: Different sizes for various screws.
- Putty Knife: Helps in applying adhesive smoothly.
- Safety Gear: Includes gloves, goggles, and a mask to protect you from fiberglass particles.
- Caulking Gun: For applying sealant around the edges.
Material List
| Material | Purpose |
|---|---|
| Fiberglass Sheets | The main material for siding. |
| Adhesive | To attach the fiberglass sheets to the RV. |
| Screws | To secure the sheets in place. |
| Sealant | For sealing gaps to prevent water damage. |
| Cleaning Solution | To clean the RV surface before application. |

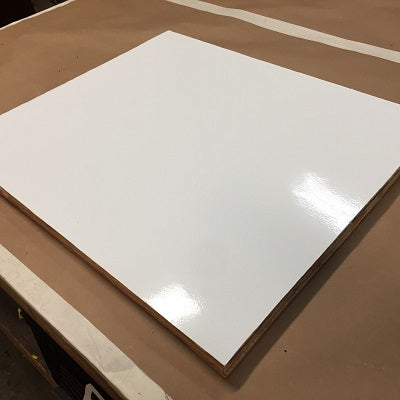
Credit: recpro.com
Preparing Your Rv
Replacing the fiberglass siding on your RV can be a rewarding task. Proper preparation is key to a successful project. This section covers safety precautions and workspace setup.
Safety Precautions
Safety should be your top priority before starting any repair work. Follow these important safety measures:
- Wear safety goggles and gloves to protect your eyes and hands.
- Ensure you have a first aid kit nearby.
- Turn off all electrical and gas connections to the RV.
- Work in a well-ventilated area to avoid inhaling dust and fumes.
Workspace Setup
Setting up your workspace correctly makes the job easier and safer. Follow these steps for an efficient workspace:
- Choose a flat, stable surface to park your RV.
- Clear the area of any debris or obstructions.
- Gather all necessary tools and materials, such as screwdrivers, drills, and fiberglass sheets.
- Set up a sturdy ladder or scaffolding to reach high areas safely.
| Tool/Material | Purpose |
|---|---|
| Screwdrivers | Removing screws from old siding |
| Drills | Drilling holes for new siding |
| Fiberglass Sheets | New siding material |
| Safety Gear | Protection during the process |
By following these safety precautions and setting up your workspace correctly, you will be well-prepared to replace the fiberglass siding on your RV.
Removing Old Fiberglass Siding
Replacing fiberglass siding on an RV can seem daunting. The first step is removing the old fiberglass siding. Proper removal ensures a smooth installation of the new siding. Below, you will find a detailed guide on how to remove old fiberglass siding effectively.
Step-by-step Guide
- Gather Your Tools: You will need a flat pry bar, a putty knife, a drill, and safety gear.
- Remove Trim and Fixtures: Carefully remove any trim, lights, and fixtures attached to the siding.
- Start at a Corner: Use the flat pry bar to lift the siding at a corner. Work your way along the edge.
- Use the Putty Knife: Slide the putty knife under the siding to loosen it further.
- Remove Screws and Nails: Use the drill to remove any screws. Pull out nails with the pry bar.
- Peel Off the Siding: Slowly peel off the fiberglass siding. Be careful not to damage the RV’s surface.
Avoiding Common Mistakes
- Rushing the Process: Take your time to avoid damaging the RV’s surface.
- Not Wearing Safety Gear: Always wear gloves and safety glasses.
- Ignoring Hidden Fasteners: Use a metal detector to find hidden nails or screws.
- Skipping the Cleaning Step: Clean the surface before installing new siding. Remove any adhesive residue.
Repairing The Underlying Structure
Repairing the underlying structure is a crucial step in replacing fiberglass siding on your RV. Ensuring the frame is sound will prevent future issues and ensure the longevity of your new siding. Follow these steps to inspect and replace any damaged sections.
Inspecting For Damage
Begin by examining the frame for any signs of wear or damage. Look for rot, rust, or any weakened areas. Use a flashlight to see dark corners and hidden spots. Pay close attention to joints and connections.
| Signs of Damage | What to Look For |
|---|---|
| Rot | Soft or discolored wood |
| Rust | Flaking metal or orange stains |
| Weak Areas | Cracks or splits in the structure |
Replacing Damaged Sections
If you find any damage, it is important to replace these sections. Here’s how:
- Remove the damaged piece: Carefully cut out the damaged area using a saw.
- Measure and cut a new piece: Use the old piece as a template to cut a new section of wood or metal.
- Install the new piece: Secure the new piece in place with screws or nails. Make sure it fits snugly and is well-supported.
- Seal the joints: Use a waterproof sealant to protect the joints from moisture and further damage.
Taking these steps ensures the underlying structure is strong. This preparation is key to a successful siding replacement.
Cutting New Fiberglass Panels
Replacing the fiberglass siding on your RV can be a daunting task. One of the critical steps is cutting new fiberglass panels. Ensuring precise cuts is essential for a perfect fit. Below, you’ll find detailed guidance on how to measure and cut fiberglass panels accurately.
Measuring Accurately
Accurate measurements are crucial. Start by measuring the area where the new panel will go. Use a tape measure for this task. Note all dimensions, including height, width, and any special features.
- Measure height and width of the opening.
- Account for any doors, windows, or vents.
- Double-check your measurements to avoid errors.
Cutting Techniques
Once you have your measurements, the next step is cutting the fiberglass panels. Here are some tips to ensure clean and precise cuts.
| Tool | Best Use |
|---|---|
| Utility Knife | Best for scoring and snapping thin panels. |
| Jigsaw | Ideal for cutting larger or thicker panels. |
| Rotary Tool | Great for intricate cuts and details. |
When cutting fiberglass, always wear protective gear. Safety goggles and a dust mask are essential. Follow these steps for the best results:
- Mark your cut lines clearly with a marker.
- Use a straightedge to guide your cuts.
- Start cutting slowly to avoid splintering.
Cutting fiberglass can create sharp edges. Sand the edges with fine-grit sandpaper to smooth them out. This prevents injuries and ensures a better fit.
Installing New Fiberglass Siding
Replacing fiberglass siding on an RV can seem daunting. But with the right steps, it becomes manageable. In this section, we’ll cover how to install new fiberglass siding. Follow these guidelines to ensure a smooth and secure installation.
Positioning Panels
Start by aligning the new fiberglass panels with the frame. Ensure the edges match up precisely. Use a level to keep the panels straight. This step is crucial for a professional look.
Once aligned, mark the positions with a pencil. This helps in repositioning if needed. Check for any gaps or overlaps. Adjust the panels until they fit perfectly. Having a helper can make this process easier.
Securing Panels
After positioning, it’s time to secure the panels. Begin by drilling pilot holes through the fiberglass and into the frame. Use a drill bit slightly smaller than your screws. This prevents the fiberglass from cracking.
Next, insert screws into the pilot holes. Tighten them until the panels are firmly in place. Do not over-tighten, as this can damage the fiberglass. Continue this process along the entire panel.
For added security, apply a bead of silicone sealant around the edges. This keeps out moisture and adds stability. Smooth the sealant with a finger or tool. Allow it to dry completely before moving on.
By following these steps, your new fiberglass siding will be secure and look great. Take your time and ensure each step is done correctly for the best results.
Sealing And Finishing Touches
Sealing and finishing touches are crucial steps in replacing fiberglass siding on your RV. These steps ensure that your RV remains watertight and looks great. Proper sealing and finishing prevent leaks and enhance the appearance of your RV. Let’s break down the final steps in this process.
Applying Sealant
Applying a sealant is essential to keep water out. First, choose a high-quality RV sealant. A good sealant is flexible and UV resistant. Apply the sealant along the edges of the new siding. Make sure to cover all seams and joints.
- Use a caulking gun for even application.
- Smooth the sealant with a wet finger or tool.
- Wipe away excess with a clean cloth.
Allow the sealant to dry completely. This may take several hours. Check the manufacturer’s instructions for exact drying times. Proper drying ensures a strong seal.
Final Inspection
A final inspection ensures that everything is in place. Check all sealed areas for gaps or bubbles. Address any issues immediately.
- Walk around the RV and inspect all seams.
- Look for any missed spots or thin areas.
- Reapply sealant if necessary.
Inspect the overall finish of the siding. Make sure it is even and properly aligned. A thorough inspection guarantees the best results.
These steps ensure your RV is protected and looks its best. Proper sealing and finishing are key to a successful fiberglass siding replacement.
Maintenance Tips
Maintaining your RV’s fiberglass siding is essential for its longevity. Proper care can prevent costly repairs and keep your RV looking new. Follow these maintenance tips to ensure your fiberglass siding remains in top condition.
Regular Inspections
Inspect your RV’s fiberglass siding regularly. Look for cracks, dents, or any signs of damage. Check around windows and doors for loose seals. Pay attention to areas near the roof where water can enter. Regular inspections help catch problems early.
Preventive Measures
Apply a UV protectant to your fiberglass siding. This helps prevent sun damage. Wash your RV regularly using mild soap and water. Avoid using harsh chemicals that can damage the fiberglass. Ensure your RV is stored in a covered area. This protects it from the elements.
Frequently Asked Questions
How Do You Remove Fiberglass Siding?
To remove fiberglass siding, first unscrew or pry off the trim. Then, carefully pull off the siding panels starting from the bottom.
What Tools Are Needed To Replace Rv Siding?
You will need a utility knife, screwdrivers, pry bar, measuring tape, and replacement fiberglass siding.
How Do You Measure For New Siding?
Measure the length and width of the area needing replacement. Ensure accuracy to avoid material wastage.
Can You Replace Rv Siding Yourself?
Yes, you can replace RV siding yourself with the right tools and careful attention to detail.
Conclusion
Replacing fiberglass siding on your RV can seem daunting. But with the right tools and steps, it’s manageable. Remember to measure accurately and cut carefully. Clean surfaces before applying new siding. Secure everything properly to ensure durability. Routine maintenance keeps your RV looking great.
Practice safety throughout the process. With patience, you’ll restore your RV’s exterior beautifully. Enjoy your renewed RV adventures!


