The Thetford RV toilet valve is crucial. It ensures your RV’s toilet works well.
Replacing this valve might seem daunting, but it’s necessary for a smooth RV experience. Leaks or malfunctions can disrupt your travel plans. Knowing how to replace the valve can save you time and money. A functional toilet system is essential for comfort on the road.
This guide will help you understand the steps and tools needed. By the end, you’ll feel confident in handling the replacement. Let’s dive into the essentials of Thetford RV toilet valve replacement.
Introduction To Rv Toilet Valves
The RV toilet valve is a crucial component of any recreational vehicle’s sanitation system. It controls the flow of water into the toilet bowl. This ensures the waste is flushed away properly. A functional valve keeps the toilet clean and prevents unpleasant odors. If the valve malfunctions, it can lead to serious issues. These issues can disrupt your travel plans and cause inconvenience.
In this article, we will explore the importance of a functional valve. We will also discuss common valve issues and how to address them.
Importance Of A Functional Valve
A functional valve is essential for maintaining hygiene in your RV. It ensures proper water flow during each flush. This helps keep the toilet bowl clean. A faulty valve can cause water leaks. These leaks can damage the RV floor and interior. It can also lead to unpleasant smells. Regular maintenance of the valve can prevent these issues.
Common Valve Issues
Several common issues can affect RV toilet valves. One common problem is a leaking valve. This happens when the valve does not close properly. Another issue is a clogged valve. This can prevent water from flowing through. A stuck valve can also be a problem. This prevents the toilet from flushing correctly. Regular checks can help identify and resolve these issues early.
Credit: parts.camperlandok.com
Tools And Materials Needed
Replacing the valve in your Thetford RV toilet can seem daunting. But with the right tools and materials, the task becomes manageable. This section will guide you through everything needed for a smooth replacement process.
Essential Tools
Here are the tools you will need:
- Screwdriver set
- Adjustable wrench
- Utility knife
- Bucket for water collection
- Towels or rags
A screwdriver set helps remove screws without stripping them. An adjustable wrench fits various nut sizes. Use a utility knife to cut old seals. A bucket and towels help manage water spills.
Required Materials
Gather these materials before starting:
- Replacement valve
- New seals or gaskets
- Plumber’s tape
- Cleaning supplies
Ensure the replacement valve matches your RV toilet model. New seals prevent leaks. Plumber’s tape seals threaded connections. Cleaning supplies keep the work area tidy.
Safety Precautions
Replacing the valve in your Thetford RV toilet requires careful attention to safety. This task involves handling tools and chemicals. To ensure a smooth and safe process, follow these safety precautions.
Protective Gear
Wearing the right protective gear is essential. Always use gloves to protect your hands from sharp tools and chemicals. Safety glasses shield your eyes from splashes and debris. A face mask can prevent you from inhaling harmful fumes.
- Gloves
- Safety glasses
- Face mask
Ensure the protective gear fits well. This will keep you comfortable and safe throughout the replacement process.
Handling Chemicals
When dealing with chemicals, such as cleaning solutions, extra caution is needed. Read all labels carefully. Follow the instructions provided by the manufacturer. Use chemicals in a well-ventilated area to avoid inhaling fumes.
| Chemical | Usage | Precautions |
|---|---|---|
| Cleaning Solution | Cleaning the toilet | Wear gloves, use in a ventilated area |
| Lubricant | Ensuring smooth valve operation | Avoid contact with skin, do not inhale |
If a spill occurs, clean it up immediately. Use appropriate materials to absorb the chemical and dispose of it properly.

Credit: pantherrvproducts.com
Preparation Steps
Replacing the valve in your Thetford RV toilet can seem daunting. But with proper preparation, the task becomes manageable. Here are the essential steps to ensure a smooth process.
Turn Off Water Supply
First, locate the water supply valve to your RV toilet. Turn it off completely. This step prevents water from spilling everywhere during the replacement.
If your RV has a water pump, turn it off as well. This ensures no water pressure remains in the system.
Double-check that the water is off by flushing the toilet. If no water enters the bowl, you are good to go.
Drain The Toilet
Draining the toilet is crucial. Any remaining water can cause a mess.
Begin by flushing the toilet to remove as much water as possible. Use a sponge or towel to soak up any remaining water in the bowl.
For a thorough drain, use a small container or cup to scoop out residual water. Dispose of the water properly.
Once the toilet is dry, you are ready to proceed with the valve replacement.
These preparation steps ensure a clean and efficient replacement process. Take your time and follow each step carefully.
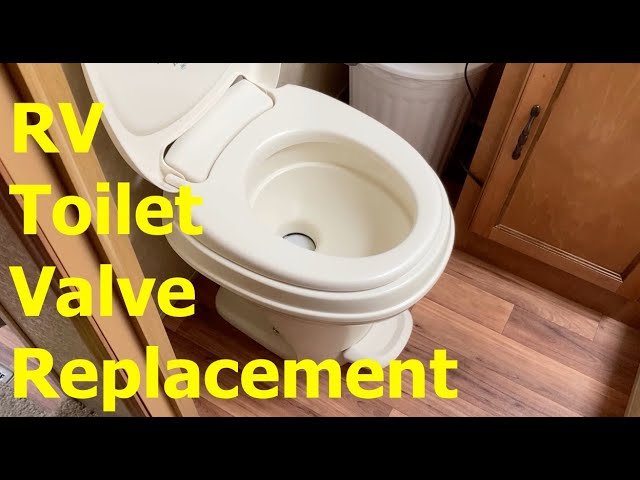
Removing The Old Valve
Replacing the Thetford RV toilet valve can seem daunting. But with the right steps, it becomes easy. The first step in this process is removing the old valve. This involves several critical actions to ensure the task is performed correctly. Below are the detailed steps to make the process smooth and efficient.
Disconnecting The Water Line
Before you start, turn off the water supply to the toilet. This is crucial to avoid any water leakage or flooding. Once the water supply is off, locate the water line connected to the valve. Use a wrench to loosen the connection. Carefully disconnect the water line from the valve. Be prepared with a towel to catch any residual water that might spill.
Unscrewing The Valve
Next, focus on the screws securing the old valve to the toilet. Use a screwdriver to unscrew the valve from its position. Keep the screws in a safe place as you will need them for the new valve. Once all screws are removed, gently pull the valve out. Inspect the area for any debris or dirt. Clean it thoroughly to ensure the new valve fits perfectly.
Removing the old valve is now complete. With these steps, you can easily proceed to install the new Thetford RV toilet valve.

Credit: www.youtube.com
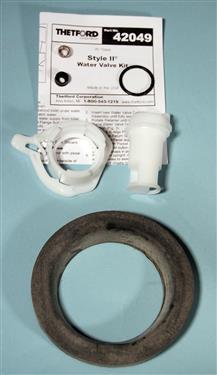
Installing The New Valve
Installing a new valve in your Thetford RV toilet can seem daunting. With the right steps, it becomes a straightforward task. This guide will help you attach the new valve and secure the water line. Let’s dive into the process.
Attaching The New Valve
Start by positioning the new valve in place. Ensure it aligns with the mounting holes. Hold the valve steady. Use a screwdriver to secure it. Tighten the screws firmly. Avoid over-tightening to prevent damage.
Check the alignment again. The valve should sit flat and secure. This ensures a proper seal and prevents leaks.
Securing The Water Line
Next, attach the water line to the valve. Insert the water line into the valve’s inlet. Push it in until it clicks. Ensure a snug fit to avoid leaks.
Use a wrench to tighten the connection. Turn the wrench gently. Over-tightening can crack the fittings. Check for a secure fit. Water should flow smoothly without any drips.
Turn on the water supply. Inspect the connection for leaks. If you see any, tighten the connection a bit more.
Testing The Replacement
After installing your new Thetford RV toilet valve, testing the replacement is essential. This ensures that everything is working properly and prevents potential issues while on the road. Below are the steps to check for leaks and ensure proper function.
Checking For Leaks
To begin, carefully inspect the area around the valve. Use a dry cloth to wipe down the connections. This will help you spot any moisture. Next, turn on the water supply and flush the toilet several times. Watch closely for any signs of leaking water.
If you notice any leaks, you may need to tighten the connections. Use an adjustable wrench to ensure all fittings are secure. If leaks persist, consider using plumber’s tape on the threads. This can help create a tighter seal.
Ensuring Proper Function
Once you have confirmed there are no leaks, the next step is to ensure the toilet functions correctly. Flush the toilet several times to check the water flow. The water should enter the bowl smoothly and exit without any blockages.
Observe the flushing mechanism. It should operate without sticking or making unusual noises. If you encounter any issues, inspect the valve and surrounding components. Make adjustments as necessary to achieve smooth operation.
| Step | Description |
|---|---|
| 1 | Inspect the area around the valve. |
| 2 | Turn on the water supply and flush the toilet. |
| 3 | Check for any signs of leaking water. |
| 4 | Tighten connections if needed. |
| 5 | Flush the toilet to check water flow. |
| 6 | Ensure the flushing mechanism operates smoothly. |
Maintenance Tips
Maintaining your Thetford RV toilet valve is crucial for smooth operation. Regular care can prevent leaks and malfunctions. Here are some essential maintenance tips.
Regular Inspections
Check the valve regularly. Look for signs of wear or damage. Early detection can save you from bigger problems later. Inspect the valve seal. It should be tight and intact. A loose seal can cause leaks.
Cleaning The Valve
Clean the valve to prevent buildup. Use a mild cleaner and a soft cloth. Avoid harsh chemicals. They can damage the valve material. Rinse thoroughly to remove any residue. This ensures smooth operation.
Frequently Asked Questions
How Do I Replace A Thetford Rv Toilet Valve?
To replace a Thetford RV toilet valve, turn off the water supply. Remove the old valve by unscrewing it. Install the new valve by following the manufacturer’s instructions. Ensure all connections are tight before turning the water back on.
What Tools Are Needed For Thetford Valve Replacement?
You will need a screwdriver, wrench, and possibly pliers. Refer to the manufacturer’s instructions for specific tools. A towel or bucket to catch any water spillage is also helpful.
How Long Does It Take To Replace A Toilet Valve?
Replacing a Thetford RV toilet valve typically takes about 30 minutes. This includes time to turn off the water, remove the old valve, and install the new one. Make sure to follow the instructions carefully.
Can I Replace The Valve Myself?
Yes, you can replace the Thetford RV toilet valve yourself. Follow the detailed instructions provided by the manufacturer. Ensure you have the necessary tools and turn off the water supply before starting.
Conclusion
Replacing the Thetford RV toilet valve is easier than you think. With simple tools and clear steps, you can do it yourself. This saves you time and money. Regular maintenance ensures your RV toilet works smoothly. No more leaks or unpleasant surprises.
Always keep a spare valve handy. It’s a small investment for peace of mind. Enjoy your RV adventures with a reliable toilet system.


