Winterizing your RV is crucial for its longevity. An air compressor can simplify this process.
As temperatures drop, protecting your RV’s plumbing system becomes vital. Water left in pipes can freeze and expand, causing damage. An air compressor helps blow out water from the system, ensuring no residual moisture remains. This method is efficient and effective, preventing costly repairs.
It’s essential to choose the right air compressor for this task. In this guide, we’ll explore the benefits and considerations of using an air compressor for winterizing your RV. Whether you’re a seasoned RV owner or new to this, understanding the process will save you time and money. Let’s dive into how an air compressor can keep your RV safe during winter.
Introduction To Winterizing Rvs
An air compressor can make winterizing your RV much easier. It helps blow out water from the pipes, preventing them from freezing. This method is efficient and saves time.
Winterizing your RV is essential for protecting it during cold months. As temperatures drop, water left in pipes can freeze and cause damage. Using an air compressor is a key step in the winterizing process. This blog post will guide you through the importance, challenges, and solutions for winterizing your RV.
Why Winterizing Is Important
Winterizing prevents water from freezing in your RV’s pipes. Frozen water can expand and cause pipes to crack. This can lead to costly repairs. Winterizing ensures your RV stays in good condition. It also prolongs the life of your vehicle. By removing all water, you avoid mold and mildew growth.
Common Challenges In Winterizing
Many RV owners face challenges in the winterizing process. Here are some common issues:
- Finding all water sources: It can be hard to locate every water line.
- Air compressor use: Not everyone knows how to use an air compressor correctly.
- Proper antifreeze application: Some struggle with knowing the right amount of antifreeze.
Using the right tools and methods can help overcome these challenges.
Using An Air Compressor
An air compressor helps in clearing water lines. Here’s how to use it effectively:
- Turn off the water heater: Ensure it is completely off.
- Drain the water: Open all faucets and drain the water.
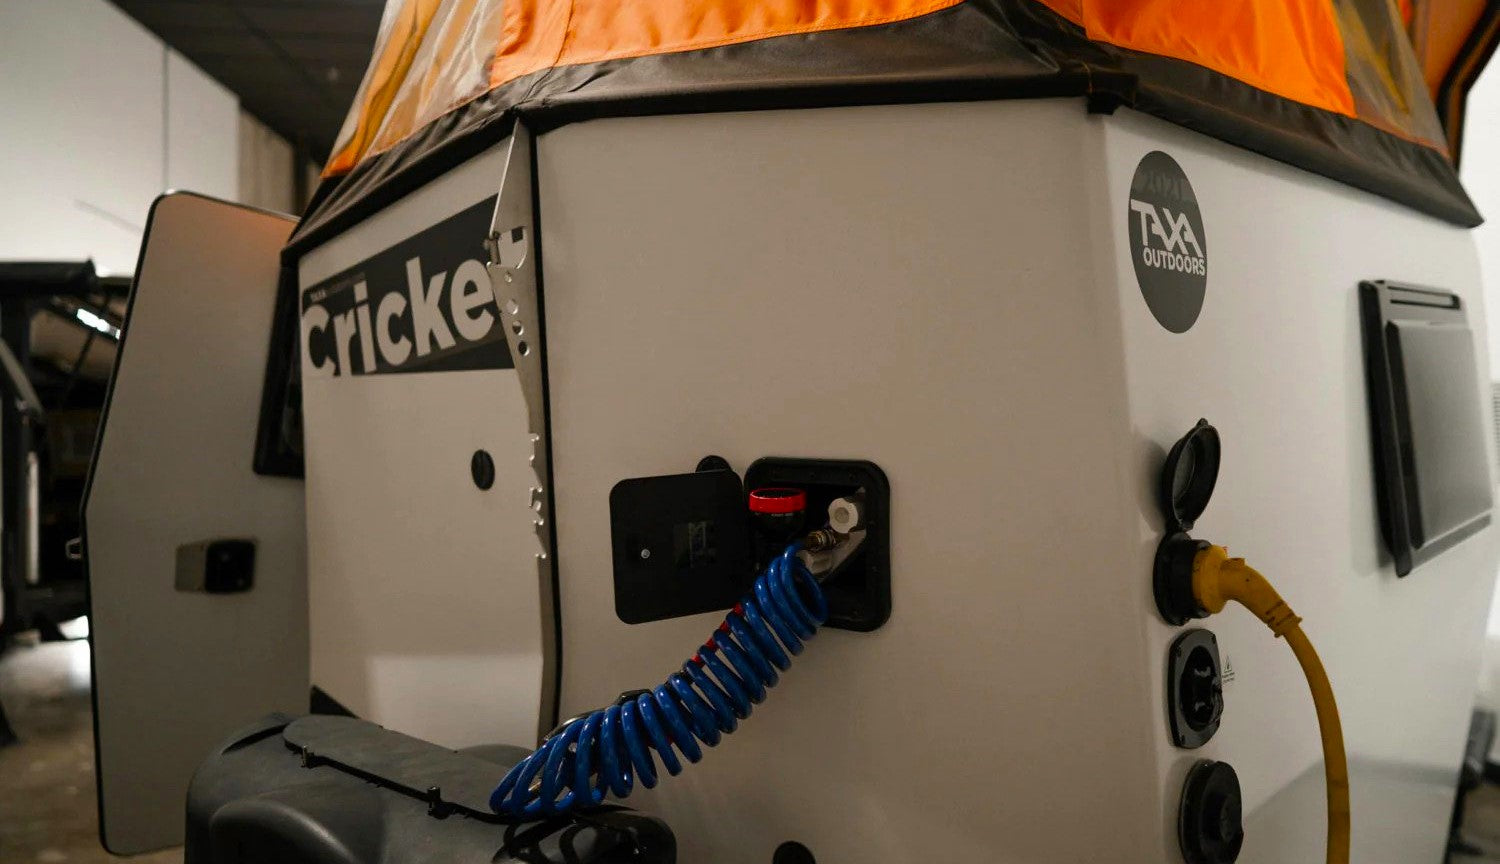
- Attach air compressor: Connect the compressor to the water system.
- Blow out lines: Use the compressor to blow air through the lines.
Additional Tips For Winterizing
Keep these tips in mind for a smooth winterizing process:
- Check all seals: Ensure windows and doors are sealed properly.
- Store batteries properly: Remove and store batteries in a warm place.
- Cover your RV: Use a cover to protect the exterior from snow and ice.
Following these steps and tips will help you winterize your RV successfully. Protect your investment and enjoy peace of mind during winter. “`

Credit: www.youtube.com
Choosing The Right Air Compressor
Winterizing your RV is crucial to avoid damage during the cold months. An air compressor is a vital tool for this task. Choosing the right air compressor can make the process smooth and efficient. But with many options available, how do you decide which one is best? This guide will help you select the perfect air compressor for winterizing your RV.
Types Of Air Compressors
There are several types of air compressors to consider. Portable air compressors are small and easy to move. They are ideal for RV owners who need flexibility. Stationary air compressors are larger and often more powerful. These are suited for those who do most of their maintenance at home. Pancake compressors are compact and have a flat design. They are easy to store and transport. Each type has its own benefits, so consider your needs before making a decision.
Key Features To Look For
When choosing an air compressor, pay attention to key features. One important feature is the PSI rating. This indicates the pressure the compressor can deliver. For winterizing your RV, look for a compressor with at least 90 PSI. Another feature to consider is the CFM rating. This measures the volume of air the compressor can produce. A higher CFM rating means the compressor can handle bigger tasks efficiently.
Also, consider the tank size. Larger tanks allow for longer operation without needing to refill. However, they can be bulkier and harder to transport. Noise level is another factor. Some compressors are quieter than others, which can be useful if you live in a quiet neighborhood. Lastly, check the power source. Electric compressors are common and easy to use. Gas-powered compressors offer more power but require more maintenance.
Essential Tools And Supplies
Winterizing your RV is crucial to prevent damage from freezing temperatures. Using an air compressor helps to clear water lines and ensures your RV is ready for winter. Below, we outline the essential tools and supplies you need for this task.
Required Equipment
- Air Compressor: A portable air compressor with a PSI of 30-50 is ideal for RVs.
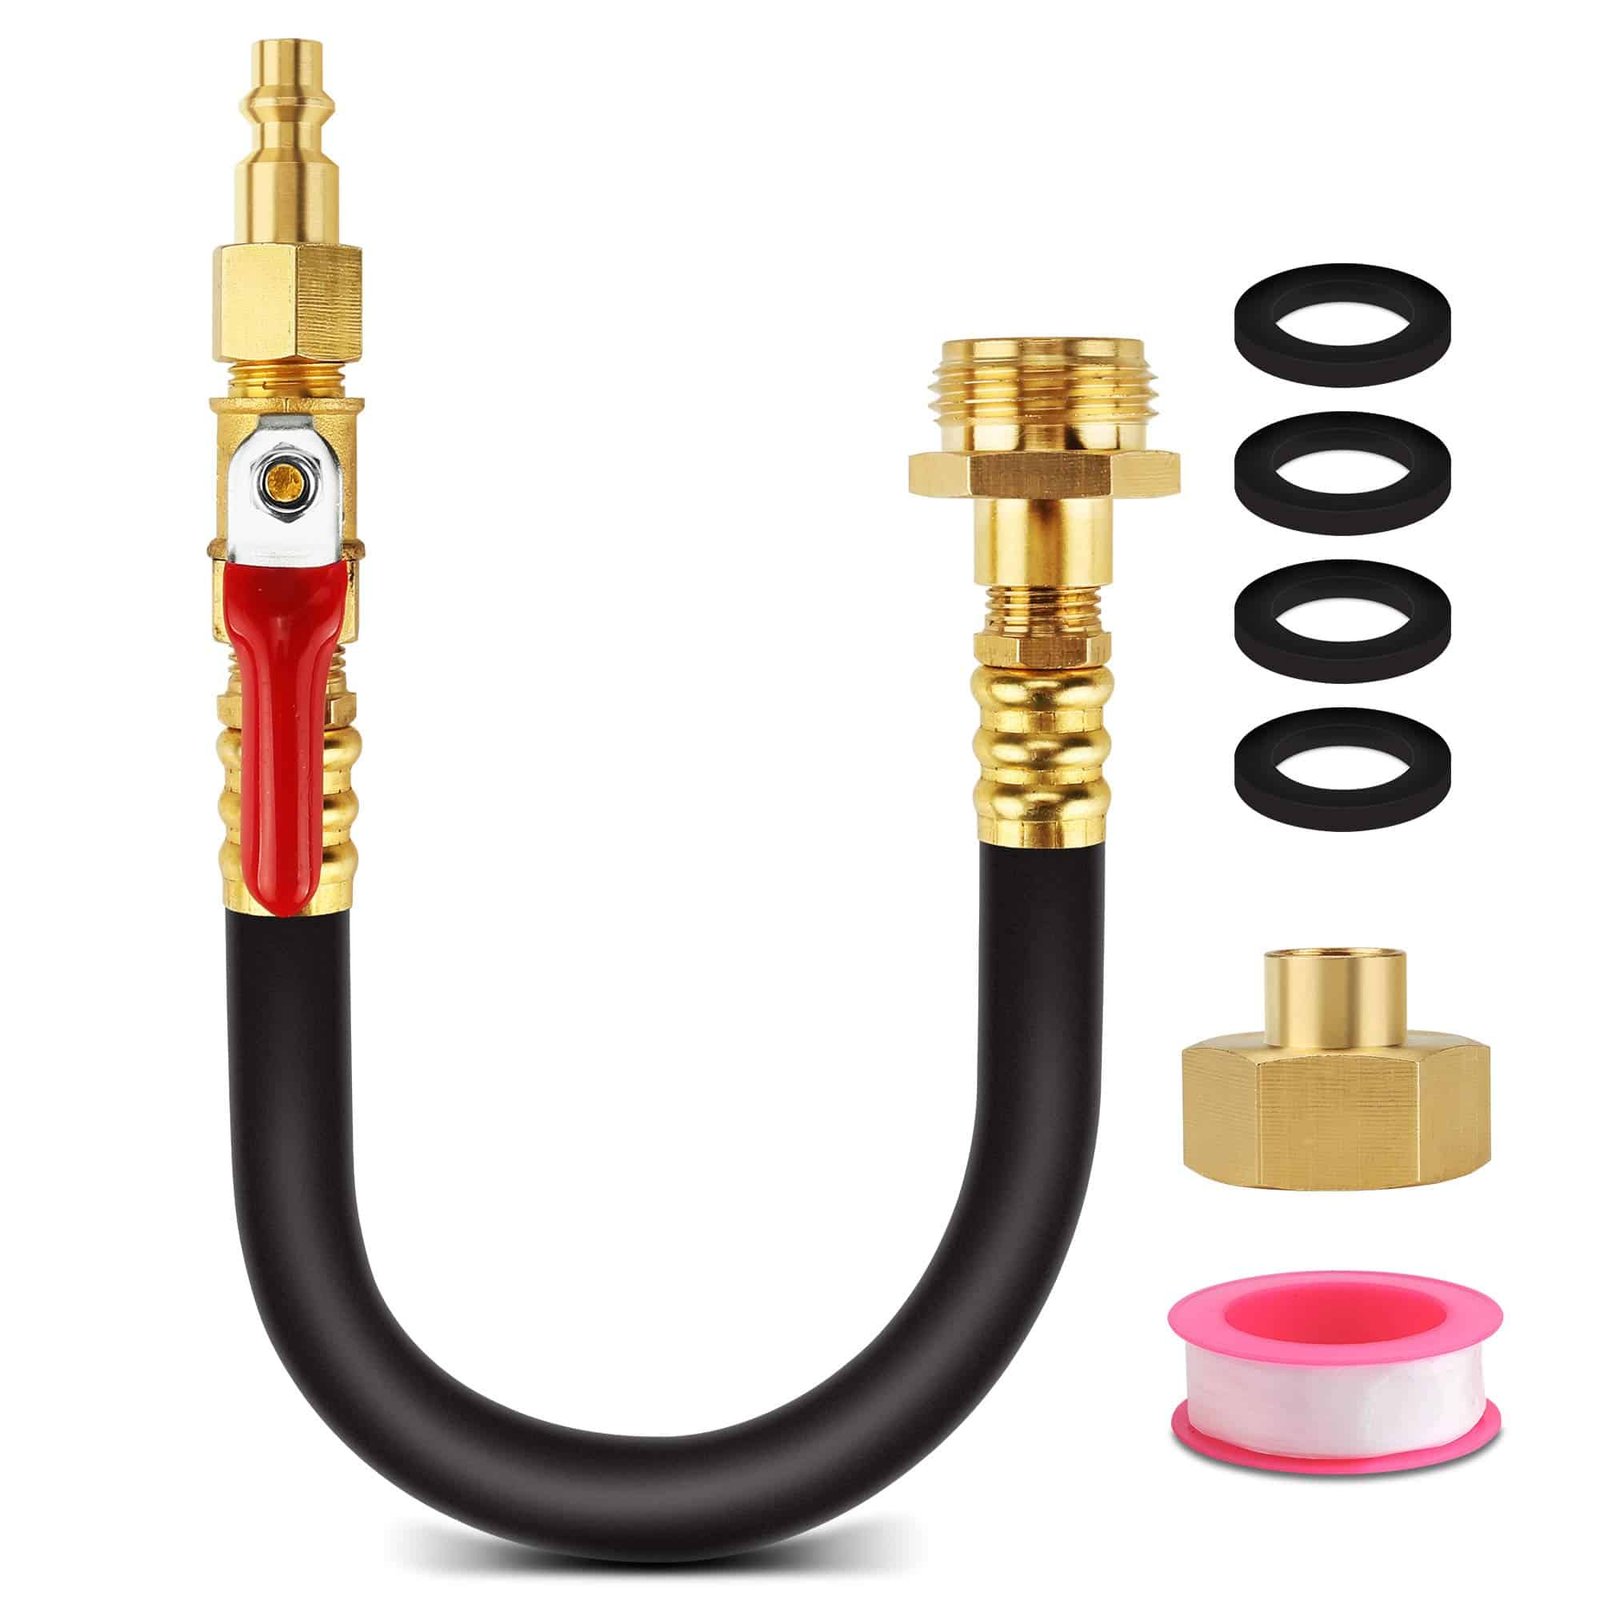
- Blowout Plug: This connects the air compressor to your RV’s water system.
- Adjustable Air Pressure Regulator: To control the air pressure and avoid damaging your pipes.
- RV Antifreeze: Use non-toxic antifreeze for the water lines and tanks.
- Hose Adapter: Connects the air compressor to the RV’s water inlet.
Optional Accessories
- Pressure Gauge: Ensures the air pressure is at safe levels for your RV system.
- Teflon Tape: For sealing connections and preventing leaks.
- Extra Hoses: Helps reach all parts of the RV efficiently.
- Water Pump Converter Kit: Makes it easier to winterize the water pump and lines.
Having the right tools and supplies makes winterizing your RV quick and efficient. This will protect your investment and give you peace of mind during the cold months.
Preparing Your Rv For Winterization
Winterizing your RV is crucial to protect it from harsh weather. You need an air compressor to do the job right. It helps clear out water lines and keeps your RV in top shape. Let’s dive into the process of preparing your RV for winter.
Cleaning And Inspecting The Rv
Start with a thorough cleaning. Remove any dirt and debris. Focus on the exterior and interior. Clean the windows, floors, and appliances.
Next, inspect the RV. Check for any damage or wear. Look at the roof, seals, and tires. Fix any issues before they worsen.
Draining Water Systems
Draining the water systems is essential. Start with the fresh water tank. Use the air compressor to blow out the lines. This ensures no water is left behind.
Move to the grey and black water tanks. Drain them completely. Clean them to prevent any buildup. The air compressor can help dry out the lines.
Finally, don’t forget the water heater. Drain it and use the air compressor to remove any remaining water. This step prevents freezing and damage.
Using The Air Compressor
Using an air compressor to winterize your RV is essential. It helps to clear out water from the pipes, preventing freeze damage. This process is crucial for maintaining your RV during the colder months. Let’s dive into the steps and precautions you need to follow.
Safety Precautions
First, wear safety goggles to protect your eyes. Compressed air can cause debris to fly. Ensure the area is well-ventilated. This prevents inhalation of any harmful fumes. Check the compressor for any leaks. A faulty compressor can be dangerous. Disconnect the RV from the water supply. This prevents any backflow of water. Make sure the RV’s water heater is off. This avoids any risk of burns.
Step-by-step Instructions
Start by turning off the water pump in your RV. Open all faucets and drains. This allows water to escape. Attach the air compressor to the water inlet. Use a blowout plug for this connection. Set the compressor to 30-50 PSI. Higher pressure can damage the pipes. Turn on the compressor. Let it run for about 2 minutes. This will push out the water. Close each faucet one by one. This ensures all water is removed. Repeat the process if needed. Make sure no water remains in any pipe.
Common Mistakes To Avoid
Winterizing your RV with an air compressor is crucial. It prevents damage from freezing temperatures. But many make mistakes that lead to costly repairs. Below are some common mistakes to avoid.
Over-pressurizing Systems
One common mistake is over-pressurizing the system. This can damage your RV’s plumbing. Always check the recommended PSI for your RV. Typically, it should be around 30-50 PSI. Use a pressure regulator to maintain the correct level.
Here is a simple table to guide you:
| RV Type | Recommended PSI |
|---|---|
| Small Camper | 30 PSI |
| Medium RV | 40 PSI |
| Large Motorhome | 50 PSI |
Exceeding these limits can burst pipes. So, always follow the guidelines.
Neglecting Certain Areas
Another mistake is neglecting certain areas in the RV. Many overlook the water heater, outdoor shower, and low-point drains. Ensure all water lines are drained. This includes hidden spots.
- Drain the water heater completely.
- Flush out the outdoor shower.
- Check and open low-point drains.
Failing to drain all areas can cause water to freeze. This leads to cracked pipes. Always double-check these areas to avoid damage.
Post-winterization Tips
Properly winterizing your RV is crucial to prevent damage during colder months. But post-winterization care is just as important to ensure your RV is ready for the next adventure. Here are some essential post-winterization tips to follow.
Storage Solutions
After winterizing, store your RV in a safe place. A sheltered storage area or an RV cover can protect it from harsh weather. Use moisture absorbers to prevent mold and mildew.
| Item | Description |
|---|---|
| RV Cover | Protects against UV rays and weather |
| Moisture Absorber | Prevents mold and mildew |
Regular Maintenance
Even in storage, your RV needs regular checks. Inspect tires, seals, and batteries monthly. Run the generator for 30 minutes every month to keep it in good condition.
- Tires: Check for cracks and maintain pressure
- Seals: Look for leaks around windows and doors
- Batteries: Ensure they are charged
By following these steps, your RV stays in top shape, ready for your next trip.

Credit: www.amazon.com
Troubleshooting Issues
When winterizing your RV, an air compressor can be a handy tool. But sometimes, things don’t go as smoothly as planned. You might face some issues that can be frustrating. This section will help you troubleshoot these problems. We’ll cover how to identify and fix common issues quickly.
Identifying Problems
First, listen for unusual noises from the compressor. Hissing sounds can indicate leaks. Check for any loose connections or damaged hoses. Monitor the pressure gauge; it should stay stable. A sudden drop means there’s a problem. Look for any signs of oil or water around the compressor. These can be signs of internal issues.
Quick Fixes
If you hear a hissing sound, inspect the hoses and connections. Tighten any loose connections. Replace damaged hoses immediately. For pressure issues, check the gauge and adjust settings if needed. If oil or water is present, clean the area and check for leaks. Ensure the compressor is on a flat surface to avoid performance issues.
These simple steps can solve most problems. Keep your air compressor in top shape for efficient winterizing.
Conclusion And Final Thoughts
Winterizing your RV is a crucial task. Using an air compressor can make the process easier and more effective. This guide has covered the essentials, helping you protect your RV from winter damage.
Recap Of Key Points
Let’s revisit the main points:
- Choose the right air compressor with enough power.
- Ensure you have the necessary attachments.
- Follow step-by-step instructions to blow out the water lines.
- Check for any remaining water to prevent freezing damage.
- Store your RV properly after winterizing.
Encouragement For First-timers
If you’re new to winterizing your RV, don’t worry. It may seem daunting at first, but with patience, you can do it. Start with the basics, and follow each step carefully.
Remember, it’s better to spend time now winterizing than to face damage repairs later. Your RV will be ready for the next travel season, and you’ll have peace of mind.
Credit: taxaoutdoors.com
Frequently Asked Questions
What Size Air Compressor For Winterizing Rv?
An air compressor with a 3-6 gallon tank and 30-50 PSI is sufficient for winterizing an RV.
How To Use Air Compressor For Winterizing Rv?
To winterize, connect the compressor to the city water inlet, and blow out the water lines.
Why Winterize An Rv With An Air Compressor?
Winterizing with an air compressor prevents pipes from freezing and bursting, protecting your RV during cold months.
Can Any Air Compressor Be Used For Winterizing?
Not all compressors are suitable. Use one that provides consistent pressure and has an adjustable PSI setting.
Conclusion
Choosing the right air compressor makes winterizing your RV easy. It prevents damage and saves money. Remember to follow the steps carefully. A well-maintained RV stays in great shape for years. Don’t forget to store your RV properly. Winterizing ensures your RV is ready for the next adventure.


