Repairing water damage in an RV ceiling is a manageable task. With the right guidance, you can fix it yourself.
Water damage in an RV can lead to serious issues if not addressed quickly. The ceiling is particularly vulnerable since it’s often out of sight. This guide will help you understand the steps needed to repair water damage in your RV ceiling.
By following these steps, you can save money and extend the life of your RV. We will cover how to find the damage, the tools you need, and the repair process. Let’s get started on making your RV as good as new.
Credit: refreshcamping.com
Identifying Water Damage
Spotting water damage in an RV ceiling involves looking for stains, soft spots, or mold. Fixing it requires removing damaged sections, drying the area, and replacing materials.
Water damage in an RV ceiling can lead to serious problems. Identifying it early can save time and money. Here, we will discuss how to spot the damage.
Signs Of Damage
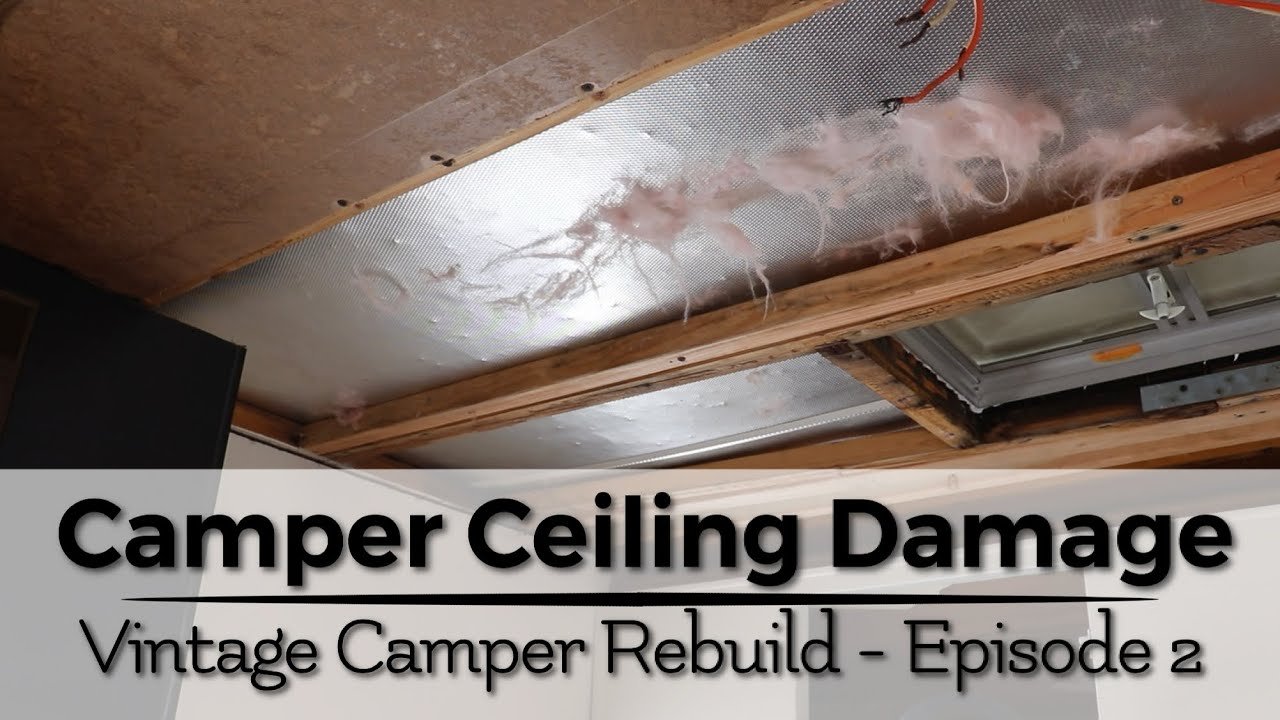
The first sign is discoloration on the ceiling. Look for brown or yellow spots. These spots indicate water has seeped in. Another sign is a musty smell. This smell can mean mold or mildew is present. Soft spots in the ceiling are another indicator. Press on the ceiling with your hand. If it feels spongy, there is likely water damage. Peeling wallpaper or bubbling paint are also signs.
Common Causes
Leaking roofs are a common cause of water damage. Check the roof for cracks or loose seals. Damaged or missing roof vents can also let water in. Poorly sealed windows can cause water to enter. Inspect window seals regularly. If they appear cracked or worn, they need replacing. RV plumbing issues can also cause ceiling damage. Look for leaks in pipes or fittings. Fix any leaks quickly to prevent further damage. “`

Credit: www.reddit.com
Gathering Necessary Tools
Gathering the necessary tools is the first step in repairing water damage in your RV ceiling. Having the right tools on hand ensures a smooth and efficient repair process. In this section, we will list the essential tools and safety equipment you need.
Essential Tools
Start with basic tools. You will need a utility knife, a putty knife, and a screwdriver. These will help you remove damaged materials. A tape measure is crucial for accurate measurements. Have a staple gun ready for securing new materials.
Next, gather materials for the repair. Get some plywood, insulation, and RV roof sealant. These will replace damaged sections. Don’t forget to have a caulk gun for applying the sealant. A sanding block will help smooth out the repaired areas.
Finally, get some paint and a paintbrush. These will help match the repaired area to the rest of the ceiling. Make sure you have all these tools before you start.
Safety Equipment
Safety is important. Always wear gloves to protect your hands. A dust mask will keep you from inhaling harmful particles. Safety goggles are essential to protect your eyes.
Working on the ceiling may require a ladder. Ensure it’s stable and secure. Wear non-slip shoes for added safety. Having proper safety equipment makes the repair process safer and more efficient.
Preparing The Rv
Repairing water damage in your RV ceiling starts with careful preparation. A well-prepared RV ensures a smoother repair process. It also helps to prevent further damage.
Clearing The Area
First, clear out the area where you will work. Remove all furniture, personal items, and any other objects. This allows you to move freely and reduces the risk of accidents.
Use a broom or vacuum to clean the space. Ensure there is no dust or debris. This helps in getting a clear view of the damage.
Protecting Interior
Next, protect the interior of your RV. Cover the floor and nearby furniture with plastic sheets. This prevents water and debris from causing additional damage.
Use painter’s tape to secure the plastic sheets. Ensure they stay in place during the repair process. This keeps your RV clean and safe.
Removing Damaged Materials
When repairing water damage in your RV ceiling, the first step is removing the damaged materials. This ensures that the new materials will adhere properly and prevents mold growth. Let’s break down the process into manageable sections.
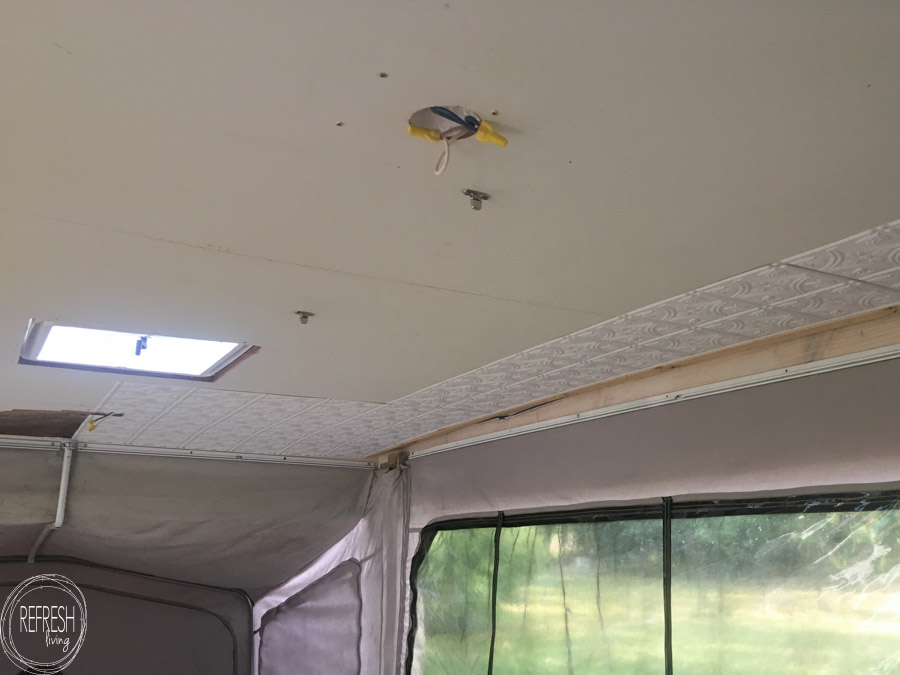
Ceiling Panels
Ceiling panels are the most visible part of your RV ceiling. Begin by removing any fixtures attached to the ceiling. Use a screwdriver to take out screws holding the panels in place. Gently pry the panels away from the ceiling framework. If the panels are glued, use a putty knife to carefully loosen them. Dispose of the damaged panels safely. Ensure the area is clean before proceeding to the next step.
Insulation
After removing the panels, you will access the insulation. Wet insulation needs to be replaced. Wear gloves and a mask to protect yourself from mold and dust. Remove the wet insulation carefully. Place it in a plastic bag for disposal. Check the ceiling framework for any signs of mold or rot. Clean the area with a bleach solution to kill any mold spores. Let the area dry completely before installing new insulation.
Use the following table as a guide for materials and tools you will need:
| Materials | Tools |
|---|---|
| Replacement ceiling panels | Screwdriver |
| Insulation | Putty knife |
| Plastic bags | Gloves |
| Bleach solution | Mask |
Drying Out The Area
Water damage in an RV ceiling can be a serious issue. Drying out the area is the first and most crucial step to prevent further damage. It stops mold growth and structural issues. Follow these steps to ensure your RV ceiling is thoroughly dry.
Using Fans
Fans are great tools for drying out water-damaged areas. Place multiple fans around the affected spot. Position them to blow air directly onto the ceiling. The constant airflow helps evaporate the moisture. Box fans and oscillating fans work best. Keep them running for at least 24 hours. Ensure the area is well-ventilated for maximum effect.
Dehumidifiers
Dehumidifiers help remove moisture from the air. Place a dehumidifier in the RV near the damaged ceiling. Set it to the highest setting. It will draw out the moisture and collect it in the tank. Empty the tank regularly to maintain efficiency. For large areas, consider using multiple dehumidifiers. This speeds up the drying process.
| Tool | Usage |
|---|---|
| Fans | Increases airflow to dry the area |
| Dehumidifiers | Removes moisture from the air |
By using both fans and dehumidifiers, you can effectively dry out the water-damaged area. This combination ensures that moisture is removed quickly and efficiently.
Repairing The Roof Leak
Repairing the roof leak is crucial to fixing water damage in your RV ceiling. Water leaks can cause significant damage if not addressed quickly. It is essential to understand the repair process to prevent further issues.
Sealing The Leak
First, identify the source of the leak. It could be a crack or a hole in the roof. Clean the area around the leak. Remove any debris or dirt. Use a roof sealant to cover the crack or hole. Apply the sealant generously. Ensure it covers the entire damaged area. Let it dry completely. Check the instructions on the sealant for drying times.
Inspecting Roof
Next, inspect the entire roof for any other potential leaks. Look for cracks, holes, or any signs of wear and tear. Pay special attention to seams and edges. Use a flashlight for better visibility. If you find any issues, seal them immediately. Regular inspections can prevent future leaks. Keep a maintenance schedule to check your roof periodically.
Installing New Materials
Repairing water damage in an RV ceiling requires installing new materials. This step is crucial for maintaining the structural integrity of your vehicle. By replacing damaged components, you ensure a safe and comfortable living space. Below, we detail the process for installing new insulation and ceiling panels.
New Insulation
Start by removing any old, water-damaged insulation. Use a utility knife to cut and pull out the material. Discard it properly. Measure the space between the ceiling joists. Buy new insulation that fits these measurements. Choose moisture-resistant insulation for better protection.
- Cut the new insulation to size using a sharp knife.
- Fit the pieces snugly between the joists.
- Ensure there are no gaps or compressed areas.
This step helps prevent future water damage and keeps your RV insulated against temperature changes.
New Ceiling Panels
After installing the insulation, proceed with the new ceiling panels. Select panels that are lightweight and moisture-resistant. Plywood or vinyl panels are good options. Measure the ceiling area to determine the size of panels needed.
- Cut the panels to fit the ceiling dimensions.
- Apply adhesive to the back of each panel.
- Press the panels firmly against the ceiling joists.
- Secure the panels with screws for added support.
Ensure the panels are aligned correctly to avoid gaps. Use a level to check the alignment. Once installed, your RV ceiling will look as good as new.
Finishing Touches
Completing the water damage repair in your RV ceiling involves the finishing touches. This final step ensures your ceiling looks polished and new. These steps include painting and a final inspection. Here’s how to do it right.
Painting
Painting the repaired area helps blend it with the rest of the ceiling. Follow these steps for a seamless finish:
- Choose the right paint: Use paint that matches the existing color. This helps to avoid noticeable patches.
- Prepare the surface: Sand the repaired area lightly. This ensures the paint adheres well.
- Apply primer: Use a primer to seal the surface. This step is crucial for a smooth finish.
- Paint: Use a roller or brush to apply the paint. Two coats are usually enough. Allow each coat to dry completely before applying the next.
Final Inspection
After painting, perform a final inspection. This ensures everything is in place and looks good. Here’s what to check:
- Consistency: The paint should be even and match the rest of the ceiling.
- Seams: Ensure there are no visible seams or gaps.
- Structural integrity: Press gently on the repaired area. It should feel firm and stable.
- Cleanliness: Remove any paint drips or splatters. Use a damp cloth for this.
If everything looks good, your RV ceiling repair is complete. Enjoy your refreshed space.
Credit: refreshcamping.com
Frequently Asked Questions
What Causes Water Damage In Rv Ceilings?
Water damage in RV ceilings is usually caused by leaks from the roof or windows. Poor maintenance can also contribute. Regular inspections help prevent damage.
How Can I Identify Water Damage In An Rv Ceiling?
Look for discoloration, sagging, or soft spots on the ceiling. Musty odors may also indicate water damage. Early detection is crucial.
What Tools Do I Need To Repair Rv Ceiling Water Damage?
You’ll need a utility knife, putty knife, sealant, replacement materials, and a screwdriver. Proper tools ensure an effective repair process.
Can I Repair Rv Ceiling Water Damage Myself?
Yes, you can repair it yourself with the right tools and materials. Follow a step-by-step guide for best results.
Conclusion
Repairing water damage in your RV ceiling is manageable with the right steps. Identify the damage, gather your tools, and follow a systematic approach. Be patient and thorough in your repairs. Regular maintenance can prevent future issues. Always check for leaks and fix them promptly.


