Is your RV kitchen faucet leaking at the base? It’s a common issue.
This small problem can lead to bigger headaches if not fixed quickly. Leaks can cause water damage, mold, and even high water bills. It’s essential to address this issue to keep your RV in top shape. In this post, we will explore why your RV kitchen faucet might be leaking and provide simple steps to fix it.
Whether you’re on a road trip or parked at a campsite, you need your faucet in good working order. Let’s dive into the causes and solutions for a leaking RV kitchen faucet base to ensure a smooth and hassle-free journey.
Identifying The Leak
A leaking RV kitchen faucet can be frustrating and wasteful. Identifying the source of the leak is the first step to fixing the problem. This guide will help you pinpoint the exact location of the leak and understand the common signs to look out for.
Signs Of A Leak
- Water pooling around the base of the faucet.
- Dripping water even when the faucet is turned off.
- Moisture under the sink or on the countertop.
- Water stains or damage to surrounding areas.
If you notice any of these signs, it’s likely that your faucet is leaking at the base. Understanding where the leak is coming from can save you time and money on repairs.
Common Leak Locations
Leaks can occur in various parts of the faucet. Here are the most common areas to check:
| Location | Description |
|---|---|
| Base of the Faucet | Often caused by a worn-out O-ring or gasket. |
| Water Supply Connections | Loose or damaged connections can cause leaks. |
| Spout | Internal issues can lead to leaks from the spout. |
Inspect each of these areas carefully. Look for any visible signs of wear or damage. Tighten connections and replace worn-out parts as needed. By identifying the exact location of the leak, you can take the necessary steps to fix it and prevent further damage.
Tools And Materials Needed
Fixing a leaking RV kitchen faucet at the base doesn’t require advanced skills. The right tools and materials make the job easier. This section lists what you need to get started.
Essential Tools
A few basic tools can help you fix the leak. Gather these items before starting:
- Adjustable Wrench: Useful for tightening loose nuts and bolts.
- Phillips Screwdriver: Essential for removing screws from the faucet assembly.
- Flathead Screwdriver: Handy for prying open parts without damaging them.
- Plumber’s Tape: Helps seal connections and prevent future leaks.
- Bucket: To catch any water that might spill during the repair.
Necessary Materials
Some materials are required to fix the leak effectively. Ensure you have these on hand:
- Replacement O-rings: Worn O-rings often cause leaks at the base.
- Sealant or Plumber’s Putty: Provides an extra layer of protection against leaks.
- Replacement Faucet Parts: In case any parts are damaged beyond repair.
- Cleaning Cloth: To wipe down any water or residue during the fix.
Having the right tools and materials is crucial. This ensures a smooth and successful repair process.
Turning Off The Water Supply
Dealing with an RV kitchen faucet leaking at the base can be frustrating. The first step to fix this issue is to turn off the water supply. Properly shutting off the water will prevent further damage and make the repair process smoother.
Shutting Off Valves
Start by locating the shut-off valves under the sink. These valves control the water flow to the faucet. Most RVs have two valves: one for hot water and one for cold water.
- Turn the hot water valve clockwise to shut it off.
- Turn the cold water valve clockwise to shut it off as well.
If your RV does not have shut-off valves under the sink, you may need to shut off the main water supply. This valve is typically located where the water line enters the RV.
| Valve Type | Location | Action |
|---|---|---|
| Hot Water Valve | Under the Sink | Turn Clockwise |
| Cold Water Valve | Under the Sink | Turn Clockwise |
| Main Water Supply Valve | Water Line Entry | Turn Clockwise |
Draining The Faucet
After shutting off the water supply, drain the faucet to remove any remaining water. This step ensures a dry work area and prevents water spills.
- Open the faucet to release any trapped water.
- Leave the faucet open until the water stops flowing.
It’s also a good idea to place a bucket or towel under the sink to catch any residual water. This keeps your workspace clean and dry, making it easier to identify and fix the leak.
Credit: www.irv2.com
Removing The Faucet Handle
Dealing with a leaking RV kitchen faucet can be frustrating. The first step to fix this issue is to remove the faucet handle. This allows you to access the base and see the source of the leak. Removing the handle is a simple task if you follow these steps.
Unscrewing The Handle
First, locate the screw holding the handle in place. It is often hidden under a cap or behind a decorative cover. Use a flathead screwdriver to gently lift the cap. Once exposed, use a Phillips head screwdriver to remove the screw. Keep the screw in a safe place to avoid losing it. After unscrewing, the handle should come off easily.
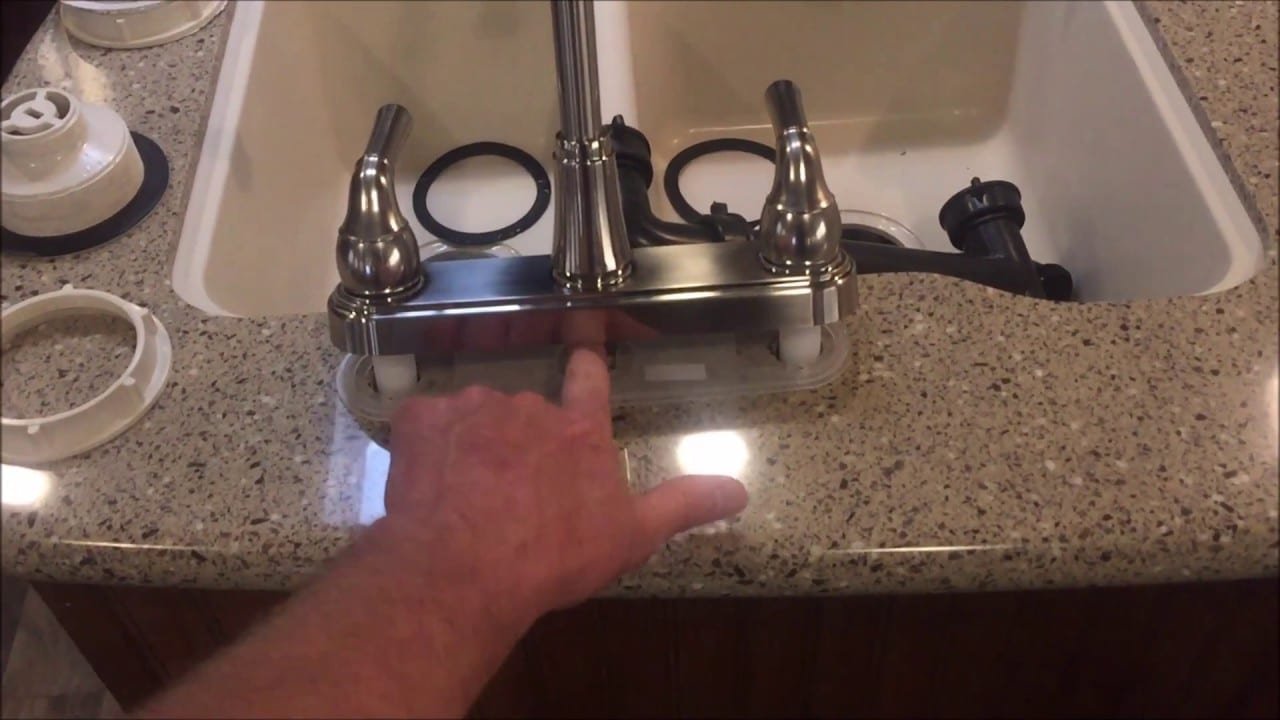
Accessing The Base
After removing the handle, you can see the faucet base. This is where you need to look for the leak. Check for any loose or damaged parts. Tighten any loose screws or nuts. Replace any worn-out components to ensure a proper seal. Cleaning the base area is also a good idea. Dirt and grime can cause leaks over time. Use a cloth to wipe away any buildup.
Inspecting The O-ring
Experiencing a leaking RV kitchen faucet? A common culprit is the O-ring. Inspecting the O-ring can help identify the issue and prevent further damage.
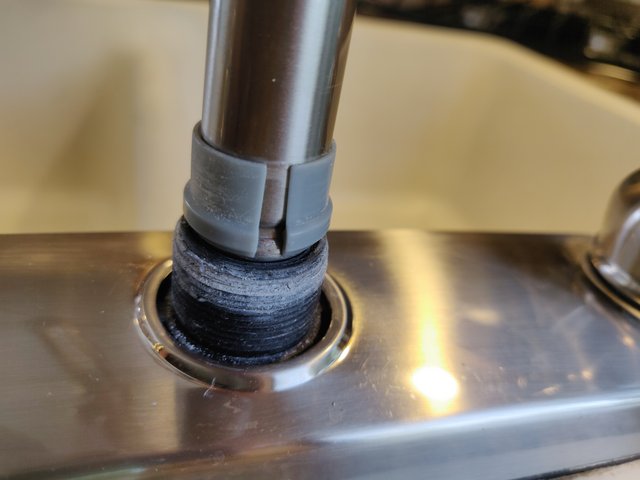
Locating The O-ring
The O-ring is a small, rubber ring located at the base of the faucet. Start by turning off the water supply to avoid any mess. Next, remove the faucet handle using a screwdriver. The O-ring should be visible at the base of the faucet. If you cannot locate it, refer to your RV’s manual for guidance.
Checking For Damage
Once you have located the O-ring, inspect it carefully. Look for any cracks, tears, or signs of wear. A damaged O-ring can cause water to leak from the base of the faucet. If you notice any damage, it is best to replace the O-ring immediately.
Here are some common signs of a damaged O-ring:
- Visible cracks or tears
- Flattened or misshapen ring
- Discoloration or hardening
If the O-ring appears to be in good condition, it may simply need cleaning. Use a soft cloth to remove any debris or build-up. Reassemble the faucet and turn the water supply back on to check for leaks. If the leak persists, further inspection may be required.
| Condition | Action |
|---|---|
| Cracks or tears | Replace the O-ring |
| Misshapen | Replace the O-ring |
| Dirty or build-up | Clean the O-ring |
Regular inspection of the O-ring can help prevent leaks and extend the life of your RV kitchen faucet. If the O-ring is damaged, do not delay in replacing it to ensure your faucet remains functional.
Replacing The O-ring
Experiencing a leak at the base of your RV kitchen faucet? It might be time to replace the O-ring. This small, but essential component, can cause significant water wastage if damaged. Replacing it is a straightforward process. It ensures your faucet works efficiently and stops any annoying leaks. Below, we guide you through choosing and installing the new O-ring.
Choosing The Right O-ring
Selecting the correct O-ring is crucial. First, check the faucet model. Ensure you get the right size and material. O-rings come in rubber, silicone, and other materials. Rubber is common and durable. Silicone can be more flexible. Measure the old O-ring’s diameter and thickness. This ensures a perfect fit. Wrong size? The leak will persist.
Installing The New O-ring
Start by turning off the water supply. Unscrew the faucet handle carefully. Locate the damaged O-ring. Remove it with a small tool or your fingers. Clean the area around the O-ring slot. Any debris can prevent a proper seal. Place the new O-ring into the slot. Ensure it sits snugly and evenly. Reassemble the faucet handle. Turn on the water supply. Check for leaks. If installed correctly, the leak should be gone.
Reassembling The Faucet
Fixing a leaking RV kitchen faucet base requires careful reassembly. Correct reassembly ensures the faucet works without leaks. This section explains how to reattach the handle and test for leaks.
Reattaching The Handle
First, place the handle back onto the faucet. Ensure it aligns with the valve stem. Tighten the screw that holds the handle in place. Use a screwdriver to secure it firmly. Avoid over-tightening to prevent damage.
After tightening, check the handle’s movement. It should move smoothly without resistance. If it feels stiff, you may need to adjust the screw slightly. Proper alignment is key to avoiding future leaks.
Testing For Leaks
Turn on the water supply slowly. Observe the base of the faucet for any signs of leaks. If water seeps out, turn off the supply and recheck your work. Tighten any loose connections. Make sure all parts fit snugly.
Once no leaks are visible, test the faucet by running water for a few minutes. Check the base again for any moisture. If the area remains dry, your reassembly is successful. A well-reassembled faucet will provide reliable use without leaking.

Credit: www.reddit.com
Preventative Maintenance Tips
Regular maintenance is crucial to keep your RV kitchen faucet in top shape. Leaking at the base can cause significant issues if ignored. Below are some preventative maintenance tips to help you avoid this problem.
Regular Inspections
Performing regular inspections can help identify potential issues early. Check the faucet base for any signs of moisture or water damage. Use a flashlight to see if there are any hidden leaks. Inspect the connections and seals for wear and tear.
- Check for visible leaks.
- Look for water stains or mold.
- Examine seals and connections.
Regular inspections help catch issues before they become serious. This proactive approach can save you from costly repairs.
Proper Usage
Using the faucet correctly can prevent damage. Avoid using excessive force when turning the handles. Excessive force can damage the internal components. Ensure that the faucet is completely turned off when not in use. This can prevent drips and leaks.
- Turn handles gently.
- Ensure complete shut-off.
- Avoid hanging heavy items on the faucet.
Proper usage extends the life of your faucet. It minimizes the risk of leaks and other issues.

Credit: m.youtube.com
Frequently Asked Questions
Why Is My Rv Kitchen Faucet Leaking At The Base?
A common reason for leaks at the base is a worn-out O-ring or seal. Inspect and replace it if needed.
How Can I Fix A Leaking Rv Kitchen Faucet?
To fix it, first, turn off the water supply. Then, disassemble the faucet, replace faulty parts, and reassemble.
What Tools Do I Need To Repair A Leaking Rv Faucet?
You’ll need a wrench, screwdriver, replacement O-rings, and plumber’s tape. Ensure you have the correct parts for your faucet model.
Can A Leaking Rv Faucet Cause Water Damage?
Yes, persistent leaks can lead to water damage in your RV. Address leaks promptly to avoid costly repairs.
Conclusion
Fixing a leaking RV kitchen faucet base is essential. It helps prevent water damage. Regular checks can spot issues early. This saves time and money. Follow the steps shared here. You can handle minor leaks easily. If the problem persists, call a professional.
Keeping your faucet in good shape ensures a smooth RV experience. Enjoy stress-free travels with a well-maintained kitchen.


